> For the complete documentation index, see [llms.txt](https://helpcenter.xopero.com/xopero-one-en/llms.txt). Markdown versions of documentation pages are available by appending `.md` to page URLs; this page is available as [Markdown](https://helpcenter.xopero.com/xopero-one-en/backup-and-recovery/devops/gitlab/backup/creating-a-backup-plan-for-a-group.md).
# Creating a backup plan for a group
In this article, you will find information about GitLab group backup in Xopero ONE.
## Backup plan setup
{% stepper %}
{% step %}
Login to [**XMS**](#user-content-fn-1)[^1], open the **Plans** > **Backup** tab and click the **Add plan** button in the top bar.
{% endstep %}
{% step %}
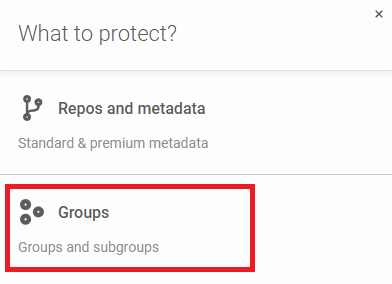
Select **GitLab** from the list, and then click **Groups** in the next aside.
{% endstep %}
{% step %}
Add or select the **GitLab** groups you want to add to your plan.
{% endstep %}
{% step %}
Specify a name for the backup plan.
{% endstep %}
{% step %}
Select the appropriate metadata that you want to back up. Here, you can also change the **default worker**, which is the device directly responsible for the backup process of your repositories.
{% hint style="success" %}
Information about groups and subgroups is included in the backup by default.
{% endhint %}
{% hint style="success" %}
You can have multiple workers and assign different workers to each backup plan.
{% endhint %}
{% hint style="info" %}
It is worth noting that the **cloud worker** (a cloud-installed **Xopero ONE** worker) allows you to perform cloud-to-cloud backups if you want to store your backups in the cloud.
{% endhint %}
{% endstep %}
{% step %}
Select one of the locations assigned to your **Xopero ONE** instance as storage.
{% endstep %}
{% step %}
Customize the scheduler and specify how long your data should be retained. If needed, adjust the advanced settings to suit your needs.
{% endstep %}
{% step %}
If necessary, adjust the advanced settings such as encryption, error handling, or bandwidth limits to fit your requirements.
{% endstep %}
{% step %}
Double-check your data and click **Save** to create the backup plan.
{% endstep %}
{% endstepper %}
***
## Useful links and items
{% content-ref url="/pages/fASS7gF644OXlxNTKatT" %}
[Cloud storage](/xopero-one-en/storage/cloud-storage.md)
{% endcontent-ref %}
{% content-ref url="/pages/Ekfjl1LObG4kYTtmU0jp" %}
[Xopero ONE worker](/xopero-one-en/deployment-and-configuration/xopero-one-worker.md)
{% endcontent-ref %}
{% content-ref url="/pages/lXJCXtK2CVyy7zbhCjwy" %}
[Scheduler & retention](/xopero-one-en/management/scheduler-and-retention.md)
{% endcontent-ref %}
[^1]: Xopero ONE Management Service
 **Add plan** button in the top bar.
{% endstep %}
{% step %}
Select **GitLab** from the list, and then click **Groups** in the next aside.
**Add plan** button in the top bar.
{% endstep %}
{% step %}
Select **GitLab** from the list, and then click **Groups** in the next aside.


