## Installer download
1. Login to **Xopero ONE Management Service** (**XMS**) using a web browser, then go to **Devices** menu section and click **➕ Add device.**
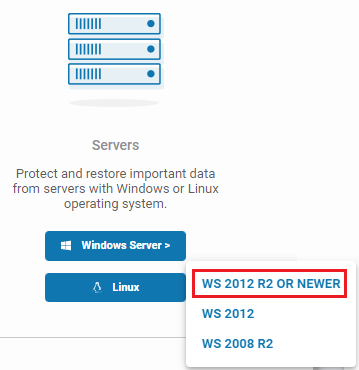
2. The **Download agent** window will open— scroll down to the **Server** section and click **Windows Server >** button.
3. Select **WS 2012** or **WS 2008 R2** to download a dedicated installer.
4. The download will start automatically; additionally, an **Installation** tab with a step-by-step installation instruction will pop-up in XMS.
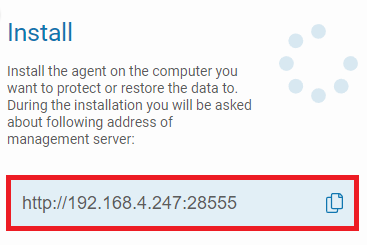
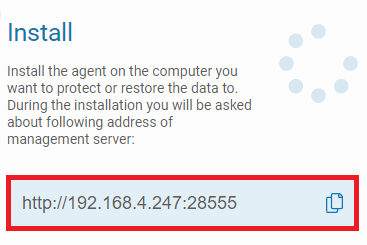
5. Under the **Install** section you will see the address combined a port— save it for later as you will have to use it during agent installation.
6. Once the installation wizard is downloaded, you can move to the installation process.
***
## Installation process
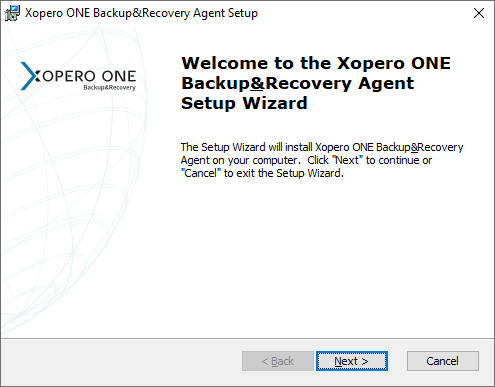
1. Open and run the downloaded setup wizard. Click **Next** to begin the installation process.
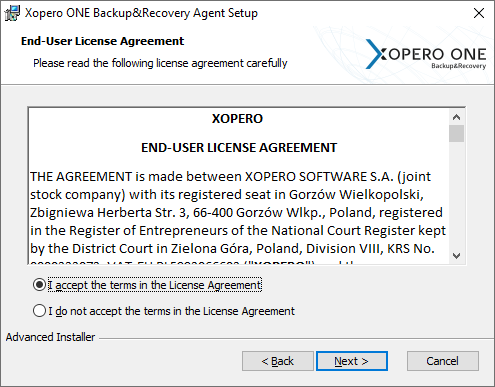
2. Read and accept the **End-User License Agreement**, then move to the next step.
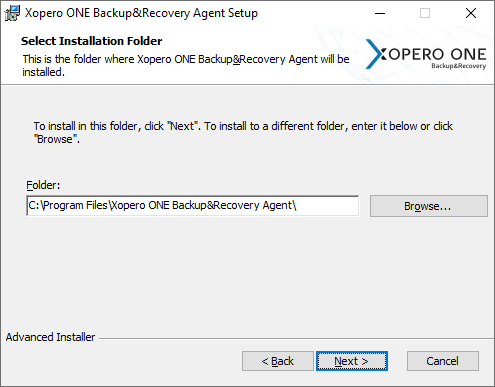
3. Choose the installation directory for the **Xopero ONE** client.
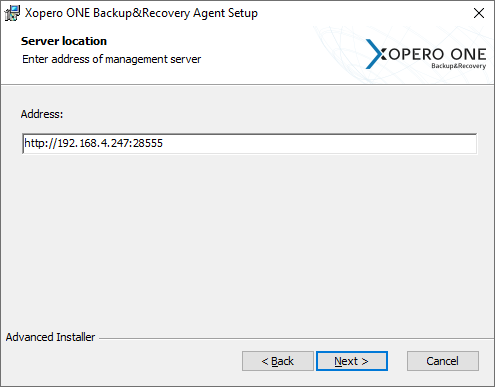
4. Paste the previously copied address to the **Address** field and hit **Next** to continue.
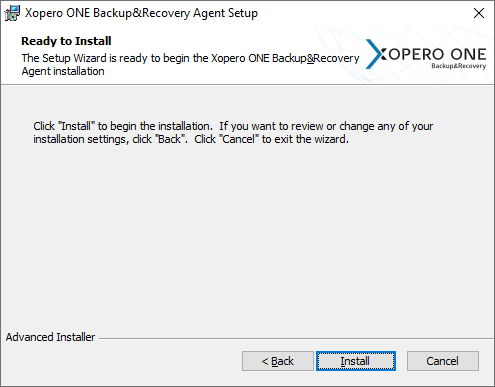
5. Click **Install** to start the installation.
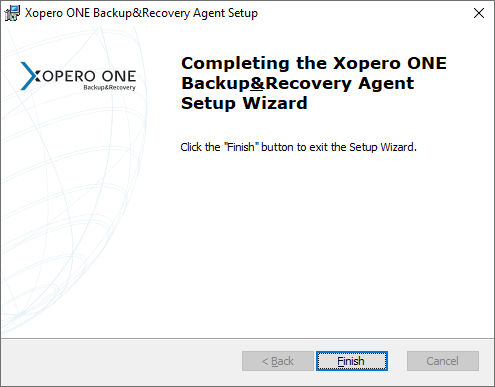
6. Once the wizard finishes installation, click the **Finish** button to close it.
7. You can now activate your device in **Xopero ONE Management Service**.
{% endtab %}
{% tab title="Windows workstations & Windows server 2012 R2+" %}
## Installer download
1. Login to **Xopero ONE Management Service** (**XMS**) using a web browser, then go to **Devices** menu section and click **➕ Add device.**
2. The **Download agent** window will open— scroll down to the **Server** section and click **Windows Server >** button.
3. Select **WS 2012 R2 OR NEWER** to download a dedicated installer.
4. The download will start automatically; additionally, an **Installation** tab with a step-by-step installation instruction will pop-up in XMS.
5. Under the **Install** section you will see the address combined a port— save it for later as you will have to use it during agent installation.
***
## Installation process
1. Open and run the downloaded setup wizard. Click **Next** to begin the installation process.
2. Read and accept the **End-User License Agreement**, then move to the next step.
3. Choose the installation directory for the **Xopero ONE** client.
4. Paste the previously copied address to the **Address** field and hit **Next** to continue.
5. Click **Install** to start the installation.
6. Once the wizard finishes installation, click the **Finish** button to close it.
7. You can now activate your device in **Xopero ONE Management Service**.
{% endtab %}
{% tab title="Microsoft Standard Installer (.msi)" %}
## Installation process
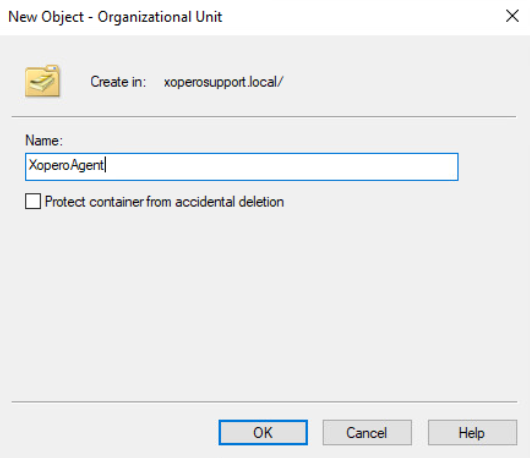
1. Open **Active Directory** and create a new **Organizational Unit** on the domain controller under the **Active Directory Users and Computers** catalog.
2. Enter a custom name for the **Organizational Unit** and click **OK** to confirm.
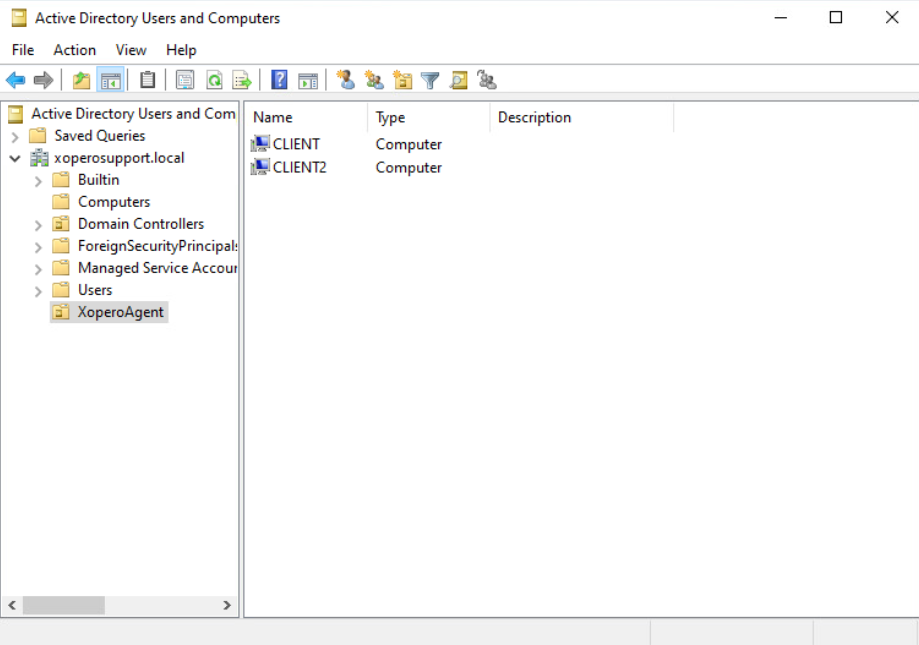
3. Transfer all devices you want to have the **Xopero ONE** agent installed on to the newly created **Organizational Unit**.
4. Create a folder that will be available on your network to all computers that are to be covered by the installation policy of the **Xopero ONE** agent, and place the .msi installer in it.
{% hint style="info" %}
The **.msi** installer can be downloaded in **Xopero ONE Management Service** (**XMS**), in **Devices** > **➕ Add device**.
{% endhint %}
5. Change access permissions of the folder created in the previous step. Right-click the folder and select **Properties**, then go to **Sharing** tab and click the **Advanced Sharing** button.
6. Make sure the ✅**Share this folder** checkbox is checked and click **Apply** to save your settings.
7. Next, click the **Permissions** button under the **Comments** field and change user permissions for the folder.
> For domain adminstrators: **Full Control**\
> For authenticated users: **Read**
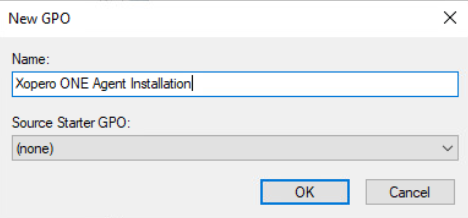
8. Open the **Group Policy Management** (**GPO**) window, find the OU created in step 1, right-click it, and select the **Create a GPO in this domain, and Link it here...** option from the drop-down menu.
9. Enter a custom name for your new group object and click **OK**.
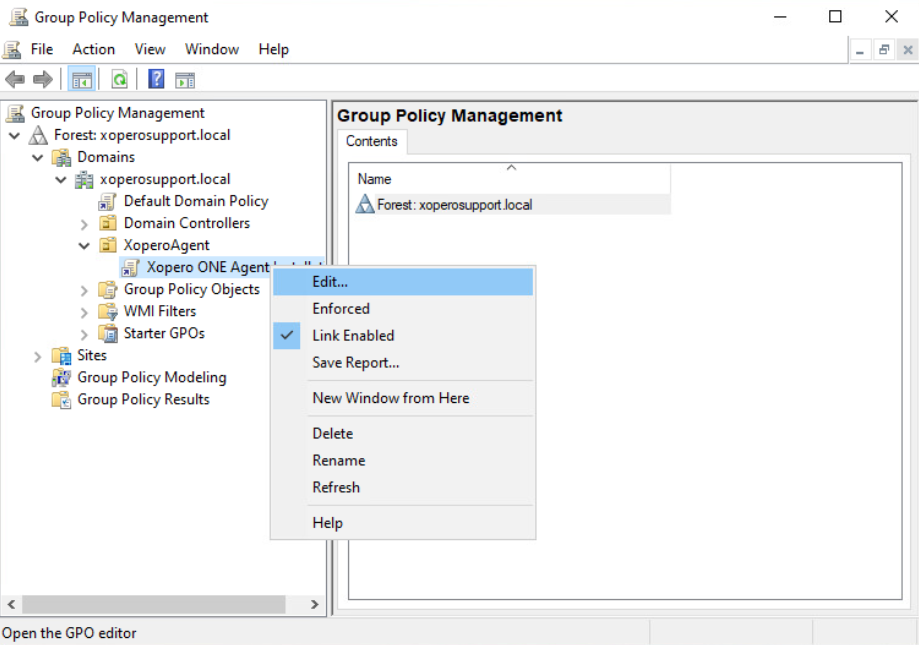
10. Right-click the newly created rule and select **Edit...** from the drop-down menu.
11. Expand **Computer Configuration** > **Policies** > **Software Settings** > **Software Installation** tabs. Inside **Software Installation**, right-click anywhere on the right side of the window and select **New** > **Package...** from the dropdown.
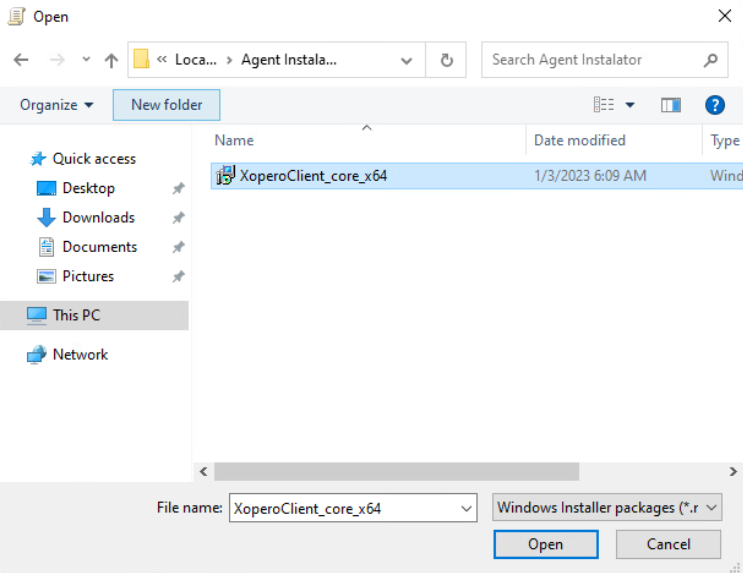
12. Find the shared directory in which you've placed the **.msi** installer in, then select and open it.
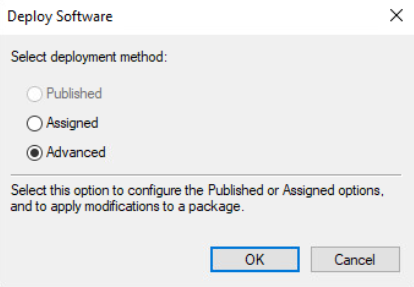
13. In **Deploy Software** window select the **Advanced** deployment method and click **OK**.
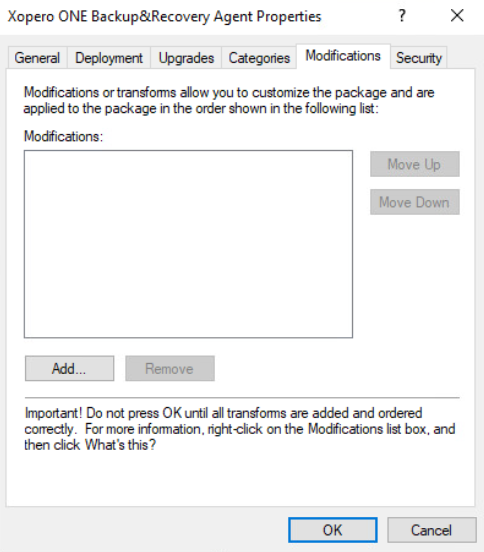
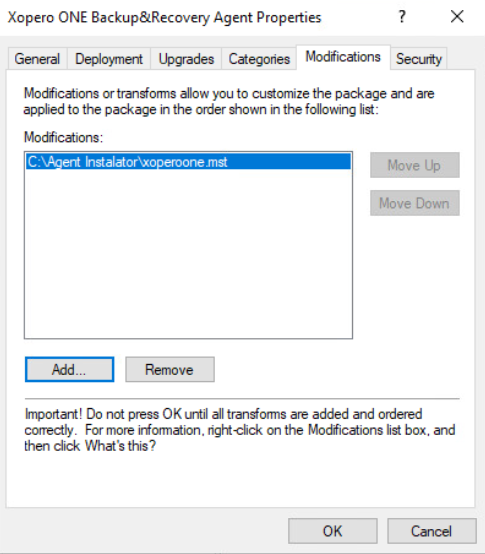
14. In **Xopero ONE Backup\&Recovery Agent Properties** window, switch to **Modifications** tab.
15. Create an **.mst** file containing additional configuration for the installer— you can use **Orca** software available as part of the **Windows SDK**:
{% hint style="success" %}
Find how to install Orca on [Microsoft Learn website](https://helpcenter.xopero.com/xopero-one-en/deployment-and-configuration/xopero-one-agent/broken-reference).
{% endhint %}
1️⃣ Run Orca, go to **File** > **Open**, then find and select the **Xopero ONE** agent **.msi** installer.
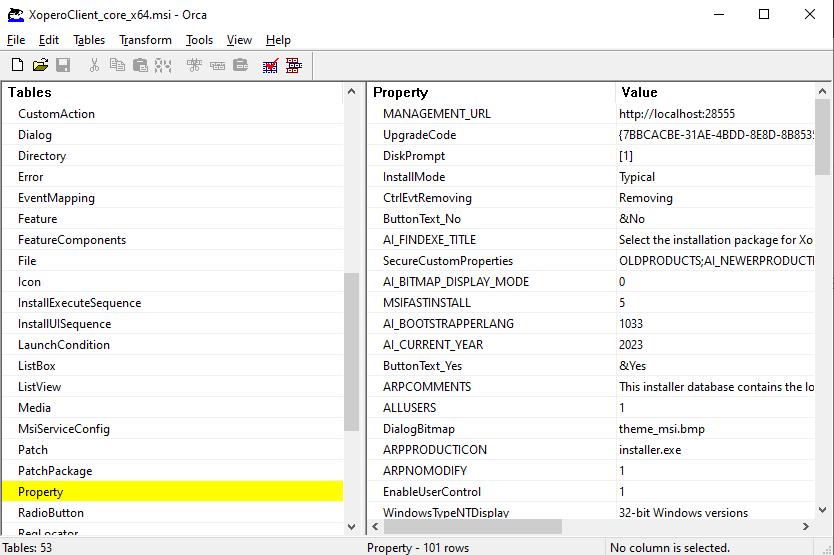
2️⃣ Click **Transform** and select **New Transform** from the context menu. Find the **Property** table and double-click the **MANAGEMENT\_URL** row to edit it— change its value to your XMS[^1] IP address (in **XMSIPaddress:port** format, i.e., ).
3️⃣ Additional parameters that can be edited are:
> **APPDIR** - **Xopero ONE** agent installation path
4️⃣ Next, click **Transform** > **Generate transform** and save the **.mst** file in the previously created shared directory.
16. Back to **Xopero ONE Backup\&Recovery Agent Properties** window, click **Add...** and specify the path to the **.mst** file corresponding to the **XMS** address (parameter for the MSI installer). Once done, click **OK** to confirm the changes and close the window.
17. Once the GPO responsible for MSI installer distribution and deployment is successfully created, you can implement it on user computers covered by this policy in **Active Directory**— simply run **CMD** and use the following command:
```
gpupdate /force
```
18. After restarting the updated station, the **Xopero ONE** agent will be automatically installed with the parameter corresponding to the **XMS** address.
{% endtab %}
{% endtabs %}
[^1]: Xopero ONE Management Service