> For the complete documentation index, see [llms.txt](https://helpcenter.xopero.com/xopero-one-en/llms.txt). Markdown versions of documentation pages are available by appending `.md` to page URLs; this page is available as [Markdown](https://helpcenter.xopero.com/xopero-one-en/storage/cloud-storage/azure-blob-storage/azure-storage-configuration.md).
# Azure storage configuration
This article explains how to configure a storage account and blob storage in Azure.
## Creating a storage account
{% hint style="danger" %}
**Xopero ONE supports only Block Blobs**; the other two types—**Page Blobs** and **Append Blobs**—**are not supported**.
{% endhint %}
{% stepper %}
{% step %}
Navigate to the **Create a resource** section in the top-left corner of the **Azure Portal**.
{% endstep %}
{% step %}
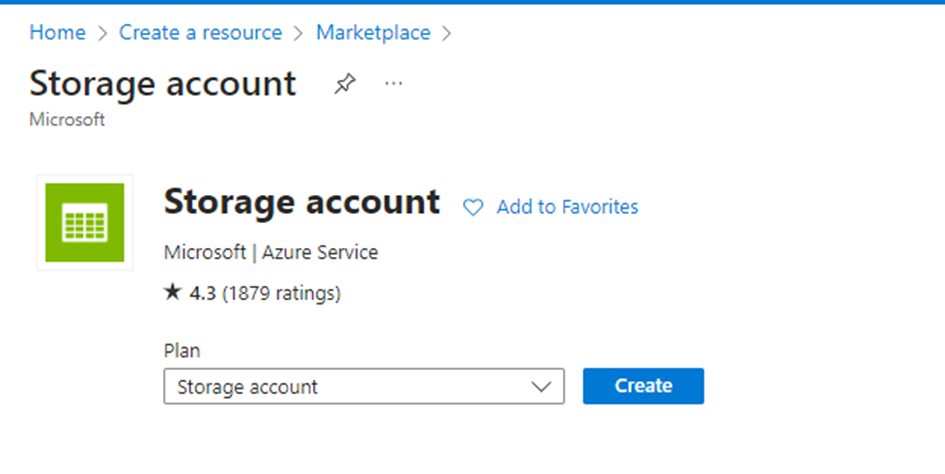
In the search bar, type storage account and select **Create** from the results.
{% endstep %}
{% step %}
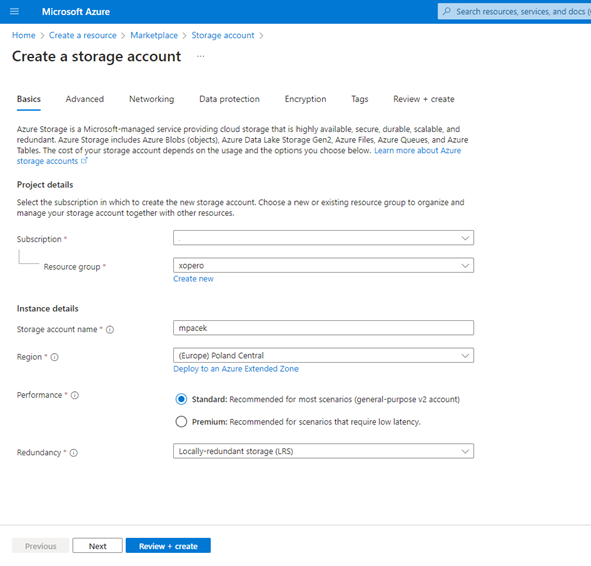
On the configuration page, complete the required fields: choose your subscription, select or create a resource group, and enter a unique name for the storage account that meets the global uniqueness requirement.
{% endstep %}
{% step %}
Select the region for the storage account, choose the performance tier (**Standard** or **Premium**), and specify the redundancy option, such as **Locally-redundant storage** (**LRS**) or **Geo-redundant storage** (**GRS**), according to your data redundancy needs.
{% endstep %}
{% step %}
Next, configure the networking options— choose whether the storage account will be accessible via the public internet, a private virtual network, or both.
{% endstep %}
{% step %}
In the **Advanced** tab, configure additional options such as data access and encryption. If needed, add tags in the **Tags** tab to meet management requirements (if you have any).
{% endstep %}
{% step %}
After configuring all settings, review your selections and click **Create** to finalize the creation of your storage account.
{% endstep %}
{% endstepper %}
***
## Creating a blob storage container
{% hint style="danger" %}
**Xopero ONE** supports only three **Azure Blob Storage** access tiers: hot, cool, and cold. **The archive access tier is not supported.** Learn more about access tiers for blob data in the [official Microsoft documentation](https://learn.microsoft.com/en-us/azure/storage/blobs/access-tiers-overview).
{% endhint %}
{% stepper %}
{% step %}
After creating the storage account, create a blob storage container— navigate to the storage account and select **Containers** from the side menu.
{% endstep %}
{% step %}
Click **+ Container** to add a new container, enter a name, and select the appropriate access level (**Private**, **Blob**, or **Container)**.
{% endstep %}
{% step %}
Click **Create** to set up the container.
{% endstep %}
{% endstepper %}