This article provides information on roles and permissions for Xopero ONE accounts.
System Administrator
Highest-privilege account; includes all permissions of lower roles. Can manage data stores and system settings.
Backup Operator
Same permissions as Viewer, plus the ability to create and run backup tasks.
The system allows for granular control through the following permission categories:
Restore Operator
Same permissions as Viewer, plus the ability to restore data.
Viewer
Least privileged account; can only view settings and cannot perform other actions.
Account management
Enables the creation of new administrative accounts and modification of existing ones. Available only for System Administrator role.
Device management
Allows activation of new devices and administration of currently connected devices.
Microsoft 365 management
The initial administrative account—the one used to sign up for Xopero ONE—is designated as the Root Administrator. This account has the highest level of permissions and cannot be restricted. Note that the Root Administrator account can be reassigned if necessary.
Facilitates the addition of new Microsoft 365 tenants and management of existing ones.
Data delete
Grants the ability to delete backup copies and storage repositories.
DevOps management
Allows the addition and administration of DevOps organizations.
Virtual environments management
Supports integration of new virtual environments and management of existing VMware configurations.
Learn the basics of account management in Xopero ONE.
Login to your XMS panel, go to the ⚙ Settings tab, then select Accounts.
Click the Add new button at the bottom of the section.
Enter username and password for your new account.
Next, set the default language for the new account, and assign its role and permissions.
Review your account configuration and click Save.
Login to your XMS panel, go to the ⚙ Settings tab, then select Accounts.
Choose an account you want to edit and click the edit button.
Login to your XMS panel, go to the ⚙ Settings tab, then select Accounts.
Choose an account you want to delete and click the recycle bin button.
In Edit admin account panel you can change your account password, default language, role, and permissions.
Review your changes and click Save to finish editing the account.
The system will ask you to confirm the operation. If you are sure you want to remove the selected account, click the Remove button.
Your username must be an e-mail address.
You can use your GitHub, GitLab, Bitbucket, Google, or Microsoft Azure AD email address to log in to Xopero ONE via SSO— just make sure that the email address in Xopero ONE matches the one used in your service provider.
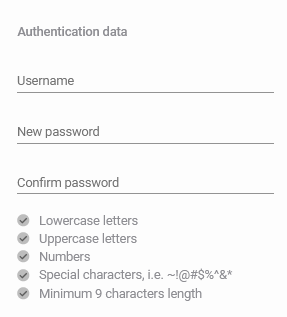
Remember that when setting up a password, you must meet the password criteria displayed in the form.
See all details about available roles and permissions in .

It is not possible to change the account username (email address).


This article provides information on how to change the Root Administrator in Xopero ONE.
To change the root admin, please follow these steps:
Log in to the XMS panel using the current Root Administrator account.
Click ⚙ Settings at the bottom-right of the left-side menu, and select Accounts.
Add a new user account with the desired email address, or select an existing account.
Click the edit button next to the newly created user account. In the account panel, scroll down to the bottom and select Set as root.
The Root Administrator has now been changed to your new account— log back in using your new credentials to verify that the change was successful.
After selecting this option, you will be logged out automatically.