Prior to agent installation, check if your system is meets all the requirements.
System requirementsSupported platformsDownload the agent installer (bash script) to your Linux system and grant execute permission to the file owner (user or group) using the following chmod command:
To download the agent installer, login to Xopero ONE Management Service using a web browser, then go to Settings > Advanced > Workers and click Download agent button. The Download agent window will open — click the appropriate agent version to download it.
chmod +x xoperoclient.shNext, run the script using the following command:
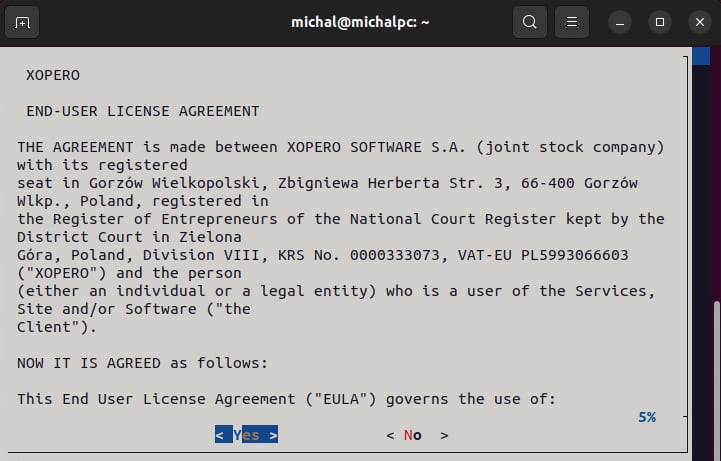
Accept the END-USER LICENSE AGREEMENT to proceed.
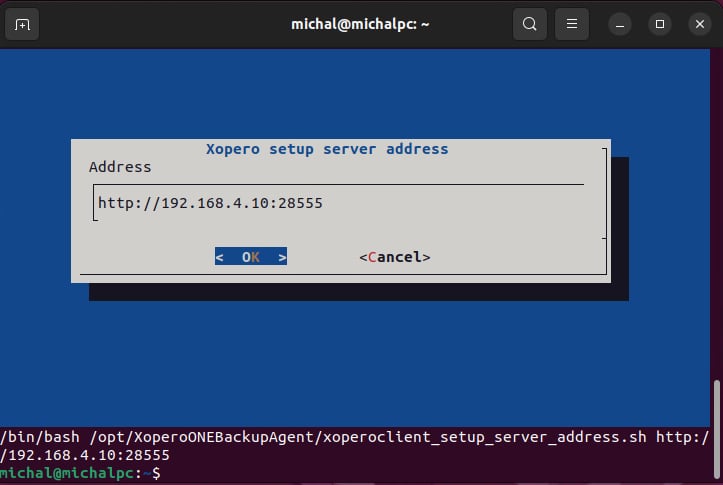
Next, enter the IP address in the Address field (including the protocol and port) and click OK to finish the installation. Your address can be found in Xopero ONE Management Service — the system will display it once you start downloading the agent installer.
Now that Xopero ONE agent is installed, you can activate it in the Xopero ONE Management Service (XMS) web panel and start protecting your data.
Download Xopero ONE agent installation wizard via XMS and run it.
Click Continue to proceed.
To learn how to activate the agent in the Xopero management console, check the Useful links and items section.
Login to Xopero ONE Management Service (XMS) using a web browser, then go Settings > Advanced > Workers and click the Download agent button.
The Download agent window will open— scroll down to the
Select Continue in the Read Me section.
Read the END-USER LICENSE AGREEMENT and hit Continue to accept it.
Hit Agree to accept the terms of the software license agreement.
Change the installation directory if needed and click Install to begin the installation.
During the installation process, the creator will ask you for the address of your XMS— define it in this step.
Click OK to confirm your configuration.
The Xopero ONE agent has been successfully installed— you can close the installation wizard.
If you don't want to use the installation wizard, you can choose the unattended installation option.
Download the xoperoclient.pkg file to your device.
Run the following command in macOS terminal (Applications > Utilities > Terminal):
‼️Command overview:
Setting the environment variable with your Xopero ONE Management Service IP address and default portsudo /bin/launchctl setenv "XOPERO_INSTALLER_SERVER_ADDRESS_CONFIG" "https://<XMS_adress::28555>"Launching the installersudo installer -pkg <pkg_file_location> -target /;Removing environment variablessudo /bin/launchctl unsetenv "XOPERO_INSTALLER_SERVER_ADDRESS_CONFIG"
After installation, in a few steps you need to add the necessary permissions for the Xopero file.
Click on the Mac icon in the upper left corner and select System Preferences... from the drop-down menu.
Next, go to Security & Privacy.
Navigate to the Privacy tab, then select Full Disk Access from the menu on the left.
Add Xopero.Device.App.app to the list.
Grant access to Xopero.Device.App.app to finish the configuration.
./xoperoclient.sh or bash xoperoclient.shThe above script should be initiated using an account with administrative privileges — because of that it might be required to use the sudo command simultaneously (as in the above example).
To download the agent installer, login to Xopero ONE Management Service using a web browser, then go to Settings > Advanced > Workers and click Download agent button. The Download agent window will open — click the appropriate agent version to download it.
sudo command
sudo /bin/launchctl setenv "XOPERO_INSTALLER_SERVER_ADDRESS_CONFIG" "https://XMS_adress::28555>" && sudo installer -pkg <pkg_file_location> -target /; sudo /bin/launchctl unsetenv "XOPERO_INSTALLER_SERVER_ADDRESS_CONFIG"To download the agent installer, login to Xopero ONE Management Service using a web browser, then go to Settings > Advanced > Workers and click Download agent button. The Download agent window will open — click the appropriate agent version to download it.
Select WS 2012 or WS 2008 R2 to download a dedicated installer.
The download will start automatically; additionally, an Installation tab with a step-by-step installation instruction will pop-up in XMS.
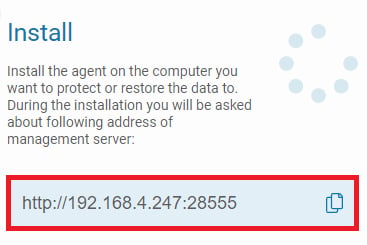
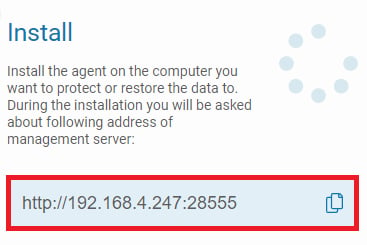
Under the Install section you will see the address combined a port — save it for later as you will have to use it during agent installation.
Once the installation wizard is downloaded, you can move to the installation process.
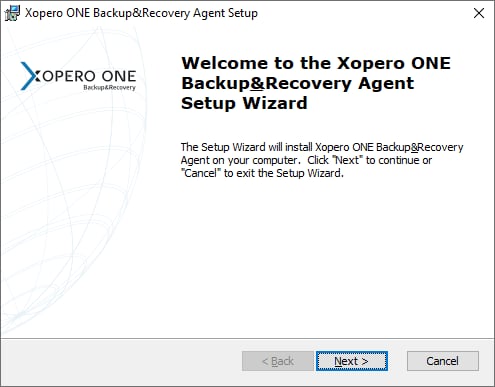
Open and run the downloaded setup wizard. Click Next to begin the installation process.
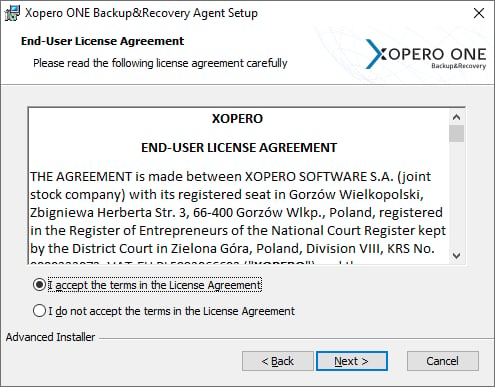
Read and accept the End-User License Agreement, then move to the next step.
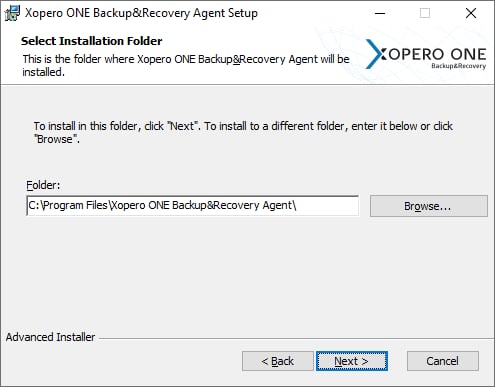
Choose the installation directory for the Xopero ONE client.
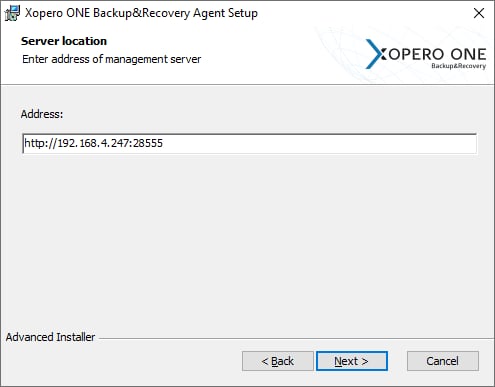
Paste the previously copied address to the Address field and hit Next to continue.
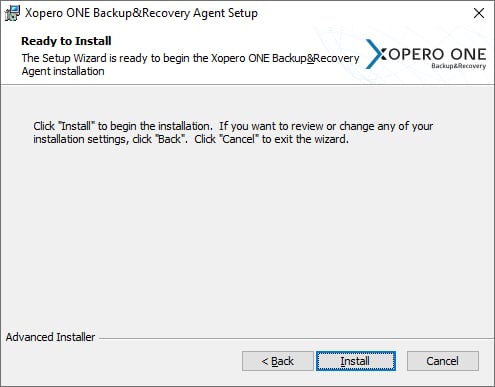
Click Install to start the installation.
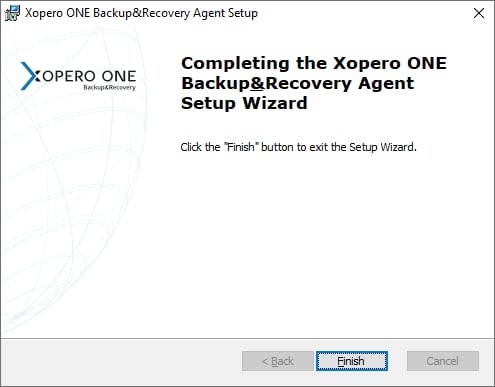
Once the wizard finishes installation, click the Finish button to close it.
You can now activate your device in Xopero ONE Management Service.
Installer download Installation process
Login to Xopero ONE Management Service (XMS) using a web browser, then go Settings > Advanced > Workers and click the Download agent button.
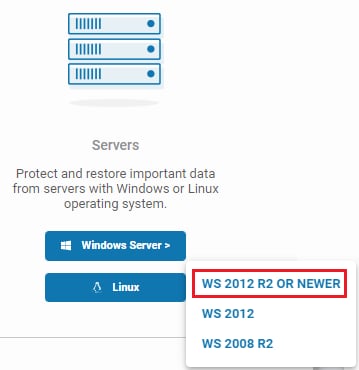
The Download agent window will open— scroll down to the Server section and click Windows Server > button.
Select WS 2012 R2 OR NEWER to download a dedicated installer.
The download will start automatically; additionally, an Installation tab with a step-by-step installation instruction will pop-up in XMS.
Under the Install section you will see the address combined a port— save it for later as you will have to use it during agent installation.
Open and run the downloaded setup wizard. Click Next to begin the installation process.
Read and accept the End-User License Agreement, then move to the next step.
Choose the installation directory for the Xopero ONE client.
Paste the previously copied address to the Address field and hit Next to continue.
Click Install to start the installation.
Once the wizard finishes installation, click the Finish button to close it.
You can now activate your device in Xopero ONE Management Service.
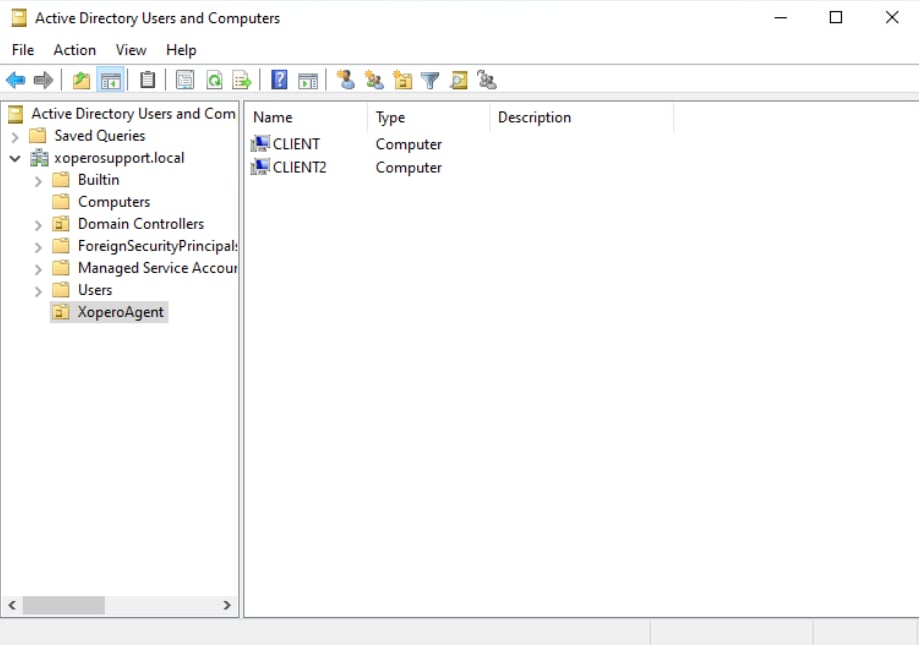
Open Active Directory and create a new Organizational Unit on the domain controller under the Active Directory Users and Computers catalog.
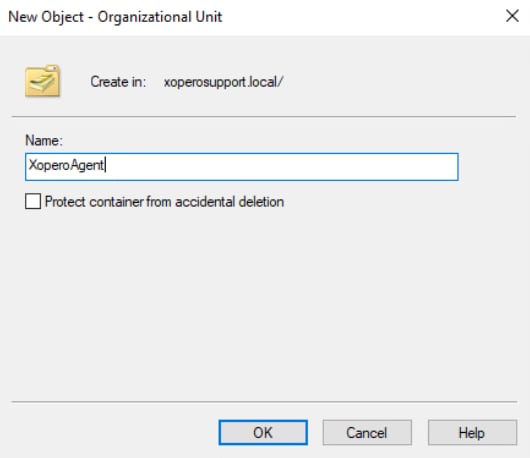
Enter a custom name for the Organizational Unit and click OK to confirm.
Transfer all devices you want to have the Xopero ONE agent installed on to the newly created Organizational Unit.
Create a folder that will be available on your network to all computers that are to be covered by the installation policy of the Xopero ONE agent, and place the .msi installer in it.
Change access permissions of the folder created in the previous step. Right-click the folder and select Properties, then go to Sharing tab and click the Advanced Sharing button.
Make sure the ✅Share this folder checkbox is checked and click Apply to save your settings.
Next, click the Permissions button under the Comments field and change user permissions for the folder.
For domain adminstrators: Full Control For authenticated users: Read
Open the Group Policy Management (GPO) window, find the OU created in step 1, right-click it, and select the Create a GPO in this domain, and Link it here... option from the drop-down menu.
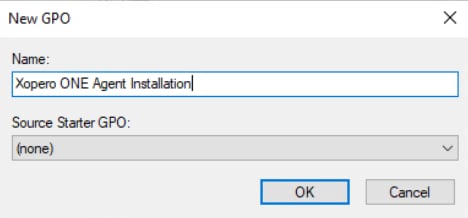
Enter a custom name for your new group object and click OK.
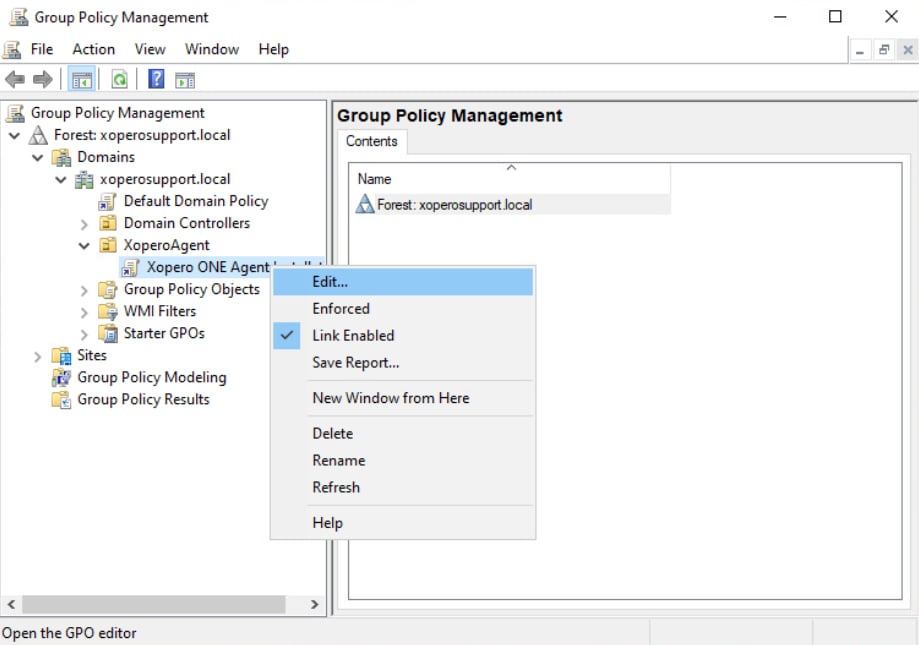
Right-click the newly created rule and select Edit... from the drop-down menu.
Expand Computer Configuration > Policies > Software Settings > Software Installation tabs. Inside Software Installation, right-click anywhere on the right side of the window and select New > Package... from the dropdown.
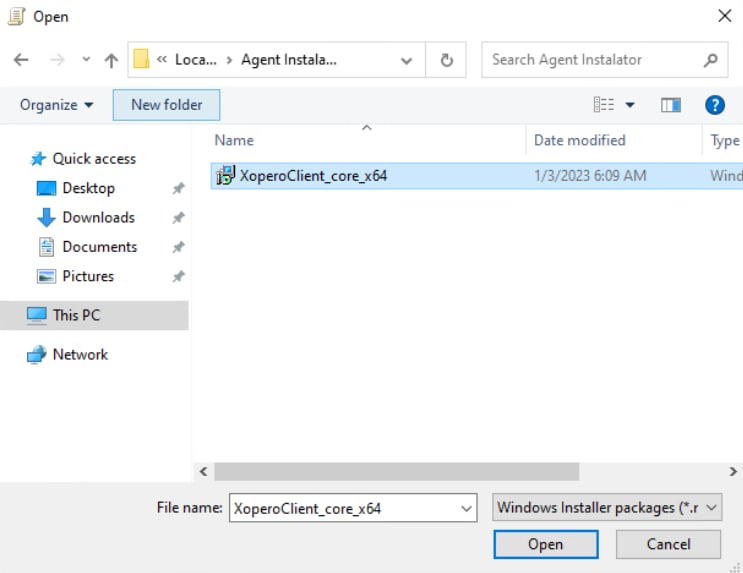
Find the shared directory in which you've placed the .msi installer in, then select and open it.
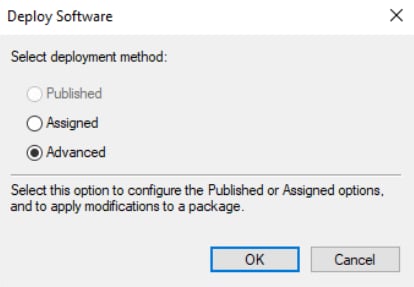
In Deploy Software window select the Advanced deployment method and click OK.
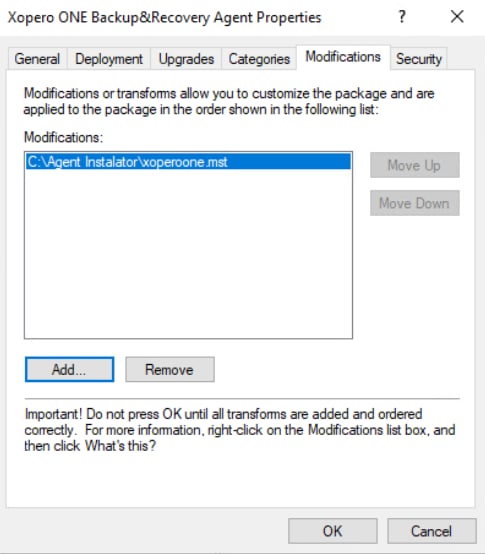
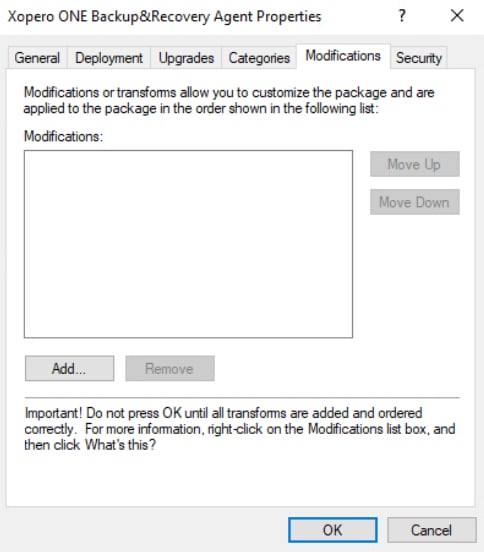
In Xopero ONE Backup&Recovery Agent Properties window, switch to Modifications tab.
Create an .mst file containing additional configuration for the installer — you can use Orca software available as part of the Windows SDK:
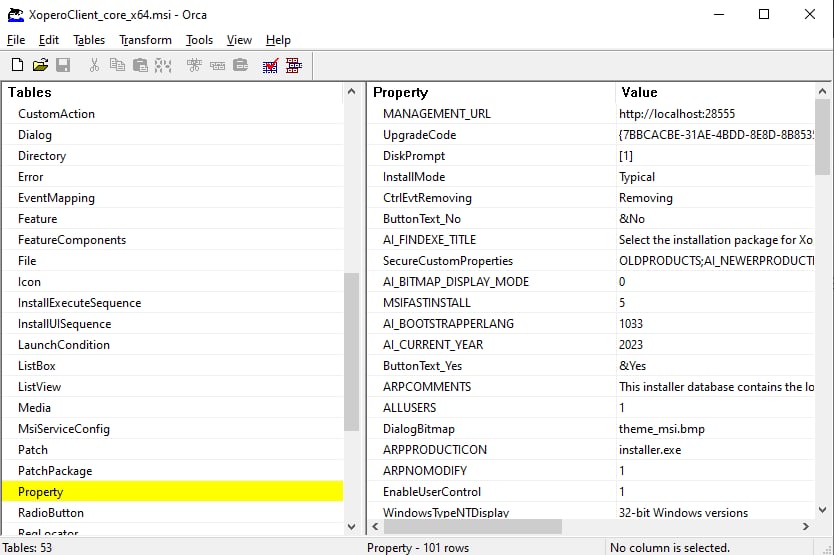
1️⃣ Run Orca, go to File > Open, then find and select the Xopero ONE agent .msi installer.
2️⃣ Click Transform and select New Transform from the context menu. Find the Property table and double-click the MANAGEMENT_URL row to edit it — change its value to your XMS IP address (in XMSIPaddress:port format, i.e., https://123.4.5.6:28555).
3️⃣ Additional parameters that can be edited are:
APPDIR — Xopero ONE agent installation path
4️⃣ Next, click Transform > Generate transform and save the .mst file in the previously created shared directory.
Back to Xopero ONE Backup&Recovery Agent Properties window, click Add... and specify the path to the .mst file corresponding to the XMS address (parameter for the MSI installer). Once done, click OK to confirm the changes and close the window.
Once the GPO responsible for MSI installer distribution and deployment is successfully created, you can implement it on user computers covered by this policy in Active Directory— simply run CMD and use the following command:
After restarting the updated station, the Xopero ONE agent will be automatically installed with the parameter corresponding to the XMS address.
To learn how to activate the agent in the Xopero management console, check the Useful links and items section.
Login to your Xopero ONE Management Service (XMS) console.
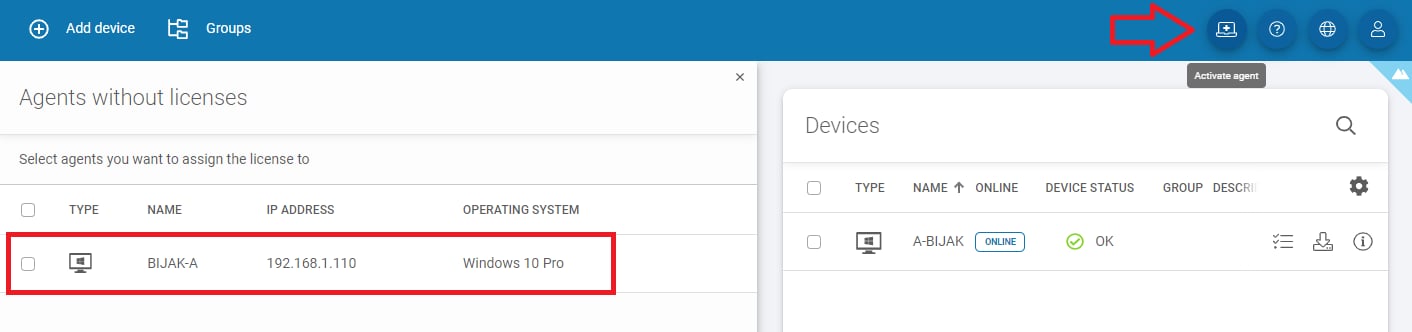
Click the Activate agent icon in the top menu.
A sidebar will appear, showing a list of available agents — you can view basic details like device type, name, IP address, and operating system.
Select the device you want to activate (you can select multiple devices if you assign them the same license type) and press the Activate button to proceed.
Next, select the license type you want to assign to the chosen device(s) and click Assign license to confirm your selection.
Once the license is correctly assigned, your device(s) will be visible in the Devices tab.
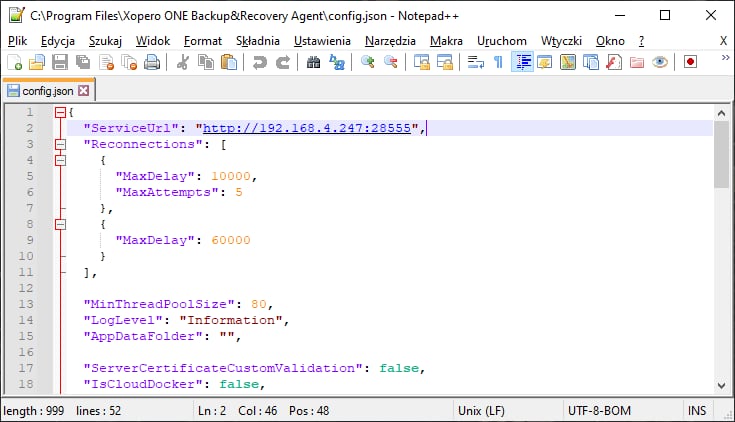
The config.json file, by default, is located in the following locations:
For Windows: C:\Program Files\Xopero ONE Backup&Recovery Agent
For Linux: /opt/XoperoONEBackupAgent/
💡You can edit config.json with a simple text editor (i.e., Notepad++).
The Xopero ONE Management Service (XMS) address to which your agent connects is crucial during both installation and configuration. If the IP address or protocol (http/https) of the Management Service changes, the agent's status will switch to offline. To re-establish the connection, update the ServiceUrl value in the configuration file with the updated address.
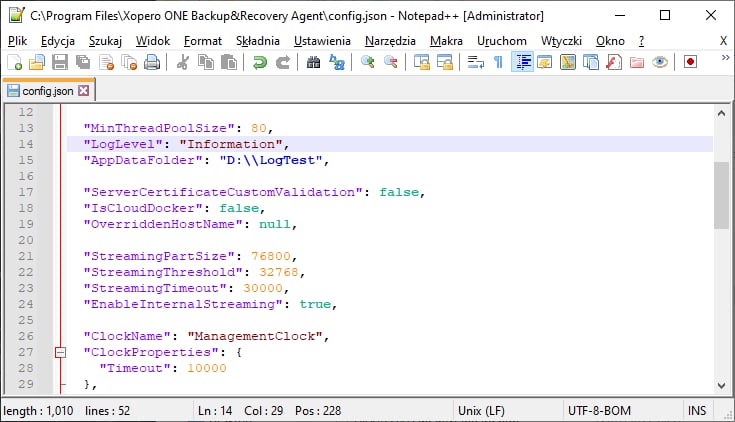
By default, the LogLevel value is set to Information. You can change it to:
Trace
Debug
Information
Warning
Error
Critical
None
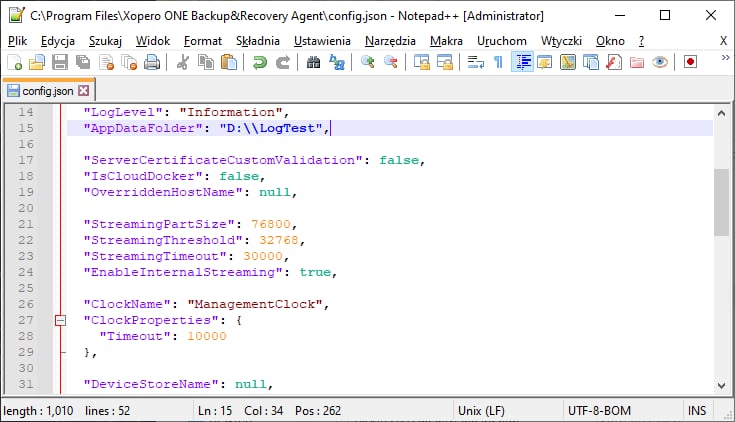
By default, application logs are stored in the following directory: C:\ProgramData\Xopero ONE\Xopero ONE Backup&Recovery Agent\Logs. To change the location, modify the AppDataFolder parameter.
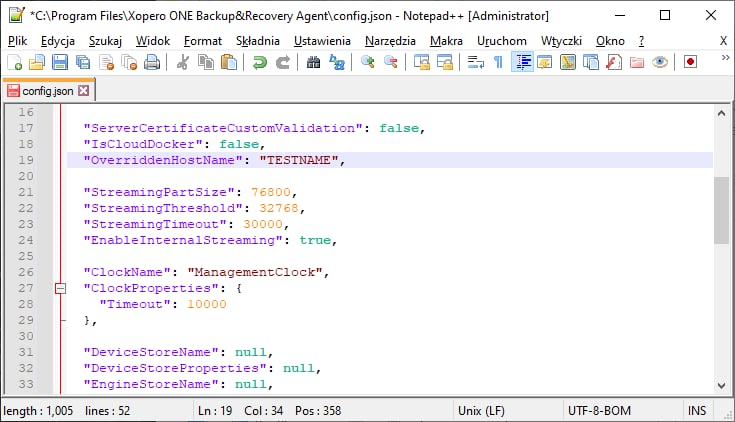
The device name defaults to the system's name. To customize it, modify the OverriddenHostName parameter.
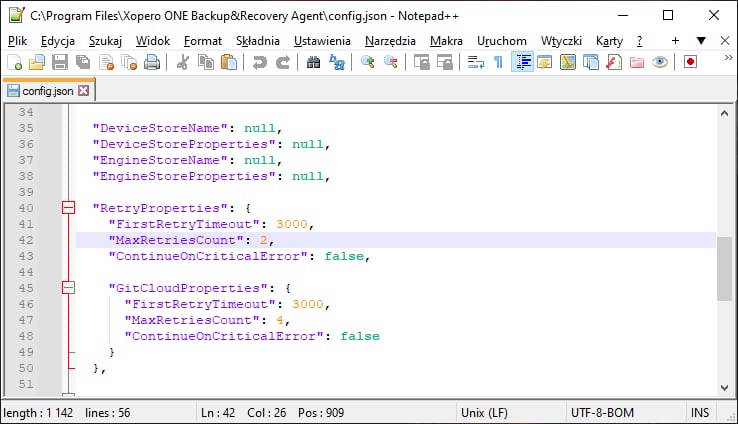
If database backup task ends with error DV0249 - "Unable to read backup data", first address any connection stability issues on your end. If the problem persists, you can increase the retry attempts in the Xopero ONE application— to do this, simply edit the MaxRetriesCount parameter, changing its default value from 2 to a higher value, i.e., 20.
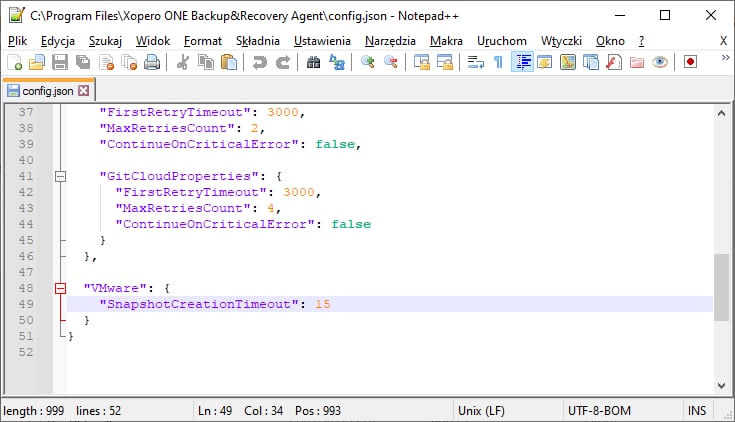
The VMware virtual appliance is a Linux-based machine with an agent service. You can modify its settings by editing the config.json file.
To configure the timeout for snapshot creation, locate the VMware section at the bottom of the file and adjust the SnapshotCreationTimeout parameter to your needs.
In the Xopero ONE system, the local worker, cloud worker, and feature worker licenses are free. These licenses allow specific operations, except for backing up the device itself — thus, devices with these licenses appear under Settings > Advanced > Workers tab.
To modify the config.json file, you must stop the Xopero ONE Backup&Recovery Agent service. After making your changes, restart the service (you might also need to refresh the changes in the Management Service panel).
Please note that the correct AppDataFolder value format includes double slash after the drive letter (i.e., D:\\).
Please note that the custom name must be in entered with quotation marks (i.e., "TESTNAME").
gpupdate /forceThe .msi installer can be downloaded in Xopero ONE Management Service (XMS), in Settings > Advanced > Workers > Download agent > Endpoints.
Find how to install Orca on .




To install the Xopero ONE agent within a Docker container, use the images available on Docker Hub:
docker pull xopero/gitprotect-agent:latestCreate a host directory for the Xopero ONE Management Service container databases (which are located at /app/Xopero inside the container) to store databases outside the container:
mkdir -p /opt/gitprotect-agent/dataRun the container with the correct volume mounting and environment variables using the following command:
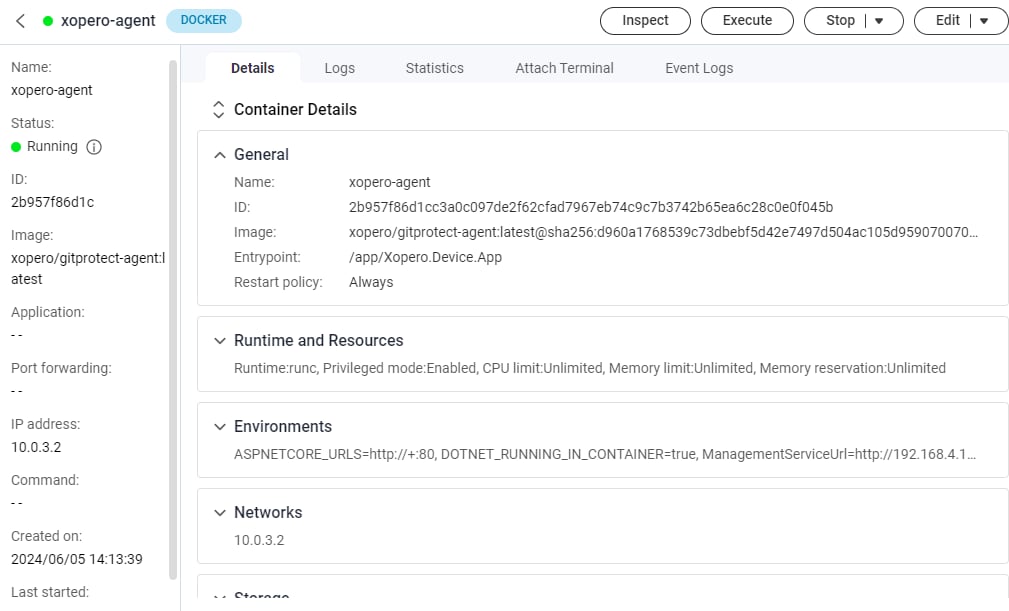
Check if the container works correctly by using the following command:
Once all the above steps are completed, the agent will report to the Management Service panel for activation.
QNAP with:
x86 or x64 CPU (ARM is not supported)
minimum 2GB RAM
QNAP with:
x86 or x64 CPU (ARM is not supported)
minimum 2GB RAM
Navigate to the Container tab and click the Create button. Expand the Image section and click Add image, then search for xopero/gitprotect-agent image.
Select the image, click Download, and choose the version tagged as latest. Click Select to confirm.
Download the Container Station app from the App Center.
Login to your QNAP web panel and open the AppCenter application. In QNAP Store, select All Apps and search for the Container Station.
Download and open the application. Select the path that will be used as a directory for your Docker container data, and click Start Now to proceed.
Open the Container Station application, select the Containers tab, and click the Create button.
In Image Configuration choose the Advanced mode option. In the image type, select Docker image, and in the Image field, paste the following command:
Ensure the Try pulling image from the registry before creating the container option is checked, and hit Next.
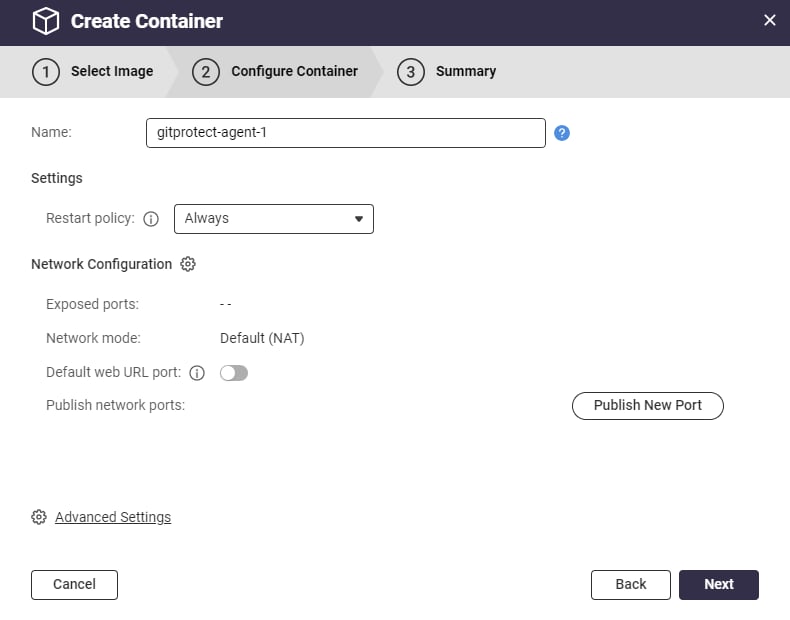
Within the Configure Container tab, the form contains several fields, with the most crucial being:
Name — here you can set a custom name for the container
Restart policy — defines if the container will star automatically in case of, for example, QNAP restart
In the Configure Container tab, navigate to ⚙️Advanced Settings.
Go to the Environments section and click Add New Variable to add new environment variables with the following values:
‼️*ManagementServiceUrl – your Xopero ONE Management Service (XMS) address in one of the following formats (depending on the XMS deployment model):
http://ipaddress:port, i.e., http://192.168.0.1:28555
https://XMSID.ads.xopero.com, i.e., https://a00b0dc0-0116-0000-0000-d0000028960e.ads.xopero.com
Click Apply to save your changes.
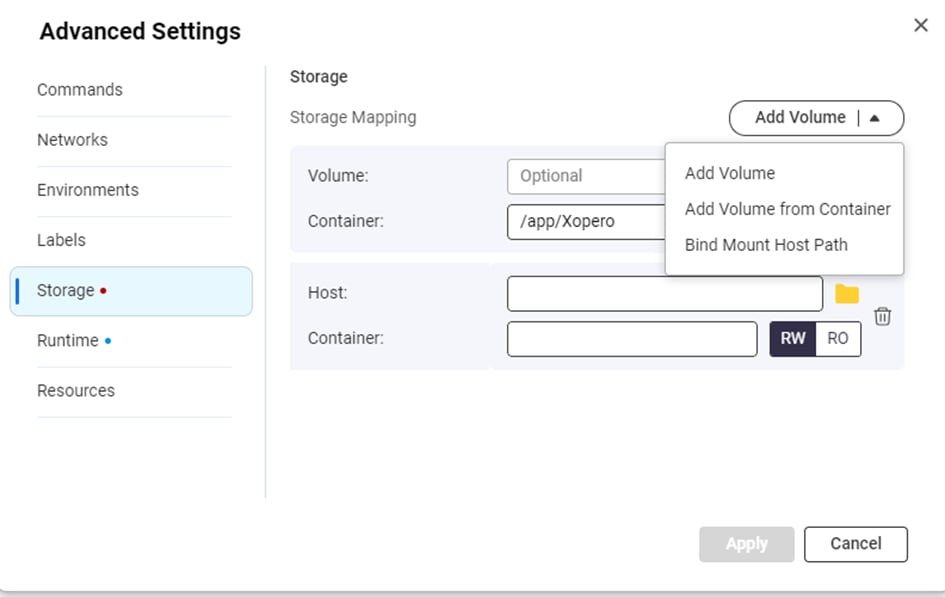
Navigate to Storage tab—here you can mount your QNAP volumes to the Xopero ONE agent docker container.
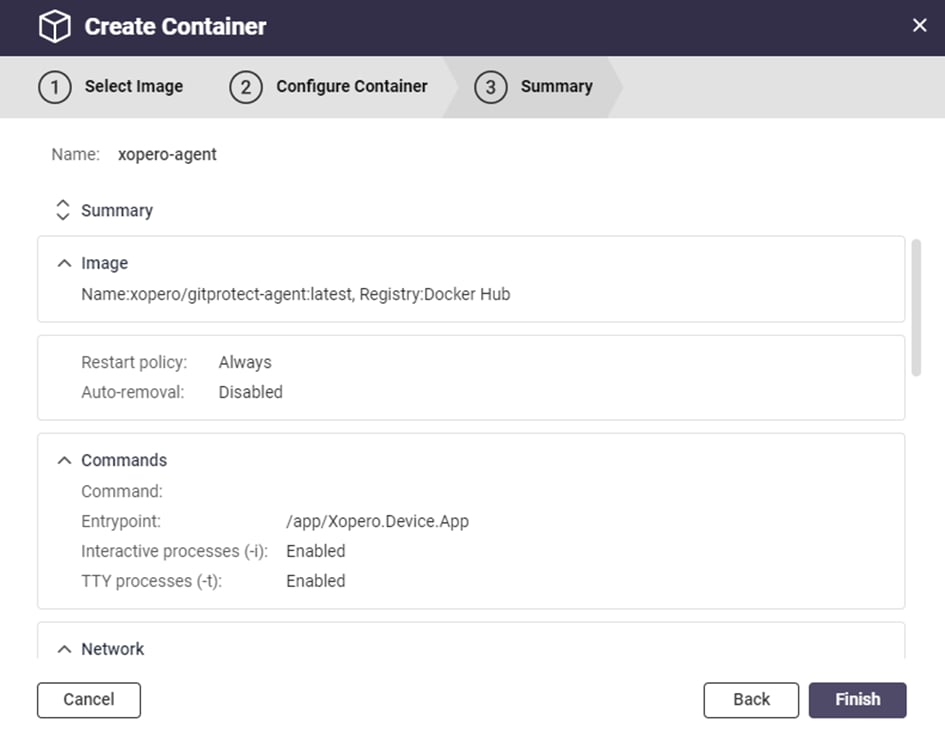
Next, double-check and confirm your settings, then click Finish to create the container.
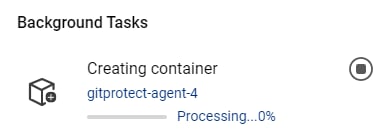
Container Station will download the latest Xopero ONE image and create the container based on that image.
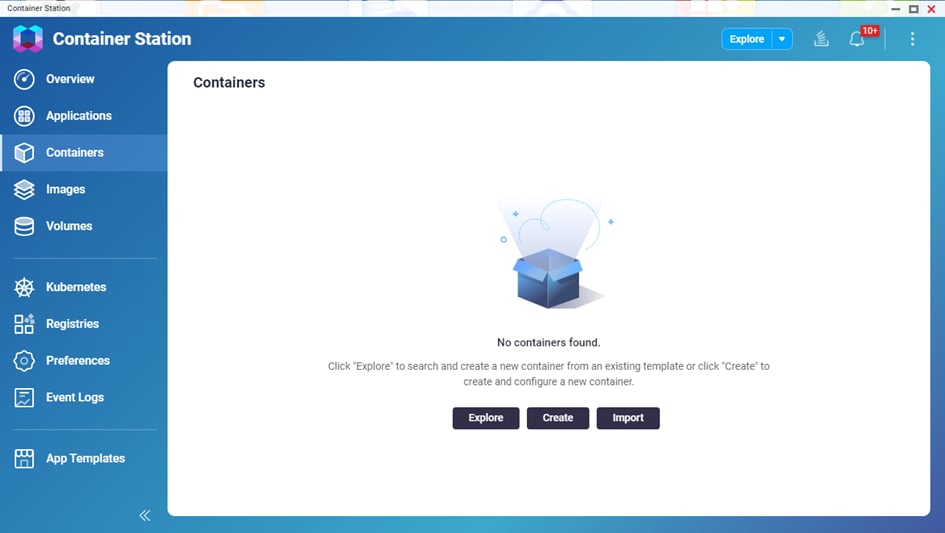
Once the container creation process is completed, your new container will be visible under Container tab in Container Station.
You can now connect to your Xopero ONE Management Service admin panel to activate the agent.
Download the Container Station app from the AppCenter.
Login to your QNAP web panel and open the AppCenter application. In QNAP Store, select All Apps and search for the Container Station.
Download and open the application. Select the path that will be used as a directory for your Docker container data, and click Start Now to proceed.
Once done, download the Xopero ONE agent Docker image, which is available on our official server.
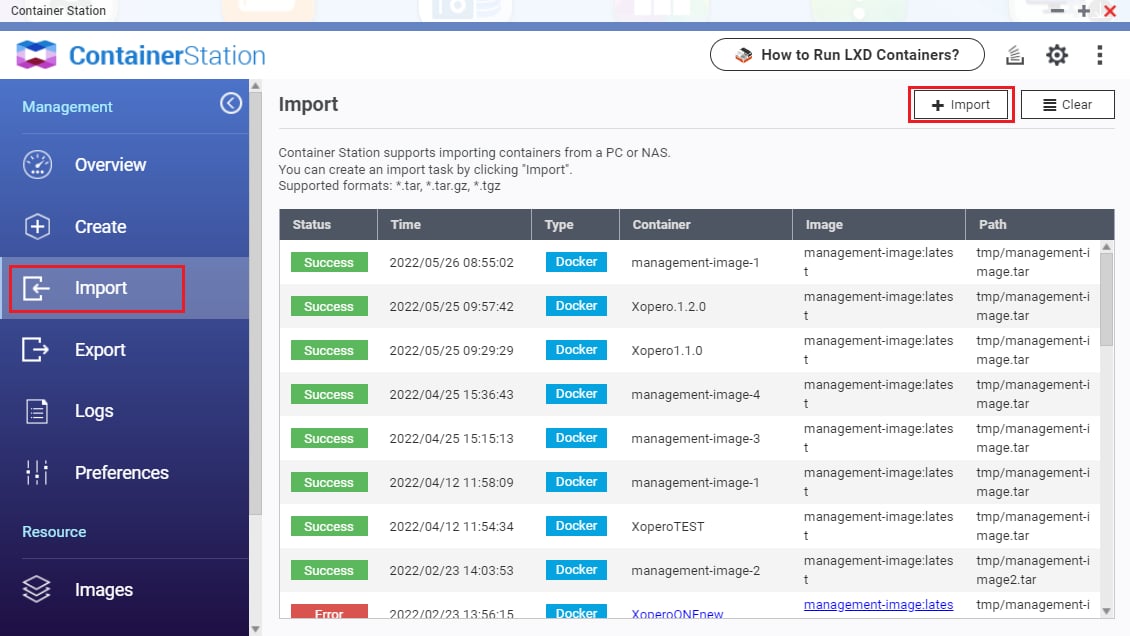
Open the Container Station application and navigate the Import tab.
Click the ➕Import button to upload the previously downloaded Docker image file.
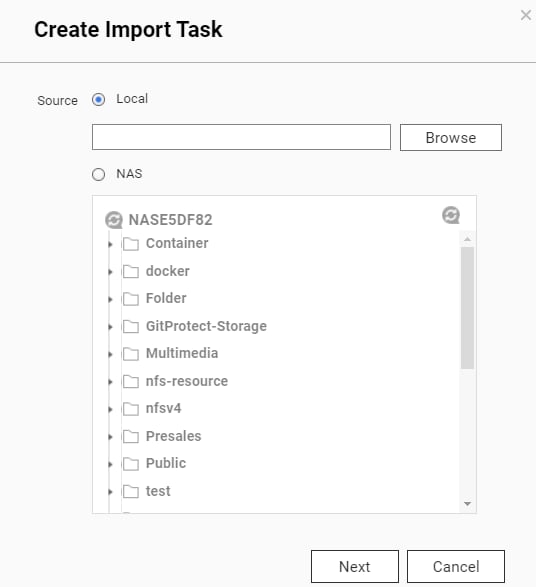
In Create Import Task window, select the source type and file path of the Xopero ONE agent Docker image and hit Next to continue.
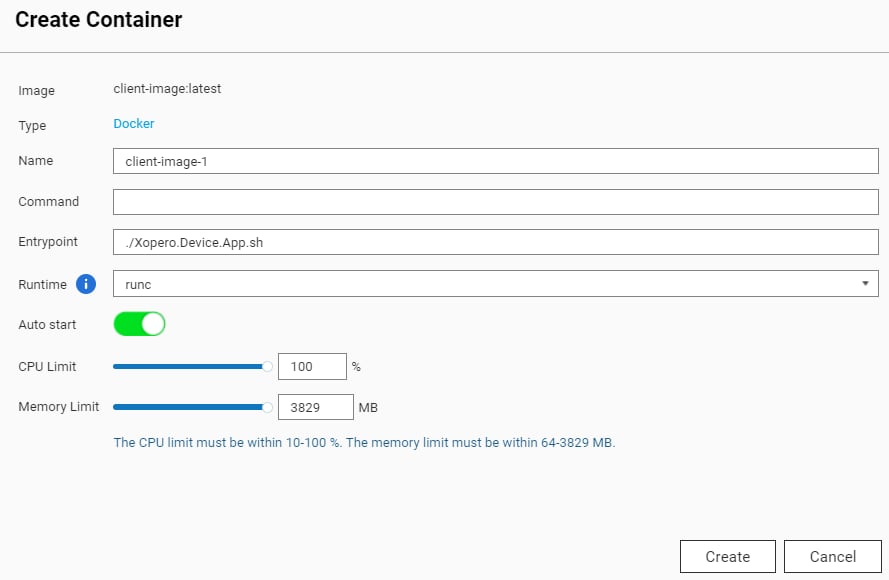
Within the Create Container tab, the form contains several fields, with the most crucial being:
Name — here you can set a custom name for the container
Auto start — defines if the container will star automatically in case of, for example, QNAP restart
CPU Limit — allows you to specify the percentage of CPU usage allocated for the container
Memory Limit — RAM limit for the container
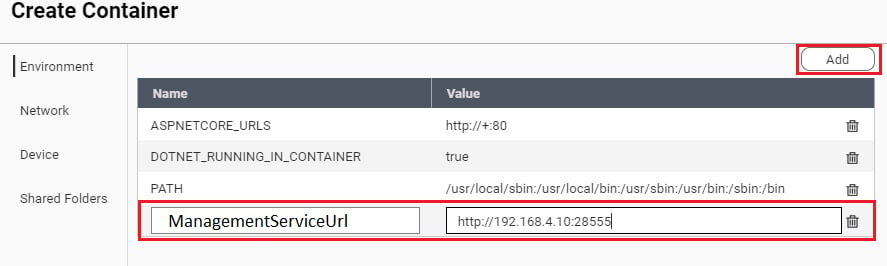
Click the ⚙️Advanced Settings >> button and navigate to the Environment section.
To add a new environment variable, click the Add button, name it ManagementServiceUrl, and set its value to your Xopero ONE Management Service address*.
‼️*ManagementServiceUrl – your Xopero ONE Management Service (XMS) address in one of the following formats (depending on the XMS deployment model):
a.
http://ipaddress:port, i.e.,http://192.168.0.1:28555b.
https://XMSID.ads.xopero.com, i.e.,https://a00b0dc0-0116-0000-0000-d0000028960e.ads.xopero.com
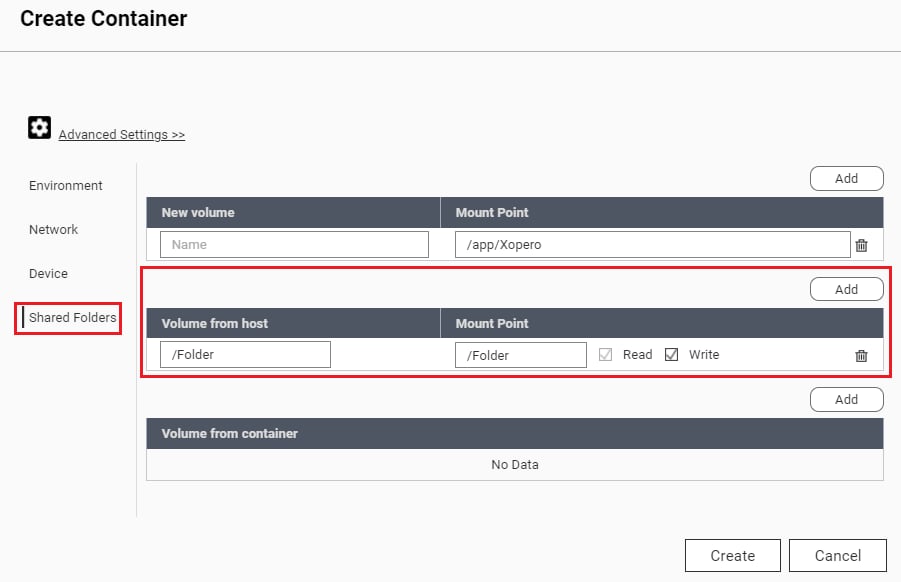
Go to the Shared Folders section — here you can mount your QNAP volumes to the Xopero ONE agent Docker container.
To back up data from your QNAP device, choose Add under Volume from host section— it lets you specify which data the Xopero ONE container can access. Select a directory from the host in Volume from host field and enter the path visible inside the container in the Mount Point field.
Once you're done with the above steps, click Create to continue.
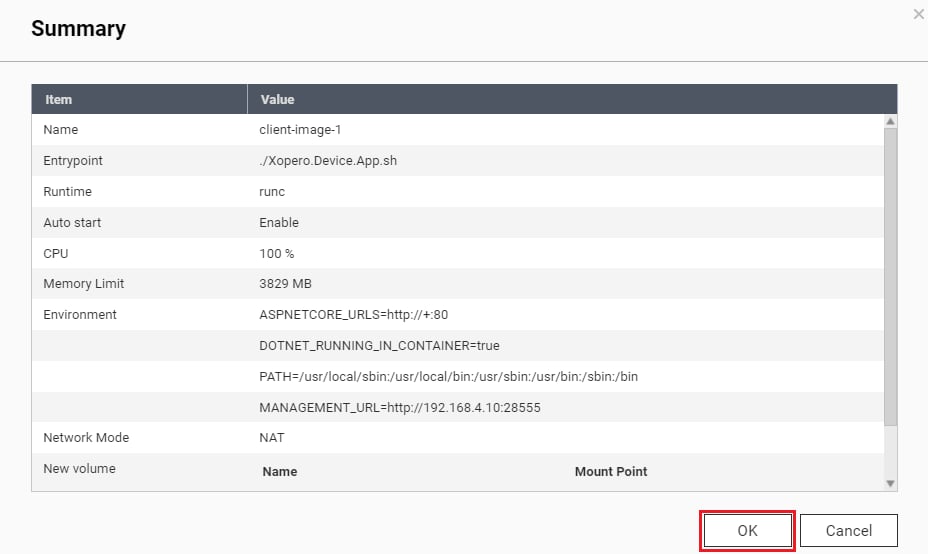
In the Summary window double-check your settings, then click OK to finish the configuration.
You can now connect to your Xopero ONE Management Service admin panel to activate the agent.
Once the image is downloaded, select it from the Image field drop-down menu.
Next, define a custom name for the container. Additionally, configure container resource limits if needed.
Check the Enable auto-restart option to ensure the container automatically restarts when the device reboots, then click Next to proceed.
In the Volume Settings section, click the ➕Add Folder button, and select directories that require protection. The container needs to have external directories mounted to access them while performing backups.
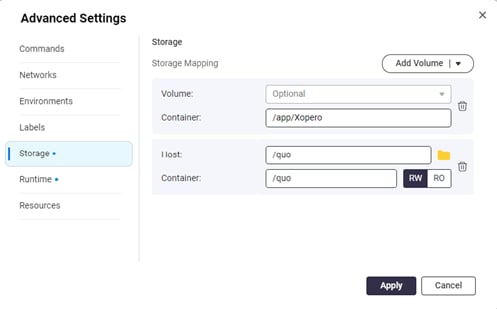
Additionally, to ensure data persistence during container updates or maintenance operations, mount agent databases to an external directory. These databases are located in /app/Xopero and should be mapped to a designated location outside the container to avoid data loss or inconsistency.
Next, in the Environment section, define the required variables:
ManagementServiceUrl — your Xopero ONE Management Service (XMS) address in one of the following formats (depending on the XMS deployment model):
a.
http://ipaddress:port, i.e.,http://192.168.0.1:28555b.
https://XMSID.ads.xopero.com, i.e.,https://a00b0dc0-0116-0000-0000-d0000028960e.ads.xopero.comXoperoOverriddenHostName — specify agent's name to facilitate identification
Click Next to confirm the configuration. In Summary window, double-check your settings and if they're all correct, hit Done to finalize the process.
docker psTo deploy the Xopero ONE agent on a Synology device using Docker, use the Container Manager application. If it's not installed, download it from the Package Center.
docker run -v /host/path:/container/path -e ENV_VAR=value image_namedocker run -d \
--name <container_name> \
-e ManagementServiceUrl="<your_xopero_one_service_URL>" \
-e XoperoOverriddenHostName="<device_name>" \
-v /opt/gitprotect-agent/data:/app/Xopero \
--restart unless-stopped \
xopero/gitprotect-agent:latestdocker run -d \
--name xopero-agent \
-e ManagementServiceUrl="https://192.168.1.10:28555" \
-e XoperoOverriddenHostName="Docker_agent" \
-v /opt/gitprotect-agent/data:/app/Xopero \
--restart unless-stopped \
xopero/gitprotect-agent:latestxopero/gitprotect-agent:latesthttp://+:80trueXopero ONE Management Service addressyour custom QNAP container nameReplace Xopero ONE Management Service address with your Xopero ONE Management Service address*.
You can mount multiple directories to the container using Add Volume button and repeating the operation.
To back up data from your QNAP device, choose Bind Mount Host Path under Add Volume drop-down menu — it lets you specify which data the Xopero ONE container can access. Select a directory from the host and enter the path visible inside the container in the Container field.
Selecting a file from a local source enables you to choose files stored on your device. Alternatively, you can use the NAS option to access files directly from QNAP.
You can mount multiple directories to the container using Add button in Volume from host section and repeating the operation.
For instance, if you need to back up a directory named Backup inside a public shared folder, set the Volume from the host field to /Public/Backup. The Mount Point can be different, i.e., /Backup.
To protect data stored in the Public directory, select this folder and specify the same path to ensure consistency between the host and the container's file systems.
You can mount multiple directories to the container by clicking ➕ Add Folder and repeating the operation.