
Filters are available only in the file-level backup plan.
When creating a backup plan, you can use filters to control which files are backed up. Filters let you include or exclude specific files and folders, for example, based on their size, or limit the backup content to them.
While selecting data to protect, add filters by clicking the funnel icon in Add rule panel (+ Add plan > Data to protect > Add rule).
In the Filters panel, configure which files, paths, or folders should be excluded from or limited in backup.
Several filters are available to choose from:
Exclude hidden and/or system files or folders:
Filter files based on their name or extension:
After setting filters, click the Apply button to save changes. Filters are applied to all devices protected by the plan. When at least one filter is active, a green dot appears on the funnel icon.
Limit backup data by including files based on their name or extension:
Limit backup data by setting a file size threshold:
Exclude specific paths from backup. Directories can be filtered using a direct path, a system variable, or a predefined Xopero variable:


Learn about backup scripts, when they run, and how to use them effectively.
Pre-backup – executed before the backup starts. You can configure the backup to wait until this script finishes, which is mandatory for scenarios like SQL database backups.
Post-snapshot – executed after the backup snapshots have been created.
Post-backup – executed after the backup completes. For example, this script can be used to shut down the backed-up machine.
Using backup scripts can help automate the backup of resources that Xopero ONE cannot back up natively. Xopero ONE also provides features such as incremental and differential backups, deduplication, flexible scheduling, and detailed monitoring of backup copies.
In the Create backup plan view, scroll to the bottom, click Edit next to Advanced settings, and then select Backup scripts.
Select the type of script you want to enable.
Xopero ONE provides a set of predefined scripts that can be used for common backup tasks. These scripts are ready to use and can be selected directly from the drop-down list when configuring your backup plan.
SQL Server database backup — protects a Microsoft SQL server database (Windows only).
MySQL database backup — protects a MySQL database (Windows, Linux, and macOS).
PostgreSQL database backup — protects a
SQL Server database backup — protects a Microsoft SQL server database.
MySQL database backup — protects a MySQL database.
PostgreSQL database backup — protects a PostgreSQL database.
Shutdown — shuts down the device.
Enter path* — allows you to run a custom script; simply type the path to your script to execute it using Xopero ONE.
Select the operating system (Windows, Linux, or macOS) and choose a from the drop-down list.
If you have selected a script, enable the Wait for the script to continue the task checkbox. This ensures that the backup task will wait until the script finishes. You can also configure a waiting interval and choose to fail the task if the script does not complete successfully.
Oracle database backup — protects an Oracle database environment (Linux and macOS only).
Enter path* — allows you to run a custom script; simply type the path to your script to execute it using Xopero ONE (Windows, Linux, and macOS).
Enter path* — allows you to run a custom script; simply type the path to your script to execute it using Xopero ONE.
You can enable multiple scripts at the same time.
Custom pre- and post-task scripts can identify the current backup type by using the __XOPERO_BACKUP_TYPE__ argument. When this argument is included in a script, it is dynamically replaced at runtime with a specific string value corresponding to the current backup type, injecting Full for a full backup, Incremental for an incremental backup, Differential for a differential backup, or SyntheticFull for a synthetic full backup.
The script is executed before the backup starts.
The script is executed after the data snapshot has been completed.
The script is executed after the backup is completed.
*WARNING! If your backup plan includes multiple devices, the script must be located at the same path on all devices where you want it to run.


Learn how to optimize your backup tasks.
Xopero ONE provides several features to help you optimize your backup tasks and configure them quickly and easily, depending on your needs. When creating a backup plan, you can customize the backup window, task balancing, storage location, bandwidth limits, and more.
This feature allows you to automate your backup schedule, set a backup window, and define the time zone for your backup plans.
Learn more about scheduling in.
The backup window allows you to specify the hours during which backups are permitted to run. Any backup tasks scheduled outside of this window will not start, and tasks that exceed the allowed time frame will be stopped and marked as failed. This ensures that backups do not interfere with business hours or critical system operations, giving you full control over when your backup processes run.
There is no way to run a backup task that was stopped for exceeding the backup window.
It is not possible to run a backup task during a blocked time frame.
Balance backup speed and CPU load — task balancing feature allows you to set a limit on the number of concurrent tasks or configure a delay between the start of successive tasks.
Task balancing can be configured in the Advanced settings of a backup plan.
In the Backup storage tab, you can view information about the assigned storages— Xopero ONE is a multi-storage system, allowing you to distribute backup data across multiple locations.
To optimize resource usage on the devices where data is stored, you can assign each backup plan to a different storage.
Backup scripts are divided into three categories depending on the moment at which we want to execute them:
Before backup
When the data snapshot is completed
When the backup is finished
To shut down the computer after finishing the task, select the Post-task script, then choose the operating system and select Shutdown from the drop-down list. This script helps optimize backups by reducing energy consumption and freeing up system resources once the backup is complete, especially for machines that do not need to remain running outside working hours.
With the bandwidth limit feature, you can control network usage by setting an internet speed limit— simply enter a value and select the unit (kB/s, MB/s, or GB/s).
This setting applies to backups sent to S3-compatible storage. By default, the buffer size is 128 MiB, which allows transferring approximately 1,250 GiB of data. If your data exceeds this limit, you can adjust the buffer size accordingly.
Due to the system’s architectural design, this limit can be exceeded only by backup plans for the following resource types:
Disk image backups (endpoint/server).
File-level backups, including databases (endpoint/server).
Hyper-V virtual machine backups.
VMware virtual machine backups.
256
2500
64
625
128
1250
210
Learn more about backup scripts in this article.
Adjusting the buffer size directly affects the agent’s RAM usage during the backup process.


2050

In this article, you will get information about backup plan dashboard details.
You can view the backup plan dashboard details in your backup plan list.
Go to the Plans tab in XMS. Click the info icon next to the backup plan you want to check.
In the backup plan dashboard, you can find all the information about your backup plan, including:
Next run — here you can see when the next backup plan is scheduled to run, or you can start it manually:
Plan duration — the chart shows the times at which backup tasks were performed. You can view this information for intervals of 7, 14, or 30 days, making it easy to compare whether tasks are completing within a consistent time frame or taking unusually long.
Latest tasks — shows the status of the most recent backup tasks.
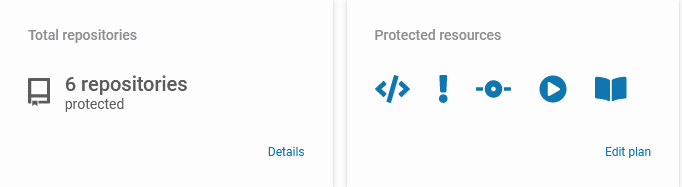
Total devices/repositories — number of devices/repositories your backup plan protects.
Protected resources — displays the data that the backup plan protects, as configured during its creation. You can edit this list here if needed.
Schedule and retention — displays the backup plan’s schedule and retention settings. You can view and edit these settings here if needed.
At the bottom of the backup plan details dashboard panel, you have options to edit the backup plan, delete it, or run it manually.
If a backup task is already in progress, the dashboard will display a progress summary.



This article provides information about VSS settings.
VSS is a Microsoft service and is available only on Windows operating systems.
Xopero ONE uses Shadow Copy (aka Volume Snapshot Service, Volume Shadow Copy Service, or VSS) for its backup operations. VSS is a technology included in Microsoft Windows that can create backup copies or snapshots of computer files or volumes, even when they are in use.
When creating a backup plan, you can enable the use of VSS in the Advanced settings—simply toggle the switch. You can also allow the backup to continue even if VSS errors occur.
Without VSS, backup data may become inconsistent. Use this option only if you fully understand the risk — for example, when running backups outside of working hours.
