Xopero ONE supports the majority of the most popular cloud service providers compatible with S3:
Sending backup tasks to S3 cloud storage has a limit (buffer). The default buffer value is 128 MB, which limits both the maximum data size and the minimum internet speed. If your network environment or S3 endpoint has no additional restrictions, the minimum required upload speed is ~0.64 Mbit/s.
Xopero ONE supports S3-type immutable storage as a backup location. This feature is available for selected storages supported by Xopero ONE, such as AWS, Wasabi, and Backblaze B2. Datastores of this type allow you to freely save and read data, but modification and deletion are only possible after meeting the bucket's retention policies.
Advantages:
This article describes the process of setting up an S3-compatible bucket as storage in Xopero ONE.
Open the Storages section and click Add storage button.
The Add storage sidebar will appear— use it to enter the name of your new storage in the Add storage name field (step 1), then click the arrow next to the Storage type section (step 2) to expand the list of available storage types.
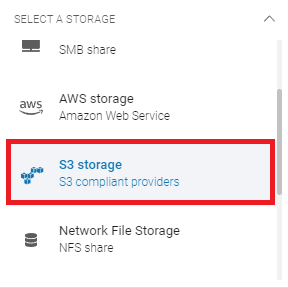
Scroll down the list and select the S3 storage option.
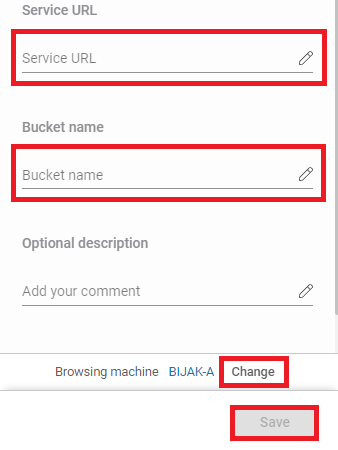
After selecting storage option, the system will display additional sections, including: Authentication data, Service URL, Bucket name, and Optional description.
Copy the access key ID and secret access key from your S3-compliant storage provider, paste the access key ID to the corresponding field, and click Select or add secret access key to open the Password Manager menu and add your copied secret key to your bucket.
In the Service URL field, enter the URL provided by your S3-compliant storage provider.
Enter the bucket name in the Bucket name field and proceed to the next step.
Ensure that the browsing machine—a device with an active license and the Xopero ONE agent installed—can access your S3 bucket. To use a different device, click Change next to the Browsing machine at the bottom.
Review your settings and click the Save button to add the storage to Xopero ONE. Refresh the page to see the newly added storage on your storages list.