HTTP access tokens in Bitbucket DC can be used instead of passwords to authenticate with Git.
To create an HTTP access token for your user account in Bitbucket DC:
Click your profile picture and go to Manage account > HTTP access tokens.
Select Create token.
Set the token name, permissions, and expiry.
💡 Learn more about HTTP access tokens in official .
1
Login to XMS and open the DevOps tab. Find your Bitbucket DC project (this must be done for each project individually) and click Edit in the bottom-left corner of the project tile.
2
Go to the Additional credentials
1
In XMS, open the Plans tab and click Add plan, or select Edit plan if you already have one.
2
Scroll down to Advanced settings, click Edit, and enable the Additional git credentials
section and click it.
3
Click the Add new button, enter the credentials, and then click Save to finish.
switch.
3
The system will display all additional accounts available for the selected organization. Toggle the switch ON next to the accounts you want to use, and then click the Save button.
4
Back in the Edit backup plan panel, click the Save button to save your backup plan settings. The backup plan will now run using the selected additional Bitbucket DC accounts.
Adding Bitbucket DC credentials to Xopero ONE
Adding additional credentials in Xopero ONE does not automatically integrate them into backup tasks— you must enable new credentials for use in a backup plan.
This article provides general information about the throttling prevention mechanism and how Xopero ONE uses credential rotation to ensure task continuity.
Throttling mechanisms are commonly used by cloud service providers to prevent API overloads. In the context of data protection, throttling can lead to task interruptions or significantly extended execution times. Xopero ONE minimizes this risk through an advanced system of credential rotation and dynamic exchange.
Throttling prevention mechanism
Xopero ONE implements a credential management system that optimizes API limit usage by distributing requests across multiple accounts or access tokens. This process occurs automatically on two levels.
Credential rotation
Every task (backup or restore) launched in the system is assigned credentials from an available pool. The system applies a rotation principle, meaning that subsequent tasks use different authentication data (e.g., task A uses credential a, task B uses credential b, and so on). This ensures that APIlimits are used evenly, significantly reducing the likelihood of being blocked.
Dynamic credential exchange
If throttling occurs during an active task, the Xopero ONE Management Service (XMS) takes the following steps:
Available additional credentials — if other credentials are available in the pool, XMS sends new credentials to the agent. The task continues without interrupting the operation.
No additional credentials available — if the credential pool is exhausted, XMS informs the agent that no more credentials are available. The task is then suspended and marked as Throttled, waiting for the limits to reset.
For the credential exchange mechanism to function correctly during operations, specific permission requirements must be met:
In the task summary within the Xopero ONE panel, you can review the list of all credentials used to perform the operation and check the specific time periods when throttlingoccurred.
Important recovery requirements
Reducing throttling impact in M365
This article provides information about throttling in Microsoft 365 services and how to reduce its impact.
Overview
You can read more about throttling on the .
Throttling limits the number of API calls or operations within a given time window to prevent overuse of resources and ensure server stability. If throttling is exceeded, further requests from the client (such as Microsoft Graph API calls for Microsoft 365 backups in Xopero ONE) are temporarily restricted, which may extend backup times.
Microsoft uses throttling to maintain the optimal performance and reliability of its services. The more complex the Microsoft 365 organization, the more likely throttling issues are to occur.
Learn more about throttling limits on the .
The best way to minimize throttling is to schedule backup procedures outside of business hours. Below are a few other example methods you can use to reduce the impact of throttling in Microsoft 365.
Limiting concurrent tasks
In Xopero ONE, you can set a limit for concurrent backup tasks based on the number of users or the time interval between executions. When creating or editing an M365 backup plan, go to the Scheduler section to adjust the default values— enable task balancing by defining the backup times.
By default, Microsoft 365 throttles data flow to maintain service availability and stability. A side effect of this throttling is that backups may take longer than expected. To make your Microsoft 365 backups run faster:
Sign in to your Microsoft 365 Admin Center.
Navigate to Support > New service request.
In the search field, enter EWS and select Increase EWS Throttling Policy from the list.
Run the diagnostic test to determine whether you are being throttled.
If you are being throttled, EWS will temporarily increase the throttling limits.
Increasing EWS throttling policy limits in Microsoft 365
This article explains how to prepare and add additional GitLab accounts to Xopero ONE in order to prevent throttling.
GitLab account preparation
The best way to add an additional account to your GitLab environment is by adding a new user to the dedicated group. This way, the added user automatically gains access to all projects within the group.
Alternatively, you can add a user to individual projects separately.
Adding additional credentials in Xopero ONE does not automatically integrate them into backup tasks— you must enable new credentials for use in a backup plan.
1
Login to XMS, open the GitLab tab and click Edit in the bottom-left corner of the selected GitLab repository tile.
2
Go to the Additional credentials section and click it.
3
Click the Add new button, enter the credentials, and then click Save to finish.
1
In XMS, open the Plans tab and click Add plan, or select Edit plan if you already have one.
2
Scroll down to Advanced settings, click Edit, and enable the Additional git credentials
switch.
3
The system will display all additional accounts available for the selected organization. Toggle the switch ON next to the accounts you want to use, and then click the Save button.
4
Back in the Edit backup plan panel, click the Save button to save your backup plan settings. The backup plan will now run using the selected additional GitLab accounts.
This article explains how to prepare and add additional Bitbucket accounts to Xopero ONE in order to prevent throttling.
Bitbucket account preparation
Xopero ONE allows authentication with multiple organization accounts during repository backups. This helps distributing the limits of sent requests (imposed by the service provider) across more accounts, which speeds up the backup process and prevents throttling.
Additional accounts require an app password for authentication.
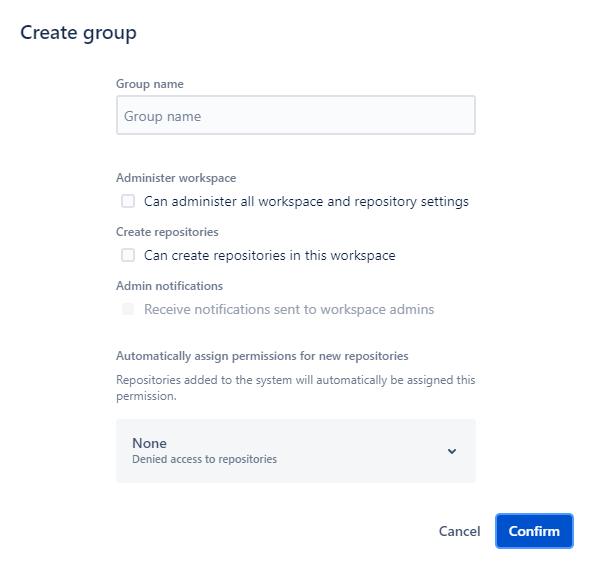
To add additional accounts for authentication to your Bitbucket organization, log in to your Bitbucket account and add a member to your workspace. The user should belong to a group with an Admin role for repositories, and also have the Administer workspace (Can administer all workspace and repository settings) option selected.
It is necessary to enable Bitbucket development mode— this type of app requires development mode to be turned on in the Bitbucket settings.
You can generate multiple app passwords in the App passwords tab of your Bitbucket account.
The minimum permissions required to authorize the Xopero ONE application to perform a repository backup are:
1
Login to XMS and open the DevOps tab. Find your Bitbucket repository and click Edit in the bottom-left corner of the selected tile.
2
Go to the Additional credentials section and click it.
1
In XMS, open the Plans tab and click Add plan, or select Edit plan if you already have one.
2
Scroll down to Advanced settings, click Edit, and enable the Additional git credentials
3
Click the Add new button, enter the credentials, and then click Save to finish.
switch.
3
The system will display all additional accounts available for the selected organization. Toggle the switch ON next to the accounts you want to use, and then click the Save button.
4
Back in the Edit backup plan panel, click the Save button to save your backup plan settings. The backup plan will now run using the selected additional Bitbucket accounts.
If you want the backup to include repository metadata as well, you need to grant additional permissions.
Adding Bitbucket credentials to Xopero ONE
Adding additional credentials in Xopero ONE does not automatically integrate them into backup tasks— you must enable new credentials for use in a backup plan.
Enabling Bitbucket credentials for backup
Additional GitHub credentials
This article explains how to prepare and add additional GitHub and GitHub Enterprise credentials to Xopero ONE in order to prevent throttling.
GitHub account preparation
You can add anyone to your GitHub (or GitHub Enterprise) organization, and they will become a member. To do this, follow the instructions on the official GitHub page.
Personal access token preparation
To create a personal access token in GitHub:
In the upper-right corner of any page, click your profile photo and select Settings.
In the left sidebar, click Developer settings.
Select Personal access tokens.
Click Generate new token.
Enter a descriptive name for the token.
1
Login to XMS, open the GitHub tab and click Edit in the bottom-left corner of your GitHub organization tile.
2
Go to the Throttling prevention section and click Manage credentials.
1
In XMS, open the Plans tab and click Add plan, or select Edit plan if you already have one.
2
Scroll down to Advanced settings, click Edit, and enable the Additional git credentials
3
Click the Add new button and select one of the available options:
4
For Access Token:
Enter your account username and add or select PAT from the Password Manager, then confirm your selection. You can add any number of accounts to your organization.
We use a specific user and their limits, which is why a dedicated backup user is recommended. This prevents situations where real users might hit their API limits.
To learn how to add a PAT to the Password Manager see .
5
For GitHub App:
From the drop-down list, select an application (#1–#10) and install it in the appropriate organization. The process is the same as when adding the main GitHub app.
The account is used solely for application installation. After the installation is complete, the account is no longer utilized for any operations, as all subsequent actions are performed by the installed application.
IMPORTANT! You can add an additional GitHubApponly if the following conditions are met:
The installing account has sufficient permissions on GitHub— the installation must not require sending and approving an installation request (it may happen, for example, when the account lacks repository administration rights or has a role other than Owner in an organization). For more details, see *.
The organization in Xopero system has the main credentials for the GitHub account where the additional GitHub App is being installed**:
If the organization was registered through a GitHub App, additional GitHub Apps can only be added for accounts that already have the main GitHub App registered. Additional GitHub App for other personal accounts are not allowed.
switch.
3
The system will display all additional accounts available for the selected organization. Toggle the switch ON next to the accounts you want to use, and then click the Save button.
4
Back in the Edit backup plan panel, click the Save button to save your backup plan settings. The backup plan will now run using the selected additional GitHub (or GitHub Enterprise) accounts.
You must use tokens (classic)— Xopero ONE does not support fine-grained tokens.
Please note that the beta version may have changed. After the full release, our administrators will need time to analyze the possibility of supporting this token type.
Adding additional credentials in Xopero ONE does not automatically integrate them into backup tasks— you must enable new credentials for use in a backup plan.
Enabling GitHub credentials for backup
If the organization was registered through OAuth or a PAT, additional GitHub App can be added for any account, including other personal accounts.
*If condition 1 is not met, an error message will indicate that you do not have the required permissions to complete the installation.
**If condition 2 is not met, an error message will prompt you to first register the account with the organization in our system.