Download the agent installer (bash script) to your Linux system and grant execute permission to the file owner (user or group) using the following chmod command:
To download the agent installer, login to Xopero ONE Management Service using a web browser, then go to Settings > Advanced > Workers and click Download agent button. The Download agent window will open — click the appropriate agent version to download it.
chmod+xxoperoclient.sh
Next, run the script using the following command:
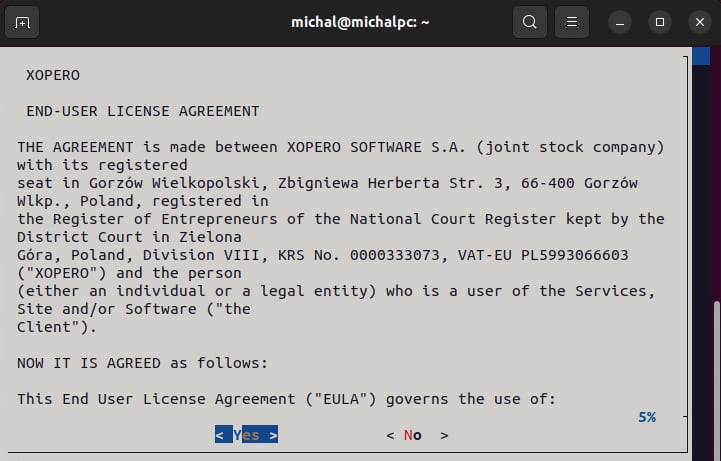
Accept the END-USER LICENSE AGREEMENT to proceed.
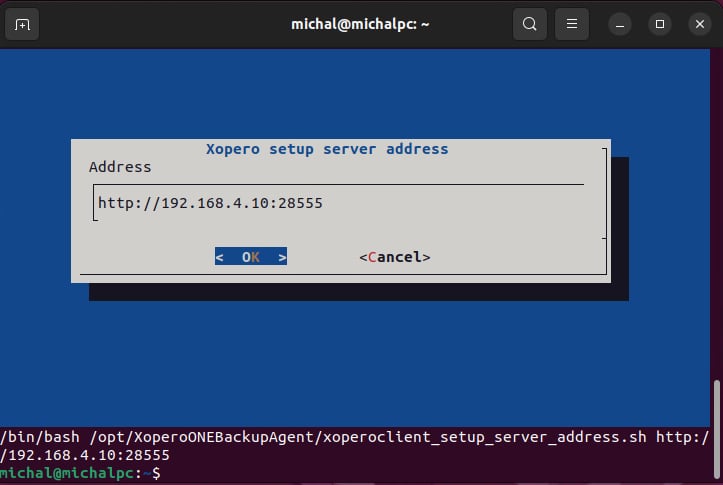
Next, enter the IP address in the Address field (including the protocol and port) and click OK to finish the installation. Your address can be found in Xopero ONE Management Service — the system will display it once you start downloading the agent installer.
Now that Xopero ONE agent is installed, you can activate it in the Xopero ONE Management Service (XMS) web panel and start protecting your data.
Download Xopero ONE agent installation wizard via XMS and run it.
Click Continue to proceed.
To learn how to activate the agent in the Xopero management console, check the Useful links and items section.
Select Continue in the Read Me section.
Read the END-USER LICENSE AGREEMENT and hit Continue to accept it.
Hit Agree to accept the terms of the software license agreement.
Change the installation directory if needed and click Install to begin the installation.
During the installation process, the creator will ask you for the address of your XMS— define it in this step.
Click OK to confirm your configuration.
The Xopero ONE agent has been successfully installed— you can close the installation wizard.
If you don't want to use the installation wizard, you can choose the unattended installation option.
Download the xoperoclient.pkg file to your device.
Run the following command in macOS terminal (Applications > Utilities > Terminal):
‼️Command overview:
After installation, in a few steps you need to add the necessary permissions for the Xopero file.
Click on the Mac icon in the upper left corner and select System Preferences... from the drop-down menu.
Next, go to Security & Privacy.
Navigate to the Privacy tab, then select Full Disk Access from the menu on the left.
Add Xopero.Device.App.app to the list.
Grant access to Xopero.Device.App.app to finish the configuration.
./xoperoclient.sh or bash xoperoclient.sh
The above script should be initiated using an account with administrative privileges — because of that it might be required to use the sudo command simultaneously (as in the above example).
Installation
To download the agent installer, login to Xopero ONE Management Service using a web browser, then go to Settings > Advanced > Workers and click Download agent button. The Download agent window will open — click the appropriate agent version to download it.
To download the agent installer, login to Xopero ONE Management Service using a web browser, then go to Settings > Advanced > Workers and click Download agent button. The Download agent window will open — click the appropriate agent version to download it.