
Loading...
Loading...
Loading...
Loading...
Loading...
Loading...
Loading...
Loading...
Loading...
Loading...
Loading...
Loading...
Loading...
Loading...
Loading...
Loading...
Loading...
Loading...
Loading...
Loading...
Loading...
Loading...
Loading...
Loading...
Loading...
Loading...
Loading...
Loading...
Loading...
Loading...
Loading...
Loading...
Loading...
Loading...
Loading...
Loading...
Loading...
Loading...
Loading...
Loading...
Loading...
Loading...
Loading...
Loading...
Loading...
Loading...
Loading...
Loading...
Loading...
Loading...
Loading...
Loading...
Loading...
Loading...
Loading...
Loading...
Loading...
Loading...
Loading...
Loading...
Loading...
Loading...
Loading...
Loading...
Loading...
Loading...
Loading...
Loading...
Loading...
Loading...
Loading...
Loading...
Loading...
Loading...
Loading...
Loading...
Loading...
Loading...
Loading...
Loading...
Loading...
Loading...
Loading...
Loading...
Loading...
Loading...
Loading...
Loading...
Loading...
Loading...
Loading...
Loading...
Loading...
Information about the Xopero ONE backup solution, including its architecture and framework.
Examine the core architecture and primary components of Xopero ONE software.
Review third-party software dependencies and open-source licenses in Xopero ONE.
In this article, you will learn how to restore data from a file-level backup.
Open the restore view in Xopero ONE Management Service using one of the following options:
Go to the Devices tab and click Restore next to the device whose data you want to recover. After selecting the device you want to restore, choose the plan containing the data you want to recover from the Backup plans drop-down menu.
Go to the Storages tab, select the storage containing the backup data, and click the folder 📂icon to browse the storage.
Select the device whose data you want to restore. Then, choose the backup plan and review the information about the agent used to connect to the storage.
After selecting the appropriate device and backup plan, the system will display the Backup copies section — here, you can choose the backup version you want to restore. Click the desired date, then select Restore.
The Select data to restore section displays a tree structure of directories and files. You can select specific directories or individual files to restore by marking the checkboxes next to them. To restore the selected data, click Restore selected. If you want to restore all items included in the backup plan, click Restore all.
In the Data to restore section, you can modify the previously selected data that will be included in the restore process. To change or add data, click the Edit button.
The Restore to section allows you to define the destination for the restore process—here, you can select any device that is assigned to the Xopero ONE platform as the target location for your restored data.
In Restore directory section you can specify the exact location where the data will be restored. You can choose to restore it to the original directory or select a new directory.
In Restore settings section, you will find three additional options that can be enabled for the restoration process:
Overwrite existing data — determines whether existing files in the restore directory should be replaced with the restored ones.
Restore files permissions — restores the original file permissions.
Double-check your configuration and click the Start now button to begin the recovery process.


Review key differences between the on-premises and SaaS deployment models to determine the optimal configuration for your environment.
Xopero ONE provides flexible on-premises and cloud deployment models to accommodate diverse IT infrastructure, security policies, and data sovereignty requirements.
Xopero ONE is a flexible backup solution that can be deployed in two different models: SaaS and on-premises.
The primary difference between the SaaS and on-premises deployment models lies in where the Xopero ONE services are installed and run. In SaaS model, Xopero hosts and maintains all services in the cloud. In on-premises model, services are deployed and managed within the user's own infrastructure.
The backup storage location is independent of the deployment model of the Xopero ONE services. A SaaS deployment can use local storage repositories, while an on-premises deployment can use cloud-based storage repositories.
Software as a Service (SaaS) is a software delivery model in which applications are hosted and maintained by a service provider and accessed over the internet. Instead of installing and managing software on local infrastructure, users access the service through a subscription.
As a form of cloud computing, SaaS allows the provider to manage all underlying infrastructure, platform components, and application resources, while customers use the software without having to maintain the physical or software environment required to run it.
In the SaaS deployment model, the management service runs entirely on Xopero's cloud infrastructure. This model eliminates the need to provision or manage dedicated local servers. Xopero handles all backend administration, software updates, and maintenance, ensuring continuous operational availability.
No local server or hardware provisioning required.
Secure, web-based management service accessible from anywhere.
High availability and guaranteed business continuity.
Native cloud-to-cloud backup.
On-premises software is installed and operated on infrastructure owned and managed by the organization or individual using the software. Unlike cloud-based solutions, on-premises software runs on local systems within the organization's environment rather than in a remote data center or cloud infrastructure. As a result, the organization is responsible for maintaining, managing, and securing the software and the underlying infrastructure.
In the on-premises deployment model, Xopero ONE services can be installed on supported operating systems, deployed in a Docker container, or hosted directly on compatible NAS devices. This deployment model eliminates reliance on external network connectivity — backup data is transferred across the local network, significantly increasing transfer speeds and operational efficiency.
Flexible deployment on supported OS, Docker, and NAS devices.
Fast, reliable local backups unaffected by external network outages.
Complete data sovereignty with zero external data transmission.
Full support for offline and air-gapped backup operations.
Automated software updates, security patching, and maintenance.
Learn how to install and configure the Xopero Unified Protection appliance.
Instructions for deploying Xopero Unified Protection hardware, including appliance installation, network configuration, and initial system setup.
Learn more about the Xopero Unified Protection (XUP) solution designed for backup and data protection.
Xopero Unified Protection (XUP) combines simplicity, cost efficiency, and reliability to meet the needs of even the most demanding virtual, physical, and hybrid environments.
Xopero Unified Protection (XUP) is an advanced hardware–software solution that combines the performance of a physical server with pre-configured Xopero ONE software. It's a "plug-and-forget" solution — the deployment process is straightforward, requiring only mounting the device in a rack cabinet and performing basic network configuration. With these steps completed, the system is fully operational, and users can immediately log in to the management panel.
The XUP device is designed to support diverse network environments and varying IT security requirements. It can be deployed in one of two operating models:
Online model — enables full connectivity to external networks, allowing remote management and administration.
DMZ (demilitarized zone) model — places XUP within an isolated zone (local network) with no access to external networks.
XUP emphasizes protecting data against accidental or intentional deletion (for example, as a result of a ransomware attack). The security system is based on two key pillars:
Versioning (7 days) — data must remain in the system for at least one week before it can be permanently deleted.
Compliance mode (24-hour buffer) — an additional layer of protection that delays complete data deletion by 24 hours, giving administrators time to respond in critical situations.
Each Xopero Unified Protection device is equipped with an integrated management system (Xopero Unified Protection Management Service, abbreviated as XUP Management Service), which enables:
Performing basic network configuration.
Monitoring the condition of physical storage medium using SMART (Self-Monitoring, Analysis and Reporting Technology):
The storage health monitoring system (SMART or S.M.A.R.T.) enables active tracking of key operational metrics, such as device status and storage consumption. It continuously reports disk performance parameters and presents the technical condition using clear color-coded indicators:
Fail status (or no SMART data available) — marked in red, indicates a failure or inability to read diagnostic parameters.

Learn how to register for a free Xopero ONE account with the cloud-based Xopero ONE Management Service.
Registration for a Xopero ONE account in the SaaS deployment model is a simple, self-service process on the Xopero website. To sign up, customers provide basic business contact details, select data residency, and create administrator credentials. After registration, access to the Xopero ONE Management Service (XMS) is granted via a unique SaaS login URL for subsequent provisioning, adding storage or cloud agents, and configuring roles and permissions.
The below steps outline the registration process on the Xopero ONE website.
Open https://www.xopero.com/ and click the Get started button in the upper-right corner of the screen (or use this link).
Select the cloud deployment model, enter your business email address, and click Sign up free.
Enter all required information (name/organization, phone number, and data residency location) and set a strong password for your new account. Once completed, verify that the information is correct and click the Sign up free button.
Wait for the system to create your account.
Once the account is created, you will be redirected to the Xopero ONE Management Service landing page, where you can immediately add organizations to protect and create backup plans for them.
The system will generate a unique Xopero ONE Management Service instance URL for login. For subsequent logins, use this URL or go directly to .
Additionally, you will receive a welcome email from Xopero containing all important information about your account and the Xopero ONE system (including your unique login URL).


Overview of the AirGap solution and its functionality.
This article explains how to restore a PostgreSQL database from a backup.
The first step in restoring a PostgreSQL database from backup is to restore the database files from storage to a temporary directory. These files will then be imported into the PostgreSQL database environment.
To restore files backed up using a file-level backup plan follow this guide. If your database was backed up using an image-level backup, use granular recovery to restore it as described in this article.
Once the database files are restored, the next step is to import them into the PostgreSQL environment.
Log in to your database server using SSH.
Enter the following command:
The database has been successfully restored
AirGap solution overview, including the isolated backup repository, security mechanisms, and replication process.
Learn how pre- and post-replication scripts are configured in Xopero ONE Management Service to automate and control replication workflows.
psql dbname < dumpfile.sqlAirGap solution overview, including the isolated backup repository, security mechanisms, and replication process.
Xopero Unified Protection includes an AirGap solution designed to enhance data security. This functionality is based on the physical isolation of the backup repository from the network, helping to minimize the risk of data breaches, for example those caused by ransomware attacks. The AirGap architecture ensures that backup data remains inaccessible to entities operating within a compromised IT environment. By combining strict access control with automated backup processes, the solution increases infrastructure resilience and provides a foundation for a secure disaster recovery strategy.
The Xopero AirGap solution is a data protection method that uses xSAIR (Secure AirGap Immutable Repository) technology to create an isolated backup environment and store an additional backup copy fully separated from the primary network.
AirGap is based on a cluster of two Xopero Unified Protection (XUP) appliances connected in a back-to-back configuration, where the second, redundant device remains disconnected from the network most of the time, preventing any communication with it. The redundant device is powered on only for replication purposes.
The replication process is initiated by powering on the inactive XUP appliance via iDRAC (Integrated Dell Remote Access Controller). After data transfer is completed, the system automatically powers the device off, restoring the isolated AirGap state. Due to its physical disconnection from the network, the backup copy stored on the isolated device remains inaccessible to cyber threats, providing effective protection against ransomware attacks.
The AirGap system is based on communication between two interconnected XUP devices — offline and online:
XUP offline device remains powered off most of the time. It includes only data storage and, optionally, a backup agent. The device is equipped with an active iDRAC interface used for remote startup and shutdown.
XUP online device can operate in one of two variants:
Standard — includes an active management interface, a backup agent, and data storage.
The AirGap data replication process is fully automated, eliminating the need for manual intervention to maintain physical separation of resources. The system manages the connection state of the backup repository, enabling access only during data transfer and isolating it immediately afterward.
The AirGap component integration process follows these principles:
The XUP online unit connects its backup agent and data storage to the management service (hosted on a XUP device, external server, or SaaS).
The data storage of the XUP offline unit is then connected to the management service via backup agent installed on the XUP online device.
Data replication is performed through a task executed by the backup agent on the XUP online device.
To ensure unattended communication with the offline device, the process uses event-driven scripts:
PRE script — executed before the data replication process begins. It powers on the XUP offline unit via the iDRAC interface and waits until it is fully operational.
POST script — executed immediately after the replication task is completed. It safely powers off the XUP offline unit using the iDRAC interface.
Learn how to connect to Xopero ONE Management Service (XMS) admin panel via encrypted HTTPS protocol.
Open appsettings.json file located in Xopero ONE Management Service installation directory.
Find commented_out_Kestrel line.
"commented_out_Kestrel": {
"Endpoints": {
"Http": {
"Url": "http://*:5000"
}
}Modify the following code lines— erase commented_out_ prefix and add the HTTPS configuration as follows:
Path: path to the .pfx file*
Password: certificate password
*IMPORTANT! Remember to use double slash— if you're keeping the certificate in C:\cert.pfx directory, the path should be entered as C:\\cert.pfx instead.
Go to your Xopero ONE Agent installation directory and open config.json file.
Default location of the config.json file is:
For Windows: C:\Program Files\Xopero ONE Backup&Recovery Agent
Learn how to integrate Active Directory with Xopero ONE using LDAP.
Integrating Active Directory (AD) with Xopero ONE enables automated user provisioning upon login, group-to-role mapping, and administrative fallback authentication.
Integrating Active Directory (AD) with Xopero ONE (supporting both LDAP and LDAPS protocols) enables centralized and automated permission management within the backup system.
The automatic provisioning feature eliminates the need to create user accounts manually. Instead, each user's Xopero ONE profile is created automatically during their first login. User information and assigned roles are continuously synchronized and updated based on the Active Directory group structure. Administrators can further control the Xopero ONE environment by limiting authentication to selected AD groups and configuring the system's default language.
Additionally, administrators retain independent emergency access to the system. After each successful authentication, the system stores user's LDAP attributes and group memberships retrieved from Active Directory in its local database, while the user's password is securely managed by the password module. If the Active Directory
Learn about virtual appliance and its role in Xopero ONE backup.
A virtual appliance (VA) is a virtual machine image running on a Linux-based system with the Xopero ONE application pre-installed. It can be deployed through the Xopero ONE Management Service (XMS).
The main purpose of a VA is to act as a backup proxy. It enables the use of SCSI HotAdd, one of the fastest transport methods, which allows attaching devices to a running virtual machine. This capability is especially useful for both backup and restore operations.
The default virtual appliance (VA) configuration parameters are:
2 CPUs
Change the ServiceUrl value from HTTP to HTTPS.
config.json file opened in Notepad++.Once the value is changed, the agent will come back online.
"Kestrel": {
"Endpoints": {
"Http": {
"Url": "http://*:5000"
},
"Https": {
"Url": "https://*:5001",
"Certificate":{
"Path": "<.pfx file path>",
"Password": "<certificate password>"
}}}}}
The following steps outline how to configure Active Directory (AD) settings in Xopero ONE Management Service.
Navigate to ⚙️ Settings > External Identity Providers, then click Add new provider and select Active Directory.
Specify the required parameters.
Name: custom IdP name.
Server address: Active Directory server address, either IP or FQDN.
Server port: 389 (LDAP) or 636 (LDAPS).
Start point: the starting point in the Active Directory tree (e.g., ou=local-dev,DC=ad,DC=local,DC=dev,DC=organization,DC=com).
Account name: service account name, either UPN (username@domain) or DL (domain\username).
LDAP server certificate: if required by your network infrastructure, upload the server's security certificate (PEM, DER, or CRT format) to verify the server's identity.
Directory synchronization frequency: define how often the user database is refreshed and synchronized with Active Directory.
Add or select password from Password Manager: service account password.
Select the preferred language, default role assigned to users, and default user permissions.
To define roles for specific user groups, click Group mapping. You can at any time, either during the initial integration or later.
Before proceeding, you can test the connection by clicking the question mark at the bottom of the configuration panel.
Review your settings and click Save. After successfully integrating Active Directory with Xopero ONE, a Xopero ONE account is created for each user upon their first login, with permissions based on the default roles or group mapping.
The following steps outline how to configure group mapping settings in Xopero ONE Management Service.
Navigate to ⚙️ Settings > External Identity Providers, then click Add new provider > Active Directory or edit an existing one. In the Active Directory configuration aside, scroll down and click Group mapping.
In the next aside, click + Add new group mapping (or edit an existing one) and specify the required parameters.
Claim type: context for the claim value, in this case http://schemas.microsoft.com/ws/2008/06/identity/claims/role
Claim value: name of the Active Directory (AD) group (for example, Domain Admins).
Role: permission level that will be assigned to all users belonging to the specified AD group.
Permissions: supplementary privileges to grant to the specified AD group beyond their base role (optional).
Review your configuration details and click Save. Once done, all users within the specified Active Directory group will automatically inherit the selected roles and permissions.
4 GB RAM
100 GB disk space
Log in to XMS, open the Virtual Machines tab on the left side of the window, and select Deploy virtual appliance at the top.
The system will display the New VMware protection view, where you can select one of the VMware environments available in Xopero ONE.
The selected environment will be responsible for running the Xopero ONE virtual appliance. You can choose the specific host or cluster on which the machine will run, as well as the datastore that will store the virtual machine drives.
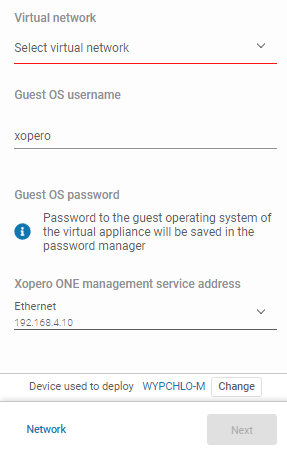
The next section is dedicated to the virtual network, where you can configure the network for your machine, guest OS username and password, as well as the Xopero ONE Management Service (XMS) address, which the application on the virtual appliance will use to establish a connection.
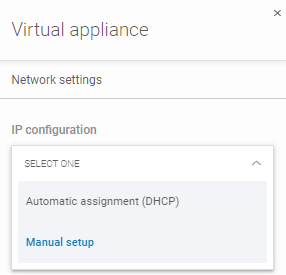
In Network settings you can also configure the IP settings by selecting Automatic assignment (DHCP) or Manual setup from the drop-down list. The first option automatically assigns network settings to the virtual machine adapter through the DHCP protocol, while the second option allows you to configure each parameter manually according to your preferences.
After making your selection and providing all the required details, click the Save button in Network settings, then click Next to install the virtual appliance. The system will display the progress of the deployment process.
Once the process completes successfully, the system will display a success message. You can now use the virtual appliance agent as a worker device in any VMware backup plan.
Information about the Xopero Unified Protection appliance, including its architecture and technical specifications.
Overview of the components and architecture of the Xopero Unified Protection appliance, including the management system, data storage, and backup agent communication flow.
Xopero Unified Protection appliance hardware specifications for standard server environments.
Overview of the Xopero Unified Protection storage architecture, including the technologies used, configuration options, and data retention mechanisms.


Learn how pre- and post-replication scripts are configured in Xopero ONE Management Service to automate and control replication workflows.
Xopero Unified Protection (XUP) leverages iDRAC for remote, automated management of the appliance. Integration with iDRAC enables execution of predefined scripts for power management and operational control, supporting reliable execution of replication jobs.
The Xopero AirGap solution is based on a cluster of two Xopero Unified Protection (XUP) devices (offline and online) connected directly in a back-to-back setup.
XUP online operates in a standard configuration: with (or without) an active XUP Management Service, a Xopero ONE backup agent, and data storage. XUP offline contains only the data storage (S3) and, optionally, the backup agent. The redundant device remains powered off and disconnected from the network most of the time, preventing any communication with it, and is powered on only for replication purposes.
To properly execute the replication job, every XUP device is equipped with an iDRAC to enable communication between two XUP devices. The iDRAC interface remains active at all times, as it is used to power the redundant (offline) device on and off. Predefined iDRAC scripts are responsible for controlling the replication process.
Below is the iDRAC scripts configuration menu in Xopero ONE Management Service (XMS), available during replication plan creation and editing in the Advanced settings section.
The iDRAC Power Up script is executed before the replication process starts and is responsible for powering on the redundant XUP device (XUP offline).
Username: the iDRAC username, which can be configured only during the initial setup by a dedicated Xopero support engineer.
IP address: the iDRAC IP address, which should point to the redundant XUP device. This value can be edited at any time — for example, if the network configuration changes and the iDRAC IP address needs to be updated.
Add new or select password from Password Manager: the iDRAC password, which can be configured only during the initial setup by a dedicated Xopero support engineer.
The iDRAC Power Down script is executed after the replication process completes and is responsible for powering off the redundant XUP device (XUP offline).
Username: the iDRAC username, which can be configured only during the initial setup by a dedicated Xopero support engineer.
IP address: the iDRAC IP address, which should point to the redundant XUP device. This value can be edited at any time — for example, if the network configuration changes and the iDRAC IP address needs to be updated.
Add new or select password from Password Manager: the iDRAC password, which can be configured only during the initial setup by a dedicated Xopero support engineer.
Script arguments — should remain empty; can be configured only during the initial setup by a dedicated Xopero support engineer.
Additional script options, which include how the replication task execution should be handled in the event of a script failure. These values can be modified at any time; however, changing them is not recommended.
Script arguments — should remain empty; can be configured only during the initial setup by a dedicated Xopero support engineer.
Additional script options, which include the ability to configure the script waiting interval before continuing the replication task. These values can be modified at any time; however, changing them is not recommended.


Learn more about Hyper-V recovery limitations in Xopero ONE.
Depending on the situation, Xopero ONE uses two restoration methods: one that provides higher accuracy and another that is less precise. The system automatically selects the appropriate method based on predefined criteria.
If the configuration version on the host where the restoration is taking place is lower than that of the VM being restored, a warning labeled DW9715 will appear. You can check the host’s configuration version using the following PowerShell command:
Get-VMHostSupportedVersion | Where-Object { $_.IsDefault -eq $true }If the VM you backed up had the TPM (Trusted Platform Module) enabled, a warning labeled DW9717 will appear during restoration.
Several important settings cannot be restored using the less accurate method. These include:
CD/DVD drive controller settings.
Connect access settings.
Console support settings.
Disk QoS (quality of service).
Display settings.
EFI boot order settings.
Floppy drive settings.
Machine group memberships.
Resource measurement settings.
Learn more about planning your Hyper-V backup.
Using Xopero ONE, you can protect Hyper-V environments with native support for virtual machine backups, as well as file-level and image-level backups of the physical Hyper-V host.
The performance of the Hyper-V host is a key factor, as it determines how many virtual machines can be secured simultaneously.
You can create backup for all machines on the host and automatically include any new machines created in the future. In the backup plan, under Advanced settings in the Task balancing tab, you can specify how many virtual machines should be backed up simultaneously. Alternatively, you can back them up individually with breaks in between.
When protecting virtual machines, Xopero ONE uses the RCT (Resilient Change Tracking) function to detect changes in virtual machine disk blocks, enabling much faster backups. Alternatively, you can choose to use the classic, slower method.
You can configure the backup to bypass virtual machine disks that cannot be included in the system snapshot. This ensures the backup proceeds without those disks when snapshot inclusion isn't possible.
Backup of Hyper-V virtual machines is based on system snapshots. Different levels of support are available, but the goal is always to create application-aware snapshots, as they provide the highest consistency.
With the application-aware option, Hyper-V also creates file-system consistent snapshots. For this reason, it is recommended to keep the application-aware option enabled, especially when protecting various Linux distributions.
Instant restore - disaster recovery feature.
Instant restore provides immediate virtual machine recovery— it restores VM’s configuration files to the Hyper-V host, prepares the VM, and mounts its disks directly from the backup. This allows the Xopero ONE administrator to start using the VM almost immediately, without waiting for the full restoration.
Open the Hyper-V tab (Virtual Machines > Hyper-V) in XMS, then click the Manage & Restore button next to the host whose backup you want to restore.
Select the VM you want to restore and click the restore button.
After choosing the backup plan and VM version, click Restore under the backup copy you wish to recover and select the Instant restore option from the drop-down list.
Specify whether to restore the VM to its original location or a new one. Provide key details, including the restored VM name, desired power state (on/off) after restoration, and the iSCSI port to use.
Next, select a directory for the VM configuration files, choose a location to store the VM disks, and assign a Hyper-V switch or resource pool for the network adapters.
Once configured, click Start now to begin the restoration process.
You can monitor active instant restore tasks in the Tasks tab in XMS. When you're finished working with the VM, you can shut it down by canceling the instant restore job — click the X button and confirm the cancellation.
Overview of Xopero ONE licensing models, including license types, usage-based components, and key licensing principles.
Licensing in Xopero ONE defines how product usage rights are assigned and managed within an organization, covering subscription scope, activated instances, and available feature sets depending on the selected plan.
Licenses are required to use Xopero ONE for backup and recovery. They define how data protection is enabled across different environments and workloads and are assigned based on the type and number of protected resources. Depending on the deployment scenario, licenses cover physical endpoints, servers, virtual machines, SaaS platforms, and repositories, ensuring that each protected element is properly accounted for within the licensing model.
Use the request form on the Xopero ONE website, and one of our representatives will contact you with information on available offers and pricing.
Below you can find all license types available in Xopero ONE, categorized by protected resource type.
Endpoint Agent — licenses for securing physical endpoints running Windows, Linux, or macOS. One license is required per endpoint.
Server Agent — licenses for securing servers (Windows and Linux), databases (Oracle, MySQL, Microsoft SQL Server, PostgreSQL, etc.), and NAS devices. One license is required per protected resource.
Virtual Agent per VM — licenses for securing virtual machines based on the number of VMs. It enables to secure systems directly from within the guest OS. This licensing model covers native backup for VMware and Hyper-V platforms, while additionally extending protection to virtualization environments not natively supported by Xopero ONE (such as Proxmox, Xen, KVM, or Nutanix).
VMware per socket — licenses for securing VMware environments based on the number of CPU sockets. This licensing model allows backup of unlimited number of virtual machines from the host level. All CPU sockets are counted, regardless of whether they are populated; therefore, both occupied and unoccupied sockets must be included in the total count.
Hyper-V per socket — licenses for securing Hyper-V environments based on the number of CPU sockets. This licensing model allows backup of unlimited number of virtual machines from the host level. All CPU sockets are counted, regardless of whether they are populated; therefore, both occupied and unoccupied sockets must be included in the total count.
Microsoft 365 — licenses for protecting Microsoft Exchange data (including individual mailboxes, shared mailboxes, calendars, contacts) and OneDrive, assigned based on the number of Microsoft 365 user accounts.
Microsoft 365 PRO — licenses for protecting Microsoft Exchange data (including individual mailboxes, shared mailboxes, calendars, contacts), OneDrive, and SharePoint. Assigned based on the number of Microsoft 365 user accounts.
Licenses for protecting Git repositories (Azure DevOps, Bitbucket, GitHub, GitLab), assigned based on the number of repositories:
GitProtect Enterprise (on-premises) — a license type that enables backup of all on-premises systems installed across the entire company.
GitProtect Enterprise (cloud) — a license type that enables backup of all cloud-hosted systems across the entire company.
GitProtect PRO (cloud) — a license type that enables backup of the entire organization. It is designed for individuals, startups, and small teams.
Jira — protection for cloud-hosted Jira instances, assigned based on the number of users; the license must cover all users in the protected Jira instance.
Confluence — protection for cloud-hosted Confluence instances, assigned based on the number of users; the license must cover all users in the protected Confluence instance.
In addition to standard licenses, Xopero ONE provides supplementary free backup agent (worker) licenses used to initiate specific operations and processes within the software, depending on the use case or deployment scenario.
Free worker licenses allow you to manage storage, restore backups, and back up resources locally, when combined with a dedicated Microsoft 365, Git, Jira, or Confluence license:
Cloud worker — agent responsible for running backup tasks in SaaS deployments. Each Xopero ONE environment is assigned one cloud worker.
Local worker — licenses for an agent responsible for running backup tasks in on-premises deployments. It allows the agent to be run on the same host as Xopero ONE Management Service and enables copying its settings. A maximum of one license is available in the license package.
Feature worker — licenses for an agent responsible for running backup tasks for Microsoft 365, Git platforms, Jira, and Confluence in on-premises deployments. It is always included in the license package in unlimited quantities.
Learn more about licensing for Xopero Unified Protection.
Xopero Unified Protection (XUP) is an all-in-one backup solution that integrates Xopero ONE software with dedicated storage medium. Unlike standalone Xopero ONE licenses, XUP uses a storage-based licensing model and provides comprehensive protection for the entire local infrastructure.
Xopero Unified Protection (XUP) operates on a licensing model that combines hardware capacity with unlimited protection for local resources. When you purchase a XUP appliance, you receive:
While Xopero Unified Protection provides unlimited protection for all local physical and virtual resources, the license can be extended to include cloud platforms and offsite storage. These are available as separate subscription-based licenses:
Microsoft 365 — protection for mailboxes, OneDrive, contacts, and calendars.
Git platforms (GitHub, GitLab, Bitbucket, Azure DevOps) — protection for repositories and metadata.
Jira — comprehensive backup for Jira spaces.
Xopero Cloud Storage
Xopero Unified Protection provides two primary ways to secure virtual machines, ensuring compatibility regardless of hypervisor:
Host-level (VMware and Hyper-V) — unlimited backup of VMs directly from the hypervisor level.
In-guest agent — by installing a backup agent (worker) directly inside a VM, you can protect the system regardless of the underlying platform. This is the recommended method for securing environments not natively supported at the host level, such as Proxmox, Xen, KVM, or Nutanix.
Examine the core architecture and primary components of Xopero ONE software.
The Xopero ONE architecture relies on a modular, multi-tier framework comprising the central management service, backup agents, and scalable storage targets.
A backup solution is a software system or service that creates and stores copies of data so it can be restored if the original data is lost, corrupted, deleted, encrypted by ransomware, or otherwise becomes unavailable.
Xopero specializes in enterprise backup, disaster recovery, and cyber-resilience solutions. One of our flagship products, Xopero ONE, provides comprehensive data protection across a wide range of physical, virtual, and cloud environments. This solution enables organizations to protect business-critical data from accidental deletion, hardware failures, ransomware, cyberattacks, and other data-loss events.
Xopero ONE is designed to protect data across physical machines, virtual environments, databases, cloud services (Microsoft 365), SaaS applications (such as Jira and Confluence), and different DevOps platforms. It consists of two primary components: the management panel and the backup agent. The solution also requires a storage repository to store backup data. This storage can be managed by the user or provided by
To integrate VMware hosts with Xopero ONE, you need an administrator account (root is not required). You can use an existing account, but best practice is to create a dedicated VMware user with admin privileges for backup and restore tasks.
Adding VMware hosts is just the first step.
To fully integrate the VMware environment, you can install a virtual appliance (VA) on the VMware host — this enables faster backups using advanced transport methods like HotAdd. Installing the VA is not required for faster backups — you can also use a storage area network (SAN), though this requires proper configuration and a SAN datastore.
If a vCenter server exists in your infrastructure, connect Xopero ONE to the vCenter server rather than an individual ESXi
To back up virtual machines directly from the Hyper-V host, you need to run Windows Server 2016 or newer. Integration with older operating systems is not possible.
Xopero ONE supports both standalone hosts and hosts connected in clusters. In clustered environments, you must install a dedicated Hyper-V agent on each host.
When adding a Hyper-V cluster, you must use an administrator account.
The management system is used for administration and configuration, while the backup agents handle the actual execution of all backup-related operations. When a backup task is initiated, the management service dispatches the job to the backup agent, which performs the requested operation. Once the task is completed, the agent transmits the execution results and logs back to the management system, where administrators can review them in the web console.
The centralized management interface of Xopero ONE is the Xopero ONE Management Service (XMS). It enables administrators to comprehensively manage backups and related resources through the web console. In the on-premises deployment model, XMS can be installed on supported Windows and Linux operating systems, deployed in a Docker environment, or hosted directly on compatible NAS devices. In the SaaS deployment model, the management service runs on Xopero's cloud infrastructure.
Regardless of the deployment model, the platform provides identical features and functionality through a unified user interface. The management panel is divided into separate modules, each of them dedicated to a different aspect of backup management, such as backup plans, storage, and backup tasks.
A backup agent is a lightweight software installed on a protected server, virtual machine, laptop, or cloud instance. It reads source data and transfers it to the designated storage destination.
Xopero ONE backup agents (also referred to as workers in the Xopero ONE environment) perform all operations requested by the Xopero ONE Management Service, including processing data (such as encryption and compression), browsing storage repositories, transferring data directly to the storage, and restoring data.
Agents execute backup and recovery operations directly and do not transfer backup data through the management panel. They are also responsible for integrating with virtualization hosts, and performing all other data-processing and infrastructure-related tasks within the system.
Depending on the deployment model and protected resources, administrators can deploy various backup agents, including the cloud worker, feature worker, local worker, endpoint agent, server agent, and virtual agent.
A data storage system is a medium designed to persistently retain and manage collections of data so that they can be retrieved and used later. Storage technologies span physical media, such as solid-state drives (SSDs) and hard disk drives (HDDs); deployment models, including cloud and hybrid cloud; and systems purpose-built for workloads such as artificial intelligence (AI) and edge computing.
In Xopero ONE, a storage repository is a designated destination used to persistently retain, organize, and protect backup data for subsequent retrieval and disaster recovery. The solution features a multi-storage architecture that supports storing backup data on-premises (local disks, SMB, NFS, and iSCSI targets), in cloud repositories (Xopero Cloud Storage, AWS, and S3-compatible storage), or in a hybrid model.

Guide to VMware backup in Xopero ONE, covering available backup options, backup mechanisms, plan configuration, and scheduling.


Functionality and mechanisms of VMware backup plans in Xopero ONE.
Overview of VMware backup options and features in Xopero ONE, including useful tools, transport methods, and backup capacity settings.
Learn about virtual disk types that are excluded from backups due to hypervisor snapshot limitations, and how to protect them.
How to create a VMware backup plan.


This article explains the process of creating a backup plan for Hyper-V virtual machines.
One of the key features of Xopero ONE is native Hyper-V backup. It enables you to back up either all virtual machines or selected VMs on both standalone and clustered Hyper-V hosts.
Log in to XMS, go to the Plans tab and click the + Add plan button in the top toolbar.
Select Hyper-V from the platforms list.
Define the name of the backup plan.
In the configuration aside, choose the host you want to protect. You can then either:
Back up all virtual machines (VMs) for comprehensive protection.
Select specific VMs by checking the boxes next to the desired entries.
Configure options specific to Hyper-V backup.
Choose your backup storage location.
Configure the by defining when backups should run and which types of backup copies to use.
Go to the Advanced settings section to customize additional options, including encryption, compression levels, and deduplication. These settings provide greater flexibility and help optimize the backup process.
After completing the configuration, click the Save button. The protection plan will then automatically begin protecting your Hyper-V virtual machines according to the schedule you defined.
Supported operating systems and web browsers for deploying the Xopero ONE Management Service and the backup agent.
Xopero ONE delivers a flexible cross-platform architecture, enabling the deployment of the central management service and backup agent across diverse on-premises, cloud, and hybrid environments.
The Xopero ONE Backup&Recovery application supports the following operating systems:
The Xopero ONE Management Service supports the following web browsers:
The Xopero ONE Backup&Recovery Agent application supports the following operating systems:
Backup and recovery guides for Xopero Sphere Recovery Drive.
Learn how to protect a Hyper-V host with Xopero ONE.
Hyper-V, Microsoft’s virtualization platform, allows organizations to run multiple virtual machines efficiently on a single host. Ensuring the protection of both the Hyper-V host and its VMs is essential for maintaining business continuity and safeguarding data. This article outlines a simple guide on how to secure your Hyper-V environment using Xopero ONE, along with recommended best practices and additional resources.
To protect a Hyper-V host, start by installing a dedicated version of the Xopero ONE agent designed for Hyper-V environments. Once installed, the host will automatically appear in the Devices tab of Xopero ONE Management Service (XMS) admin panel.


Learn how to create a disk image backup with Xopero Sphere Recovery Drive.
How to restore a disk from backup using Xopero Sphere Recovery Drive.
Select Devices from the platform list.
Choose the appropriate backup type based on your requirements and configure the settings to ensure proper protection of your Hyper-V host.
Select the Hyper-V host from the list of available devices and specify the type of data you want to back up.
Define the name of the backup plan.
Choose your backup storage location.
Next, set up the backup schedule and retention policy to define how often backups will run and how long they will be kept. In Advanced settings section you can also enable additional options, such as encryption and compression, to enhance data security and optimize storage usage.
After completing the configuration, click the Save button. The protection plan will then automatically begin protecting your Hyper-V host according to the schedule you defined.
Learn how to restore whole virtual machines in Xopero ONE.
Open the Hyper-V tab (Virtual Machines > Hyper-V) in XMS, then click the Manage & Restore button next to the host whose backup you want to restore.
Select the VM you want to restore and click the restore button.
After choosing the backup plan and VM version, click Restore under the backup copy you wish to recover and select the Whole machine option from the drop-down list.
Specify whether to restore the VM to its original location or a new one. Provide key details, including the restored VM’s name and desired power state (on/off) after restoration.
Next, select a directory for the VM configuration files, choose a location to store the VM disks, and assign a Hyper-V switch or resource pool for the network adapters.
Once configured, click Start now to begin the restoration process.
This article describes how to add a Hyper-V server to Xopero ONE.
Log in to XMS, open the Virtual Machines tab on the left side of the window, and select Hyper-V from the list.
Click the Connect button under Hyper-V.
Download and install the agent on all Hyper-V hosts you want to protect. After installation, the device(s) will appear in the upper-right corner for activation. Once added, it will be listed in the Devices tab and ready to protect physical hardware.
Activated devices will now appear in the Available hosts section. Select the host(s) you want to integrate with, and click Save.
Specify the frequency at which the Hyper-V server should refresh.
Once these steps are complete, you can start planning your Hyper-V backup strategy.
Integrating a Hyper-V cluster in Xopero ONE follows , with one key difference: the agent must be installed on every host in the cluster. When adding the cluster, select all machines to include in the setup and enter the cluster IP address, and administrator’s login credentials.
Simple guide on how to log in to Xopero ONE with a username and password.
Instructions for deploying Xopero Unified Protection hardware, including appliance installation, network configuration, and initial system setup.
To enable remote deployment of Xopero Unified Protection by a Xopero representative, the appliance must be physically installed in the rack cabinet, connected to the network and power source, and powered on. Hardware deployment includes on-site mounting, initial network and storage configuration, and basic provisioning through the Xopero Unified Protection management interface to prepare the system for further configuration and activation.
The below is a step-by-step guide for deploying a Xopero Unified Protection (XUP) appliance.
Install the XUP device in a rack-type server cabinet using the included mounting rails.
Connect the device to a power source. The device supports redundant power supplies (two independent power units), enabling connection to two separate power lines.
Connect the device to the LAN using the Ethernet ports located on the rear panel:
Port 1: eno8303
Port 2: eno8304
Selected models may also include SFP+ ports for fiber-optic cables:
After connecting the device to the LAN, it is ready to be powered on.
The below is a step-by-step guide for initializing a Xopero Unified Protection device and performing the first login.
Connect the device to a monitor to access the Xopero Unified Protection Management Service (XUP Management Service) panel and create a Xopero ONE administrator account.
Power on the device using the power button located on the front panel.
Once the device initialization is complete, an account setup wizard will appear — enter your email address and set a complex password to create the main administrative account.
How to sign up for a free Xopero ONE account in a cloud-based management service deployment.
Learn about virtual disk types that are excluded from backups due to hypervisor snapshot limitations, and how to protect them.
When performing a virtual machine backup (agentless), Xopero ONE relies on the hypervisor's snapshot mechanism to ensure data consistency. Certain disk types are architecturally excluded from snapshots by the hypervisor itself, which means they cannot be included in a standard VM-level backup.
The following disk modes do not support snapshots and cannot be backed up:
Pass-through disks — these disks are directly attached to the physical storage and are bypassed by the Hyper-V checkpoint (snapshot) mechanism.
If you need to protect data on pass-through disks, you can use the following method:
Install the Xopero ONE Backup&Recovery Agent directly within the virtual machine’s guest operating system.
Configure a file or image-level backup task with the installed agent.
By using an in-guest agent, Xopero ONE utilizes the internal VSS (Windows) or live-read (Linux) mechanisms to capture the data, effectively bypassing the hypervisor's snapshot limitations.


Where Xopero ONE Management Service is hosted across different regions.
Learn how to register for a free Xopero ONE account with a cloud-based Xopero ONE Management Service.
SFP+ port 1: eno12399np0
SFP+ port 2: eno12399np1
Enter your license key to activate the service and enable further configuration of the system.
After activating the license, the XUP Management Service panel will open. In this panel, you can view the device status and modify network settings.

This article describes how to configure the Oracle database environment in Xopero ONE.
The Oracle database backup process in Xopero ONE consists of two stages:
Creating a database dump using backup scripts.
Backing up the created dump file.
The first stage is executed through Xopero ONE using the backup scripts feature, while the second stage is performed as a standard file-level backup.
Xopero ONE creates a full database copy using the RMAN tool. It does not interfere with other copies performed by RMAN, but the backup created by Xopero ONE will be visible in RMAN.
The Oracle database environment must operate in ARCHIVELOG mode. For instructions on how to change the database mode, refer to .
Log in to XMS, go to the Backup tab (Plans > Backup) and click the + Add plan button in the top toolbar.
Select Devices from the platforms list.
Add a new user (for example, dbuser) to the Linux operating system by executing the following command:
Add the user to the dba group, which has permission to perform backups:
Finally, configure the system environment variables by following the instructions in .
This article explains how to restore a MySQL database from a backup.
The first step in restoring a MySQL database from backup is to restore the database files from storage to a temporary directory. These files will then be imported into the MySQL database environment.
To restore files backed up using a file-level backup plan follow this guide. If your database was backed up using an image-level backup, use granular recovery to restore it as described in this article.
Once the database files are restored, the next step is to import them into the MySQL environment. To restore the database to the MySQL server, use a database management tool.
To restore the database, log in to the database server using the following command:
mysql -h SERVER_ADDRESS -u USER -pSERVER_ADDRESS — the address of the MySQL server where the database will be restored
USER — the username of the database user
Next, type:
DATABASE_NAME — the name of the database where the dump file will be restored
‼️ If the corrupted database still exists in MySQL, first drop it and recreate the database using the following command:
DATABASE_NAME
The database backup is restored using the SOURCE PATH_TO_FILE command, replacing PATH_TO_FILE with the full path to the previously restored database file. The syntax is as follows:
In this article you will learn how to configure image-level backup using Xopero ONE Management Service.
Drive image-level backup (aka disk image backup) by definition creates a complete, byte-for-byte copy of a hard drive, including the operating system, all installed applications, settings, and other data. In case of failure, drive image-level backup allows for a rapid and full restoration of the system to its previous state, either on the original or a new device.
Log in to Xopero ONE Management Service, go to the Backup tab (Plans > Backup) and click the + Add plan button in the top toolbar.
This article explains how to configure the PostgreSQL database environment in Xopero ONE.
To maintain data consistency, Xopero recommends using a dedicated backup type: a file-based backup with a pre-backup script for the PostgreSQL database.
Database backup begins with a script that requests the database server to create a dump in a temporary directory. Once the dump is complete, Xopero ONE backs up the generated dump file.
Xopero ONE uses the pg_dump utility to back up PostgreSQL databases.


In the next aside, select Files & folders option and choose one or more devices for the plan to apply to (you can also select the plan to include all activated devices).
Define the name of the backup plan.
Configure your backup plan according to your needs (more information about the backup plan setup can be found in this article).
Go to the Advanced settings section and click Edit to customize additional options.
Scroll down to the Backup scripts section and click the Pre-task script toggle to turn it on.
Select the script dedicated to backing up the Oracle database environment.
Set up the script arguments — it should be entered in the Script arguments field as follows:
ORACLE_SID;dbuser;temp_directoryORACLE_SID — the database identifier.
dbuser — the name of the user with backup privileges (for example, database_user). This must be a local Linux OS user with permissions to back up the Oracle environment. Instructions for creating this user are provided in the section of this article.
temp_directory — the directory where the Oracle tool will temporarily write backup files. After the backup tasks are complete, these files will be deleted. This directory must also be included in the Data to protect section when creating a .
You can enable the two additional options using the checkboxes:
Wait for the script to continue the task — the application will wait until the dump is ready.
Fail the task if the script fails — if the script fails, the system will notify you of the backup error.
Double-check your settings and click Save to close the Advanced settings aside.
After completing the configuration, click the Save button. The protection plan will then automatically begin protecting your devices and databases according to the schedule you defined.
sudo useradd dbusersudo usermod -a -G dba dbuser
After creating the new database, use the USE DATABASE_NAME command as described above.
USE DATABASE_NAMECREATE DATABASE DATABASE_NAMESOURCE PATH_TO_FILESelect Devices from the platforms list.
In the next aside, select Whole OS option and choose one or more devices for the plan to apply to (you can also select the plan to include all activated devices, or select device groups for the plan to cover).
Define the name of the backup plan.
In the Data to protect section, select the data you want to include in the backup plan:
Global rules allow you to define locations that will apply to all selected devices. This method offers the Xopero variable option, which provides a predefined list of variables such as SYSTEM_DISK, ALL_DISKS, and HOMES.
Select from device — this method allows you to select disks individually for each device by connecting remotely to its file system.
Specify the backup location by choosing from the available storage options within your service.
Configure the Scheduler & data retention settings by defining when backups should run and which types of backup copies to use.
Go to the Advanced settings section to customize additional options, including encryption, compression levels, and bandwidth limit. These settings provide greater flexibility and help optimize the backup process.
After completing the configuration, click the Save button. The protection plan will then automatically begin protecting your devices according to the schedule you defined.
Select Devices from the platforms list.
In the next aside, select one of the available options and choose one or more devices for the plan to apply to (you can also select the plan to include all activated devices).
Define the name of the backup plan.
Configure your backup plan according to your needs (more information about the backup plan setup can be found in File-level backup and Image-level backup articles).
Go to the Advanced settings section and click Edit to customize additional options.
Scroll down to the Backup scripts section and click the Pre-task script toggle to turn it on.
Select the script dedicated to backing up the PostgreSQL database environment.
Type your database username into the Database user field.
Choose the user password by opening the Password Manager, where you can either add a new password or select an existing one.
Set up the script arguments — it should be entered in the Script arguments field as follows:
database output_dir "pg_dump_dir" port_numberdatabase — the name of the database to back up. A backup plan can target a single database or all databases. To back up all databases, use the --all parameter instead of specifying a database name.
output_dir — the directory where the database dump will be created; this is also the folder that Xopero ONE will back up.
pg_dump_dir — the path to the pg_dump utility. This is required only for PostgreSQL databases hosted on Windows.
port_number — required only if your PostgreSQL server uses a non-standard port (other than 5432).
You can enable the two additional options using the checkboxes:
Wait for the script to continue the task — the application will wait until the dump is ready.
Fail the task if the script fails — if the script fails, the system will notify you of the backup error.
Double-check your settings and click Save to close the Advanced settings aside.
After completing the configuration, click the Save button. The protection plan will then automatically begin protecting your devices and databases according to the schedule you defined.
This article describes the process of Xopero ONE Management Service installation on Windows, Linux, and as a Docker container for on-premise deployment model.
Download and run Xopero ONE installer.
Click Next to start the installation setup.
Accept the End-User License Agreement and hit Next to continue.
Select the installation folder and click Next.
Define the HTTP port for Xopero ONE Management Service. Depending on your needs you can either use a custom HTTP port, or stay with the default XMS HTTP port (28555).
Click Install to start the installation process.
Once the installation is completed successfully, click Finish to close the installation wizard.
Download and run Xopero ONE installer (XoperoONEManagementService.sh).
Add execute permission to the downloaded file using the following command:
Find how to reset the root password in Xopero ONE for on-premise & SaaS deployment models.
Login to XMS, open Settings (gear ⚙️ icon in the bottom-left corner) and select Accounts.
Find your root account and click the edit (✏️) icon.
Enter your old password and your new password in the correct fields, then click Change.
Hit the Save button to finish. Your password should now be successfully changed.
Open your XMS login page and click Forgot password? link under credentials fields.
Enter the email address associated with your root account and hit Send me a recovery link button.
This article contains information about how to proceed after installing the Xopero ONE Management Service (XMS) component.
To access the on-premise Xopero ONE Management Service, connect to the device which XMS console is installed on, using the following address:
ipAddress:port
ipAddress- the IP address of the device with XMS installed on
port- port defined during installation process— by default, Xopero ONE uses 28555
If your Management Service opened successfully, you can proceed with the below steps (creating your root account, adding the license code, logging in, running your first setup).
When you launch the Management Service for the first time, you will be prompted to create an administrator account. To register a valid admin account you have to provide your login (it has to be a valid email address) and create a password compliant with the Xopero password policy.
Once you complete the form click Register to proceed to the next step.
Having the administrator account registered, you will then be asked to provide a license key (which you should've received via email upon registering for Xopero ONE
Where Xopero ONE Management Service is hosted across different regions.
Xopero ONE Management Service is available in two deployment models: as a SaaS offering or as an on-premises component. For SaaS customers, the Management Service is hosted in the EMEA region and the US region.
In SaaS model, the Xopero ONE Management Service platform is deployed in two different locations:
In this article you will learn how to configure group mapping for SAML authentication.
For IdP integration, Xopero ONE uses differentiated login levels (i.e., Admin, Backup Operator, Viewer, etc.). By default, single users are being authenticated with predefined permissions, based on the roles they are assigned. If you require multiple users to log in with consistent security policies, permissions, or access rights, you can implement group mapping.
The configuration process includes specifying two key parameters: claim type and claim value— for example, in Entra ID, the following parameters refer to:
Claim type - name of the custom claim defined for the application on the Entra ID side to identify the group (the custom group claim name). In this example, claim type value is set to xoperogroup.
Claim value - a unique Entra ID group identifier (ID) to be mapped (not its name).
Learn how to log in to Xopero ONE with SSO.
Connect to your Xopero ONE Management Service.
Use <ipAddress>:<port> for the on-prem model or your unique login URL for SaaS model.
Select one of the available SSO options.
Go through the selected supplier's login process.
Once signed in, you will be automatically redirected to your XMS main page.


In this article you will get information about cloud worker - what is it, their usage, and their licensing model.
The cloud worker is a Xopero ONE agent installed in the cloud. It connects to cloud-based environments like Microsoft 365 or cloud storage services to perform backup tasks.
You don't have to assign any licenses to cloud workers — the correct license is assigned automatically by Xopero ONE system.
Cloud worker's installation location depends on the Xopero ONE Management Service installation directory.


EMEA
For the EMEA region, Xopero ONE Management Service platform is hosted in Poland.
US
For the US region, Xopero ONE Management Service platform is hosted in the United States.


xoperoserver.sh. Accept the End-User License Agreement to continue.Once the installation is completed, you can close the software installation window.
chmod +x xoperoserver.sh


If the password reset was initiated correctly you will see the following message:
Open your inbox, find the email from Xopero ONE & GitProtect.io and click the Password reset button.
Set a new password for your root account and press Save.
You will receive a confirmation once the password is changed successfully.
Once you see the following message, your root account password is already changed.
You can find it in a .txt file in the following path:
C:\ProgramData\Xopero ONE\Xopero ONE Backup&Recovery Service\pwdreset email@domain.com.txt


In the initial setup you should add your first device which you want to use to set up the storage. Then, you have to install the backup agent and activate it in Xopero system.
Next, add the storage where you want to store your data. As Xopero ONE is a multi-storage system, you can add different storages from different sources and use both local storage (i.e., SMB, NFS) and cloud solutions (i.e., Wasabi, Amazon, etc.).
With all system components initialized, you can start protecting your data and create backup plans.


Perform targeted granular recovery to restore individual files and folders without conducting a full system rollback.
Granular recovery enables the restoration of individual files and folders directly from image-level backups. By mounting the disk image through an iSCSI target or as a raw file image, administrators can extract selected data without running a full system restore.
The iSCSI target recovery option allows you to quickly create and share an iSCSI resource over TCP/IP. You can connect this resource to any device without restoring the backup copy to another location. This method facilitates granular recovery, enabling you to easily copy individual files.
The following steps describe how to restore data via an iSCSI target in the Xopero ONE Management Service console.
Open the Devices tab, locate the device from which you want to restore the backup, and click the Restore button.
Select the backup plan from which you want to restore the data.
Choose the timestamp from which you want to restore the data, click Restore, and select the iSCSI target recovery option from the drop-down menu.
Select the disk you want to restore and click Restore selected, or select all disks by clicking Restore all.
In the iSCSI settings section, select the target network interface and specify the port. You can accept the default values or enter custom parameters.
Accept the default iSCSI target name or enter a custom name.
Select the default worker, which will host the iSCSI target.
Verify that all entered settings are correct, then click the Run iSCSI button to start the iSCSI service.
Once the iSCSI service is running, connect to the iSCSI target to access and restore the selected data.
The following steps describe how to connect to an iSCSI target and initialize the disk in Windows.
Press Windows key + R to open the Run dialog box, type iscsicpl.exe, and click OK or press Enter to launch the iSCSI Initiator.
In the Targets tab, enter the IP address of the network interface from your Xopero ONE iSCSI configuration into the Target field, then click Quick Connect.
The following steps describe how to connect to an iSCSI target and mount the disk in Linux.
Install the iSCSI initiator package using the following commands:
The second command installs open-iscsi and creates the initiator name configuration file at /etc/iscsi/initiatorname.iscsi. Verify or modify this file if your target requires a specific IQN (iSCSI Qualified Name).
The following steps describe how to restore disk backup data via file image in the Xopero ONE Management Service console.
Open the Devices tab, locate the device from which you want to restore the backup, and click the Restore button.
Select the backup plan from which you want to restore the data.
Choose the timestamp from which you want to restore the data, click Restore
Xopero Unified Protection appliance hardware specifications for standard server environments.
Xopero Unified Protection (XUP) is designed for seamless integration into modern data center environments. The hardware appliance adhere to global industry standards, ensuring compatibility with existing server infrastructure and enabling straightforward deployment in standard rack cabinets.
Server racks are measured in rack units (U), where 1U equals 4.45 cm (1.75 inches) in height. The industry standard for a full-sized cabinet is 42U, which provides space for servers, networking, and storage.
Xopero Unified Protection (XUP) is available in two physical configurations:
Small (1U) — a compact, slim design suitable for both high-density environments and small server rooms.
This article describes how to change the Oracle database mode.
Before starting the Oracle database backup task, make sure that the database mode is set to ARCHIVELOG. To verify that the mode is configured correctly or to change it, open the command line as the user configured in the backup plan and run the sqlplus tool using the following command:
You can then close this tool using the QUIT; command.
To verify that the database mode is correctly set to ARCHIVELOG, run the following command:


Standard (2U) — a configuration that provides additional physical space for increased storage capacity.
Every XUP appliance ships with sliding rails included in the kit.
The appliance has a chassis depth of approximately 58.42 cm (23 inches), making it compatible with most standard-depth racks and many medium-depth wall-mounted and office cabinets.
The iSCSI Initiator automatically searches for available iSCSI targets and adds them to the Discovered targets list. Click Done to close the dialog box.
If the setup is successful, the target status will change to Connected.
Press Windows key + R to open the Run dialog box, type compmgmt.msc, and click OK or press Enter to launch the Computer Management tool. In the left pane, select Disk Management.
Locate the new disk on the list, right-click it, and select Initialize Disk.
Once initialized, the disk status changes to Online in Disk Management. You can now open File Explorer to browse and copy your selected files and folders to the destination storage.
After the data copy is complete, disconnect the target, open the Tasks tab in Xopero ONE Management Service, click the info icon next to the active iSCSI task, and click Stop iSCSI in the bottom-right corner of the task details pane.
Once the iSCSI service is running, discover available iSCSI targets by running the following command (use the IP address of the network interface from your Xopero ONE iSCSI configuration):
sudo iscsiadm -m discovery -t sendtargets -p <TARGET_IP>:3260Running this command returns a list of available target IQNs, for example:
192.168.1.50:3260,1 iqn.2023-01.com.example:storage.disk1Optionally, configure CHAP authentication — if the target requires authentication, configure your credentials before connecting.
sudo iscsiadm -m node -T <TARGET_IQN> -p <TARGET_IP>:3260 \
--op=update -n node.session.auth.authmethod -v CHAP
sudo iscsiadm -m node -T <TARGET_IQN> -p <TARGET_IP>:3260 \
--op=update -n node.session.auth.username -v <CHAP_USER>
sudo iscsiadm -m node -T <TARGET_IQN> -p <TARGET_IP>:3260 \
--op=update -n node.session.auth.password -v <CHAP_PASSWORD>Next, log in to the target.
sudo iscsiadm -m node -T <TARGET_IQN> -p <TARGET_IP>:3260 --loginVerify that the new disk appears.
lsblk
sudo dmesg | tail -20Format and mount the disk using the following commands:
sudo mkfs.ext4 /dev/sdb
sudo mkdir -p /mnt/iscsi_disk
sudo mount /dev/sdb /mnt/iscsi_diskOnce the disk is mounted, you can browse and copy your selected files and folders to the destination storage.
After the data copy is complete, disconnect the target, open the Tasks tab in Xopero ONE Management Service, click the info icon next to the active iSCSI task, and click Stop iSCSI in the bottom-right corner of the task details pane.
Select the disk you want to restore and click Restore selected.
Next, select the image format from the available options: RAW, VHD, VHDX, or VMDK.
Select the device where you want to restore data. To change it, click the Edit button next to the Restore to section.
In the Restore directory section, specify the exact path to restore data.
In the Restore settings section, configure the following options:
Overwrite existing data: overwrites existing files in the target restore directory.
Reduce bandwidth to: limits network bandwidth consumption during the restoration process.
Reset drivers: resets system drivers to defaults to ensure hardware compatibility during system restoration.
Double-check your configuration and click the Restore button to start the recovery process.
sudo apt update
sudo apt install open-iscsicat /etc/iscsi/initiatorname.iscsi


sudo systemctl enable --now iscsid
sudo systemctl status iscsidNOARCHIVELOG, change it to ARCHIVELOG.You can switch the database mode from NOARCHIVELOG to ARCHIVELOG using the following commands:
Now, verify that the database mode has been changed successfully by running the following command:
sqlplus / as sysdbaSELECT LOG_MODE FROM v$database;
SHUTDOWN IMMEDIATE;
STARTUP MOUNT;
ALTER DATABASE ARCHIVELOG;
ALTER DATABASE OPEN;
QUIT;SELECT LOG_MODE FROM v$database;This article explains how to restore a Microsoft SQL database from a backup.
The first step in restoring a Microsoft SQL database from backup is to restore the database files from storage to a temporary directory. These files will then be imported into the Microsoft SQL database environment.
To restore files backed up using a file-level backup plan follow this guide. If your database was backed up using an image-level backup, use granular recovery to restore it as described in this article.
Once the database files are restored, the next step is to import them into the Microsoft SQL environment.
Open the Microsoft SQL Management Studio.
Log in to the directory tree, right-click Databases, and select the Restore Database option.
In the opened window, select Device as the backup source and provide the path to the folder containing the *.bak database dump file.
After selecting the *.bak file, click OK.
The database has been successfully restored and is now listed in the directory tree.
This article provides information about prerequisites and requirements for VMware integration.
To access all VMware features, including advanced and LAN-free transport methods, Xopero ONE requires VMware version 6.7 or later.
Xopero ONE requires a commercial VMware license.
Xopero ONE works with both ESXi and vSphere.
If you use vSphere, connect Xopero ONE to the vSphere server rather than an individual ESXi host. Connecting directly to an ESXi host when a vSphere server is active may cause backup issues.


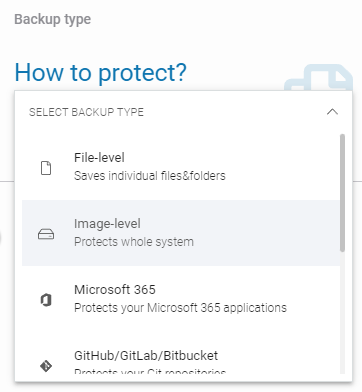
To connect VMware to Xopero ONE, you need a VMware administrative account. It is recommended to create a dedicated VMware user account for backup tasks.
MacOS devices are not supported for many VMware operations. You cannot use macOS devices to:
Register the VMware host in Xopero ONE.
Back up VMware virtual machines.
Deploy virtual appliance machines on the VMware host.
Review third-party software dependencies and open-source licenses in Xopero ONE.
Xopero ONE incorporates third-party software libraries to power core system functions, including data encryption, network communication, storage interface operations, and data compression.
The table below outlines all third-party libraries used by Xopero ONE.
This article describes how to prepare a Linux operating system for backing up an Oracle database environment.
Using the Linux command line, log in to the account used for backing up your Oracle database and execute the following commands:
echo 'connect target /; quit' | rmanecho 'SELECT INSTANCE_NAME FROM V$INSTANCE;' | sqlplus / as sysdbaIf these tools are unavailable (example below) you need to configure the environment variables.
Edit the /home//.bash_profile file and add the following records:
Now, after logging in again, executing the following commands should complete successfully.
Once done, your Linux system should now be ready to backup an Oracle environment.
Hyper-V virtual machines restoration process overview.
When working with backup software, it’s important to know how to restore your data efficiently. Xopero ONE offers multiple methods to restore virtual machines directly to Hyper-V hosts — select one that best fits your requirements.
The instant restore feature quickly restores a VM’s configuration files to the Hyper-V host and prepares the virtual machine by mounting its disks directly from storage using the iSCSI protocol. This enables the VM to start within minutes. Because the data remains in the backup storage, no actual data is copied or restored elsewhere, allowing fast access without duplicating the backup.
To restore a virtual machine to Hyper-V after an incident, run both the instant restore and whole VM recovery tasks at the same time. This allows you to access and use the VM almost immediately via instant restore. Once the whole VM recovery is finished, you can stop the instant restore process and switch to using the fully recovered VM in production.
Whole VM recovery allows you to restore a virtual machine to its original location or to a new one. This is the standard method for VM restoration — Xopero ONE retrieves the VM data directly from storage and restores it to the Hyper-V host.
Instant restore is perfect for immediate disaster recovery, giving rapid access to your virtual machines within minutes.
Whole VM recovery ensures that your VM is fully restored and ready for production use.
Using both methods together allows you to quickly recover Hyper-V virtual machines while minimizing downtime.

This article explains how to use backup scripts to create a MySQL database dump and include it in a backup plan.
The MySQL database backup process in Xopero ONE consists of two steps:
Creating a database dump using backup scripts.
Backing up the database dump.
The first step is performed through Xopero ONE using the backup scripts feature. The second step is a standard file-level or image-level backup executed directly by Xopero ONE
Overview of the components and architecture of the Xopero Unified Protection appliance, including the management system, data storage, and backup agent communication flow.
Xopero Unified Protection (XUP) integrates hardware and software components into a single appliance designed for comprehensive data protection. The XUP architecture includes an integrated data storage layer, a management interface, and a core system environment, providing centralized backup management, secure data storage, and simplified deployment. This unified design streamlines implementation, reduces infrastructure complexity, and ensures consistent protection across physical, virtual, and cloud environments.
The Xopero Unified Protection (XUP) solution consists of the following components:
Hardware layer based on rack-mounted servers.
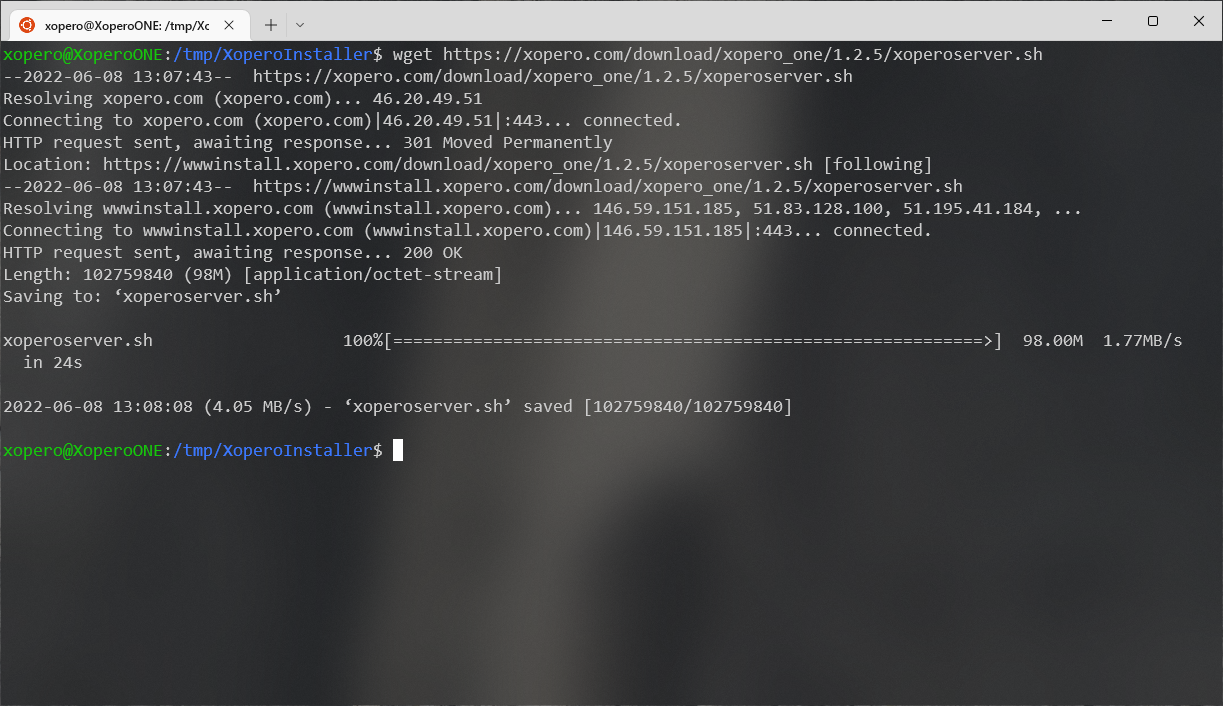
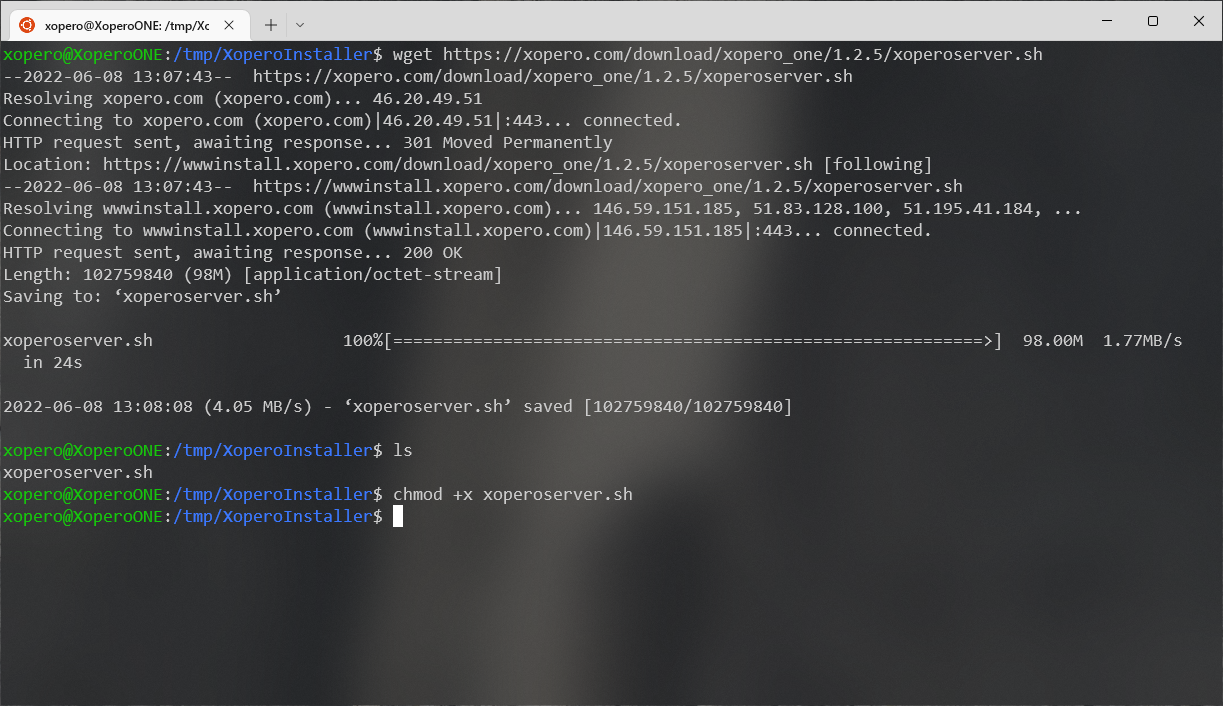
Xopero ONE service — enables the creation and execution of backup plans. The solution also includes a built-in backup agent.
The key system components include:
Xopero ONE backup agent, which enables high-speed data processing directly on the device.
Xopero ONE software, which enables execution of backup tasks.
XUP management console, used to monitor device status and modify network settings.
An integrated data storage system based on S3 bucket technology.
A high-performance disk architecture — the system uses storage tiering, with fast NVMe drives for the operating system and high-capacity HDDs (SATA/SAS) for backup storage in a SaaS model.
For the operating model with external network access, the Xopero Unified Protection system updates automatically. Available updates are displayed on the XUP management panel login screen.
The DMZ model, which has no external network access, requires manual updates performed by a dedicated Xopero technical support specialist.
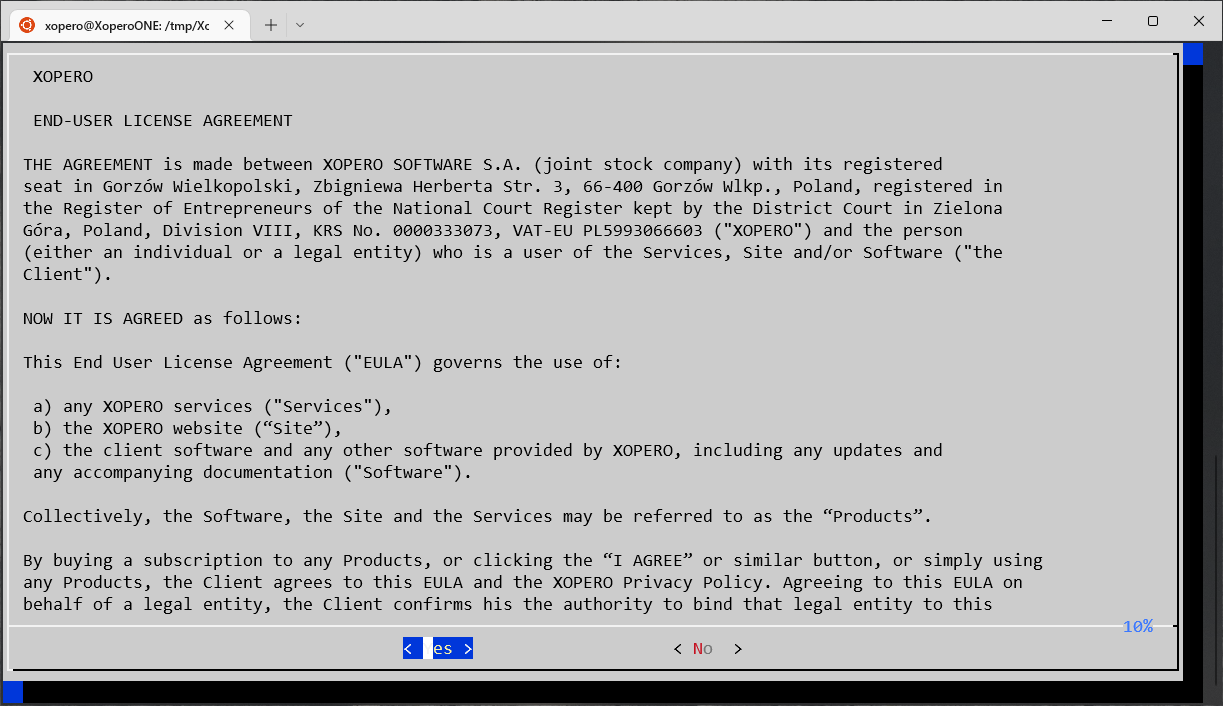
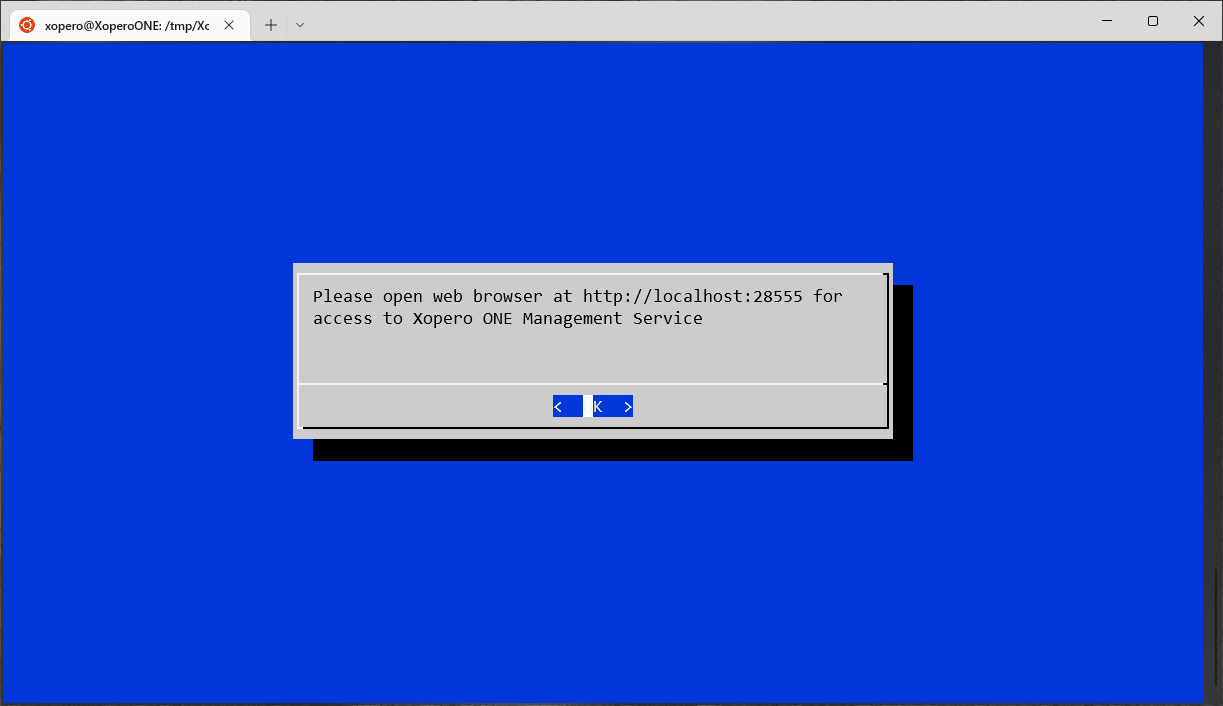
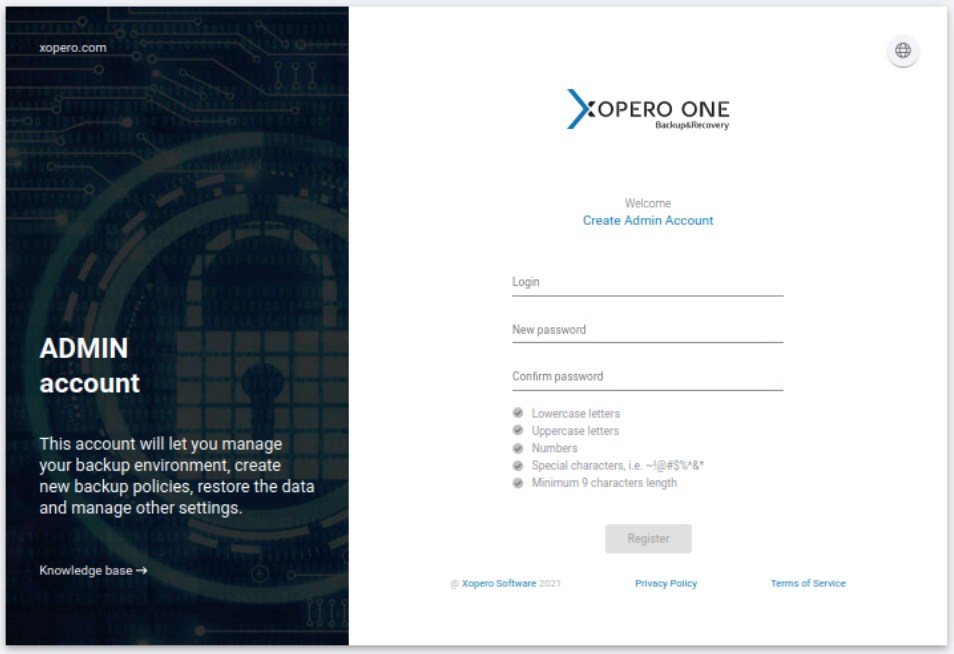
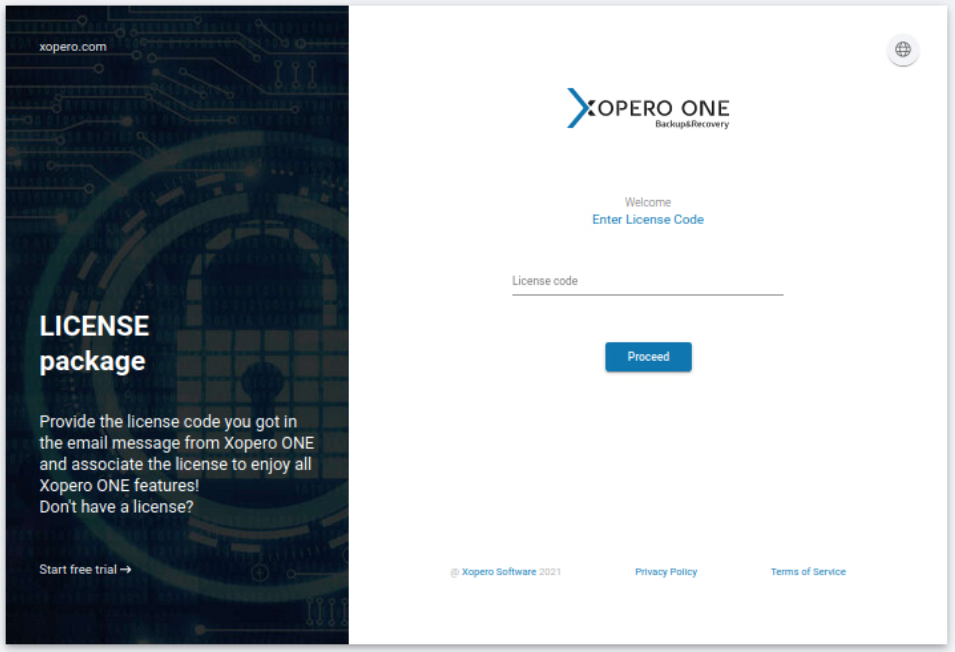
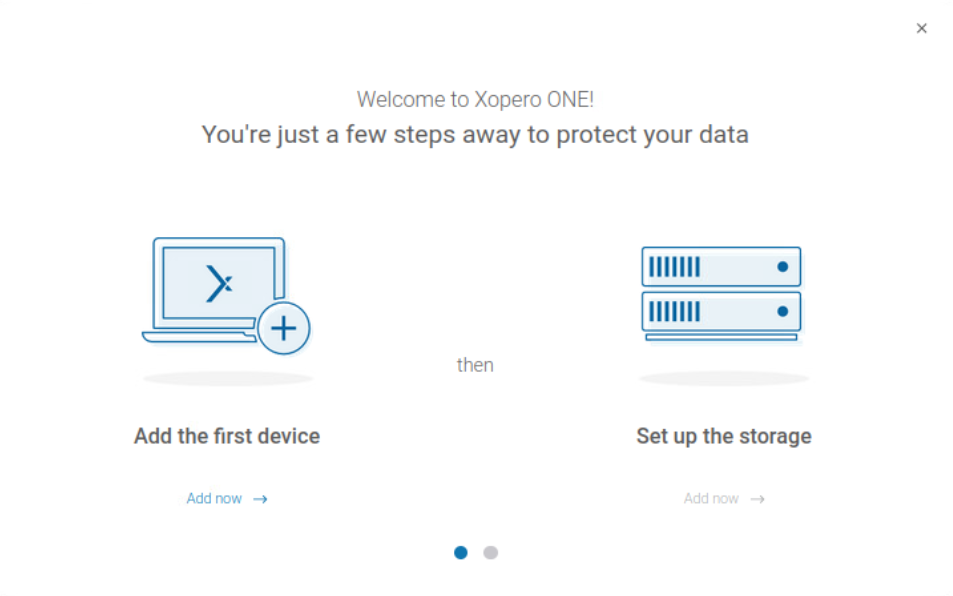


export ORACLE_SID=<database_ID>export ORACLE_HOME=database_directoryexport PATH=$ORACLE_HOME/bin:$PATHecho 'connect target /; quit' | rmanecho 'SELECT INSTANCE_NAME FROM V$INSTANCE;' | sqlplus / as sysdba@fortawesome/pro-duotone-svg-icons
Font Awesome Pro License
@fortawesome/pro-light-svg-icons
Font Awesome Pro License
@fortawesome/pro-regular-svg-icons
Font Awesome Pro License
@fortawesome/pro-solid-svg-icons
Font Awesome Pro License
@microsoft/signalr
Apache 2.0
@ng-select/ng-select
MIT
@ngrx/effects
MIT
@ngrx/store
MIT
AgileObjects.ReadableExpressions
MIT
AlphaVSS
Apache 2.0
angular-i18next
MIT
AutoMapper
MIT
AWSSDK.S3
Apache 2.0
chart.js
MIT
chartjs-plugin-datalabels
MIT
coverlet.collector
MIT
DiscUtils
MIT
FirebirdSql.Data.FirebirdClient
Developer's Public License Version 1.0
FluentFTP
MIT
FluentScheduler
BSD (3-clause)
FubarDev.FtpServer
MIT
Hali4831.MixERP.Net.VCards
Apache 2.0
i18next
MIT
i18next-browser-languagedetector
MIT
i18next-http-backend
MIT
Ical.Net
MIT
iSCSIConsole
LGPL 3.0
JsonLogic.Net
MIT
jwt-decode
MIT
K4os.Hash.xxHash
MIT
LightningDB
OpenLDAP Public License
LiteDB
MIT
LZ4
BSD (2-clause)
MailKit
MIT
Microsoft.AspNet.WebApi.Client
Microsoft EULA
Microsoft.AspNetCore
Apache 2.0
Microsoft.AspNetCore.Authentication.JwtBearer
Apache 2.0
Microsoft.AspNetCore.CookiePolicy
Apache 2.0
Microsoft.AspNetCore.Hosting
Apache 2.0
Microsoft.AspNetCore.Http.Connections
Apache 2.0
Microsoft.AspNetCore.Identity
Apache 2.0
Microsoft.AspNetCore.Identity.EntityFrameworkCore
Apache 2.0
Microsoft.AspNetCore.Identity.EntityFrameworkCore
Apache 2.0
Microsoft.AspNetCore.Identity.EntityFrameworkCore
Apache 2.0
Microsoft.AspNetCore.Mvc.Core
Apache 2.0
Microsoft.AspNetCore.Mvc.NewtonsoftJson
Apache 2.0
Microsoft.AspNetCore.Mvc.Testing
Apache 2.0
Microsoft.AspNetCore.Razor.Design
Apache 2.0
Microsoft.AspNetCore.Server.Kestrel
Apache 2.0
Microsoft.AspNetCore.SignalR
Apache 2.0
Microsoft.AspNetCore.SignalR.Client
Apache 2.0
Microsoft.AspNetCore.SignalR.Protocols.NewtonsoftJson
Apache 2.0
Microsoft.AspNetCore.SpaServices
Apache 2.0
Microsoft.AspNetCore.SpaServices.Extensions
Apache 2.0
Microsoft.AspNetCore.StaticFiles
Apache 2.0
Microsoft.CodeAnalysis.Common
MIT
Microsoft.CSharp
MIT
Microsoft.EntityFrameworkCore.Design
Apache 2.0
Microsoft.EntityFrameworkCore.InMemory
Apache 2.0
Microsoft.EntityFrameworkCore.InMemory
Apache 2.0
Microsoft.EntityFrameworkCore.Proxies
Apache 2.0
Microsoft.EntityFrameworkCore.Sqlite
Apache 2.0
Microsoft.EntityFrameworkCore.Sqlite
Apache 2.0
Microsoft.Extensions.Hosting.WindowsServices
Apache 2.0
Microsoft.Extensions.Identity.Stores
Apache 2.0
Microsoft.Extensions.Localization.Abstractions
Apache 2.0
Microsoft.Extensions.Logging.Configuration
Apache 2.0
Microsoft.Extensions.Logging.Console
Apache 2.0
Microsoft.Extensions.Logging.Debug
Apache 2.0
Microsoft.Graph
MIT
Microsoft.Identity.Client
MIT
Microsoft.Identity.Client
MIT
Microsoft.NET.Test.Sdk
Microsoft EULA
Microsoft.NET.Test.Sdk
Microsoft EULA
Microsoft.NETCore.App
MIT
Microsoft.NETCore.App
MIT
Microsoft.VisualStudio.Azure.Containers.Tools.Targets
Microsoft EULA
Microsoft.VisualStudio.Web.CodeGeneration.Design
Apache 2.0
Microsoft.Win32.Registry
MIT
Mono.Posix-4.5
MIT/BSD-3/Microsoft Patents
Mono.Posix.NETStandard
MIT/BSD-3/Microsoft Patents
Moq
BSD (3-clause)
Moq
BSD (3-clause)
MSTest.TestAdapter
MIT
MSTest.TestAdapter
MIT
MSTest.TestFramework
MIT
MSTest.TestFramework
EULA Microsoftu
NETStandard.Library
MIT
NETStandard.Library
MIT
Newtonsoft.Json
MIT
Newtonsoft.Json
MIT
ng-click-outside
MIT
ng2-charts
ISC License
ngx-toastr
MIT
NLog.Web.AspNetCore
BSD (3-clause)
Npgsql.EntityFrameworkCore.PostgreSQL
PostgreSQL License
OpenSSL.Net
BSD
protobuf-net
Apache 2.0
RestSharp
Apache 2.0
Rnwood.SmtpServer
BSD (3-clause)
rxjs
Apache 2.0
SharpCifs.Std
LGPL 2.1
SMBLibrary.Std
LGPL 3.0
Swashbuckle.AspNetCore
MIT
System.IO.FileSystem.AccessControl
MIT
System.Management
MIT
System.Reactive
MIT
System.Text.Json
MIT
tslib
BSD (0-clause)
tsutils
MIT
UnQLite
BSD (2-clause)
uuid
MIT
Vibrant.InfluxDB.Client
MIT
VMware SDK
Proprietary
xunit
Apache 2.0
xunit.runner.visualstudio
MIT
zone.js
MIT
Zstandard
BSD (3-clause)
@fortawesome/fontawesome-svg-core
Font Awesome Free License
@fortawesome/free-brands-svg-icons
Font Awesome Free License
By using the mysqldump tool, Xopero ONE supports all MySQL versions that are officially supported by Oracle.
Log in to XMS, go to the Backup tab (Plans > Backup) and click the + Add plan button in the top toolbar.
Select Devices from the platforms list.
In the next aside, select one of the available options and choose one or more devices for the plan to apply to (you can also select the plan to include all activated devices).
Define the name of the backup plan.
Configure your backup plan according to your needs (more information about the backup plan setup can be found in and articles).
Go to the Advanced settings section and click Edit to customize additional options.
Scroll down to the Backup scripts section and click the Pre-task script toggle to turn it on.
Select one of the scripts dedicated to backing up the MySQL database environment (Windows or Linux).
Type your database username into the Database user field.
Choose the user password by opening the Password Manager, where you can either add a new password or select an existing one.
Set up the script arguments — it should be entered in the Script arguments field as follows:
database — the name of the database. To include multiple databases in one backup plan, enter their names in the following format: [database1 database2 database3]. To back up all databases, use the --all parameter instead of specifying a database name.
Enable the two additional options using the checkboxes:
Wait for the script to continue the task — the application will wait until the dump is ready.
Fail the task if the script fails — if the script fails, the system will notify you of the backup error.
Double-check your settings and click Save to close the Advanced settings aside.
After completing the configuration, click the Save button. The protection plan will then automatically begin protecting your devices and databases according to the schedule you defined.
That’s all you need to do to create the database dump — this file should now be included in the Data to protect section if you are performing a file-level backup (to back up only the database). Alternatively, you can run an image-level backup to protect the entire drive.
Login to your Xopero ONE Management Service (XMS) console.
Click the Activate agent icon in the top menu.
A sidebar will appear, showing a list of available agents — you can view basic details like device type, name, IP address, and operating system.
Select the device you want to activate (you can select multiple devices if you assign them the same license type) and press the Activate button to proceed.
Next, select the license type you want to assign to the chosen device(s) and click Assign license to confirm your selection.
Once the license is correctly assigned, your device(s) will be visible in the Devices tab.
The config.json file, by default, is located in the following locations:
For Windows: C:\Program Files\Xopero ONE Backup&Recovery Agent
For Linux: /opt/XoperoONEBackupAgent/
💡You can edit config.json with a simple text editor (i.e., Notepad++).
The Xopero ONE Management Service (XMS) address to which your agent connects is crucial during both installation and configuration. If the IP address or protocol (http/https) of the Management Service changes, the agent's status will switch to offline. To re-establish the connection, update the ServiceUrl value in the configuration file with the updated address.
By default, the LogLevel value is set to Information. You can change it to:
Trace
Debug
Information
By default, application logs are stored in the following directory: C:\ProgramData\Xopero ONE\Xopero ONE Backup&Recovery Agent\Logs. To change the location, modify the AppDataFolder parameter.
The device name defaults to the system's name. To customize it, modify the OverriddenHostName parameter.
If database backup task ends with error DV0249 - "Unable to read backup data", first address any connection stability issues on your end. If the problem persists, you can increase the retry attempts in the Xopero ONE application— to do this, simply edit the MaxRetriesCount parameter, changing its default value from 2 to a higher value, i.e., 20.
The VMware virtual appliance is a Linux-based machine with an agent service. You can modify its settings by editing the config.json file.
To configure the timeout for snapshot creation, locate the VMware section at the bottom of the file and adjust the SnapshotCreationTimeout parameter to your needs.
Learn how to enable two-factor authentication in Xopero ONE.
Xopero ONE supports two-factor authentication (2FA) based on an authenticator application. To use 2FA with your Xopero ONE account, you must first enable it in the Xopero ONE Management Service (XMS) admin panel and then complete the setup.
Click your profile icon in the top-right corner of your XMS panel and select Account.
Toggle Two-factor authentication button and click Save in the bottom-right.
You will see the change confirmation in the top-right corner of the screen. Once done, log out of your XMS, then log back in to trigger 2FA setup.
Scan the QR code or copy the secret key to your authenticator app.
Enter the code from your authenticator app in the designated fields. Once done, click Verify now to finish the application setup.
If you lose access to your authenticator app, you can log in to Xopero ONE Management Service using one of the recovery codes generated during 2FA setup.
Unused codes do not expire over time; they remain active until used or until new codes are generated, either manually or by re-registering the 2FA.
If you have used several codes or suspect they have been compromised, you can generate a new set by going to ⚙️ Settings > Accounts > Edit account and clicking Generate recovery codes button.
Log in to your account (use a recovery code if your authentication device is lost or otherwise unavailable).
Go to ⚙️ Settings > Accounts > Edit account.
Toggle Two-factor authentication off to disable it and save the change. Then toggle it back on and save the change again
Learn how to register for a free Xopero ONE account with the Xopero ONE Management Service on-premises software.
The on-premises deployment model for Xopero ONE includes registering on the Xopero website and downloading and installing the Xopero ONE Management Service on a supported Windows, Linux, or Docker host. Complete the first-run setup by creating an administrator account with a valid email address and a password that complies with the product password policy; once the Management Service is operational, configure storages, then download, deploy, and activate agents on the endpoints you intend to protect.
The below steps outline the registration process on the Xopero ONE website.
Open https://www.xopero.com/ and click the Get started button in the upper-right corner of the screen (or use this link).
Select the on-premises deployment model, enter your business email address, and click Sign up free.
Enter all required information (name/organization and phone number). Once completed, verify that the information is correct and click the Sign up free button.
If the registration form is submitted correctly, you will be redirected to the Xopero ONE Management Service download page.
Wait for the system to create your account. Once it is created, you will receive a welcome email containing your license key.
To start using Xopero ONE, install the Management Service on a supported device and complete the initial configuration steps, including creating the root administrator account and entering the license key provided in the email. Once completed, you can proceed with integrating your resources and begin protecting them.
List of the minimum VMware permissions required to use Xopero ONE.
For Xopero ONE to back up and restore VMware environments, the assigned permissions must cover all resources that need protection, ensuring your virtual machines and configurations can be securely accessed and managed.
Below is a list of all permissions required by Xopero ONE to back up and protect your VMware environment. Click each section to expand it and view the full set of privileges.


output_dir — the directory where the database dump will be saved. This directory must also be selected in the Data to protect section when creating a backup plan.mysqldump_dir — the path to the mysqldump utility.
port — an optional parameter. Enter the port number only if a non-standard port is used. The default port is 3306.
For example, to back up all databases from the MySQL environment, use the following arguments:
If you want to back up only selected databases from the MySQL environment (for example, two out of seven), use the following arguments:
database output_dir mysqldump_dir portdatabase output_dir port


--all C:\MySQLBackup\ "C:\Program Files\MySQL\MySQL Server 8.0\bin"database1 database2 C:\MySQLBackup\ "C:\Program Files\MySQL\MySQL Server 8.0\bin"Warning
Error
Critical
None
Below the message you will find your recovery codes — save them before you go to the management console app. If you fail o save the codes right away, you can generate them later in your XMS account settings.
Your 2FA setup is now complete. Next time you login to your XMS panel, you will be prompted to verify yourself with 2FA.
Your 2FA configuration is now reset. During your next sign-in, you will be prompted to complete the authenticator app setup.


To install the Xopero ONE agent within a Docker container, use the images available on Docker Hub:
docker pull xopero/xone-agent:latestCreate a host directory for the Xopero ONE service container databases (which are located at /app/Xopero inside the container) to store databases outside the container:
mkdir -p /opt/xone-agent/dataRun the container with the correct volume mounting and environment variables using the following command:
Check if the container works correctly by using the following command:
Once all the above steps are completed, the agent will report to the Xopero ONE Management Service panel for activation.
QNAP with:
x86 or x64 CPU (ARM is not supported)
minimum 2GB RAM
Container Station app from AppCenter
QNAP with:
x86 or x64 CPU (ARM is not supported)
minimum 2GB RAM
Container Station app from AppCenter
Navigate to the Container tab and click the Create button. Expand the Image section and click Add image, then search for xopero/xone-agent image.
Select the image, click Download, and choose the version tagged as latest. Click Select to confirm.
Hardware, operating system architecture, and software requirements for deploying the Xopero ONE Management Service and the backup agent.
Installing the Xopero ONE Management Service and the backup agent application requires meeting specific hardware, operating system, and storage prerequisites to guarantee reliable orchestration across your backup environment. Dedicated multi-core processor allocation, sufficient RAM, and high-speed storage are essential for sustaining internal backup operations, efficient database processing, and multi-agent communication.
The table below lists the minimum and recommended system requirements for deploying the Xopero ONE Backup&Recovery application.
The table below lists the minimum and recommended system requirements for deploying the Xopero ONE Backup&Recovery Agent application.
The software requires the following components to function correctly:
Microsoft Visual C++ 2015-2019 Redistributable
.NET Framework 4.6.1 (for Windows Server 2008 R2 and Windows Server 2012 only)
Restore the entire system from an image-level backup copy.
Bare-metal recovery (BMR) restores the entire environment from an image-level backup, including the operating system, applications, and all associated data.
BMR (bare-metal restore, also known as bare-metal recovery) enables rapid system recovery using a system image created with disk-imaging software. The image file restores the entire operating system and its underlying configurations in minutes, completely bypassing the lengthy process of manual OS and application re-installation. Because BMR allows you to quickly return a physical machine or server to its full operational state following a data-loss event or hardware failure, it serves as a cornerstone of an effective disaster recovery strategy.
In Xopero ONE, the BMR process is streamlined into four primary steps:
Create an ISO file that includes the pre-configured Xopero ONE backup agent.
In this article, you will learn more about the Hyper-V backup features.
In Xopero ONE, you can enable application-aware backups for Windows Server virtual machines, which allows you to create consistent backups. This functionality is based on Microsoft VSS (Volume Shadow Copy Service), which silences applications and suspends write requests for up to 60 seconds. VSS flushes the file system buffer and freezes the file system, ensuring that metadata is saved and data is written in a consistent order. You can also enable the Continue backup on errors option, which allows the backup to proceed even if application-aware issues occur.
Hyper-V RCT (Resilient Change Tracking) is a built-in feature of the Hyper-V architecture that tracks changes in the disk blocks of virtual machines. Similar to VMware’s Changed Block Tracking (CBT), it greatly improves the efficiency of data backup operations. RCT allows incremental and differential backups to run faster and more effectively by providing a direct list of changed blocks since the last backup, eliminating the need to compare current VM disk data with previous backup versions.
4 GB
8 GB
8 GB
disk space
1 GB
2 GB
2 GB
CPU
4 cores (x64)
4 cores (x64)
RAM
4 GB
8 GB
disk space
1 GB
10 GB
CPU
2 cores (x64 or x86)
4 cores (x64 or x86)
8 cores (x64 or x86)
RAM
Incremental backups — RCT is highly effective for incremental backups, as it identifies and captures only the data blocks that have changed since the last backup. This approach greatly reduces both the backup duration and storage consumption.
Differential backups — in case of differential backups, which include all changes made since the last full backup, RCT simplifies the process by directly identifying the modified blocks. This makes differential backups faster, more reliable, and easier to manage.
The skip disks feature in Hyper-V allows the backup process to omit certain disks from snapshot creation. This applies to disks where snapshots are not supported or practical, such as shared disks or physical disks directly attached to a virtual machine. By skipping these disks, Hyper-V ensures that the backup operation can continue smoothly without errors or interruptions, maintaining the overall stability and reliability of the backup process.
Skip disks feature highlights Xopero ONE’s adaptability and commitment to delivering a seamless backup experience, even in complex virtualized environments. By leveraging this feature, IT administrators can optimize backup performance, increase flexibility, and ensure reliable protection of their virtual infrastructure against data loss and downtime.
Shared Virtual Hard Disks (VHDX) — when virtual machines use shared VHDX files for clustering, these disks typically cannot be snapshotted. The skip disks feature allows such configurations to be backed up while excluding the shared VHDX, ensuring the process completes successfully.
Physical disks — for VMs that use physical disks through pass-through functionality (directly attached storage), standard snapshot methods do not apply. By skipping these disks, the backup can proceed smoothly, protecting the rest of the environment without interruption.
Virtual machines with Fibre Channel adapters — VMs configured with Fibre Channel adapters may encounter backup failures if the skip disks option is not enabled. Using this feature prevents such errors and helps maintain the stability and reliability of the backup operation.
Download the Container Station app from the App Center.
Login to your QNAP web panel and open the AppCenter application. In QNAP Store, select All Apps and search for the Container Station.
Download and open the application. Select the path that will be used as a directory for your Docker container data, and click Start Now to proceed.
Open the Container Station application, select the Containers tab, and click the Create button.
In Image Configuration choose the Advanced mode option. In the image type, select Docker image, and in the Image field, paste the following command:
Ensure the Try pulling image from the registry before creating the container option is checked, and hit Next.
Within the Configure Container tab, the form contains several fields, with the most crucial being:
Name — here you can set a custom name for the container
Restart policy — defines if the container will star automatically in case of, for example, QNAP restart
In the Configure Container tab, navigate to ⚙️Advanced Settings.
Go to the Environments section and click Add New Variable to add new environment variables with the following values:
‼️*ManagementServiceUrl – your Xopero ONE Management Service (XMS) address in one of the following formats (depending on the XMS deployment model):
http://ipaddress:port, i.e., http://192.168.0.1:28555
https://XMSID.ads.xopero.com, i.e., https://a00b0dc0-0116-0000-0000-d0000028960e.ads.xopero.com
Click Apply to save your changes.
Navigate to Storage tab—here you can mount your QNAP volumes to the Xopero ONE agent docker container.
Next, double-check and confirm your settings, then click Finish to create the container.
Container Station will download the latest Xopero ONE image and create the container based on that image.
Once the container creation process is completed, your new container will be visible under Container tab in Container Station.
You can now connect to your Xopero ONE Management Service admin panel to activate the agent.
Download the Container Station app from the AppCenter.
Login to your QNAP web panel and open the AppCenter application. In QNAP Store, select All Apps and search for the Container Station.
Download and open the application. Select the path that will be used as a directory for your Docker container data, and click Start Now to proceed.
Once done, download the Xopero ONE agent Docker image, which is available here.
Open the Container Station application and navigate the Import tab.
Click the ➕Import button to upload the previously downloaded Docker image file.
In Create Import Task window, select the source type and file path of the Xopero ONE agent Docker image and hit Next to continue.
Within the Create Container tab, the form contains several fields, with the most crucial being:
Name — here you can set a custom name for the container
Auto start — defines if the container will star automatically in case of, for example, QNAP restart
CPU Limit — allows you to specify the percentage of CPU usage allocated for the container
Memory Limit — RAM limit for the container
Click the ⚙️Advanced Settings >> button and navigate to the Environment section.
To add a new environment variable, click the Add button, name it ManagementServiceUrl, and set its value to your Xopero ONE Management Service address*.
‼️*ManagementServiceUrl – your Xopero ONE Management Service (XMS) address in one of the following formats (depending on the XMS deployment model):
a.
http://ipaddress:port, i.e.,http://192.168.0.1:28555b.
https://XMSID.ads.xopero.com, i.e.,https://a00b0dc0-0116-0000-0000-d0000028960e.ads.xopero.com
Go to the Shared Folders section — here you can mount your QNAP volumes to the Xopero ONE agent Docker container.
To back up data from your QNAP device, choose Add under Volume from host section— it lets you specify which data the Xopero ONE container can access. Select a directory from the host in Volume from host field and enter the path visible inside the container in the Mount Point field.
Once you're done with the above steps, click Create to continue.
In the Summary window double-check your settings, then click OK to finish the configuration.
You can now connect to your Xopero ONE Management Service admin panel to activate the agent.
Next, define a custom name for the container. Additionally, configure container resource limits if needed.
Check the Enable auto-restart option to ensure the container automatically restarts when the device reboots, then click Next to proceed.
In the Volume Settings section, click the ➕Add Folder button, and select directories that require protection. The container needs to have external directories mounted to access them while performing backups.
Additionally, to ensure data persistence during container updates or maintenance operations, mount agent databases to an external directory. These databases are located in /app/Xopero and should be mapped to a designated location outside the container to avoid data loss or inconsistency.
Next, in the Environment section, define the required variables:
ManagementServiceUrl — your Xopero ONE Management Service (XMS) address in one of the following formats (depending on the XMS deployment model):
a.
http://ipaddress:port, i.e.,http://192.168.0.1:28555b.
https://XMSID.ads.xopero.com, i.e.,https://a00b0dc0-0116-0000-0000-d0000028960e.ads.xopero.comXoperoOverriddenHostName — specify agent's name to facilitate identification
Click Next to confirm the configuration. In Summary window, double-check your settings and if they're all correct, hit Done to finalize the process.
docker ps
docker run -v /host/path:/container/path -e ENV_VAR=value image_namedocker run -d \
--name <container_name> \
-e ManagementServiceUrl="<your_xopero_one_service_URL>" \
-e XoperoOverriddenHostName="<device_name>" \
-v /opt/xone-agent/data:/app/Xopero \
--restart unless-stopped \
xopero/xone-agent:latestdocker run -d \
--name xone-agent \
-e ManagementServiceUrl="https://192.168.1.10:28555" \
-e XoperoOverriddenHostName="Docker_agent" \
-v /opt/xone-agent/data:/app/Xopero \
--restart unless-stopped \
xopero/xone-agent:latestxopero/xone-agent:latesthttp://+:80trueXopero ONE Management Service addressyour custom QNAP container nameWrite the ISO file to a USB flash drive—or any alternative bootable media—to create a recovery drive.
Boot the target device (the device onto which the system image will be restored) using the newly created media.
Log in to the Xopero ONE Management Service (XMS) and start the recovery process.
The following steps outline the process of creating an ISO image with a pre-configured backup agent using the SVS Creator utility.
Download the SVS Creator utility from the official Xopero website and extract the contents of the ZIP archive to a separate folder.
Run SVSCreator.exe to open the creation wizard.
In the SVS Creator wizard window, specify the temporary working directory path, which also serves as the output destination where the final ISO image will be created. By default, this path is set to C:\Windows\Temp, but you can modify it to a different directory if needed. Once the path is selected, click Next.
Select the appropriate OS architecture (32-bit or 64-bit), then click Next.
The wizard will then automatically download and install the required components.
Once all required components are successfully installed, you have the option to include specific drivers required for the target system's recovery. Click Add to browse and select the necessary drivers, then click Next to proceed.
The wizard will then start generating the final Windows PE-based ISO image.
Once the ISO image is successfully created, an "ISO image with Windows PE successfully built" confirmation message will appear, displaying the exact output directory path of the file. You can then safely close the SVS Creator utility.
Next, write the ISO image to a USB flash drive—or another bootable media—to create a recovery drive. Use it to boot the target device and initiate the image-level backup restore.
The following steps outline the process of booting the Xopero ONE recovery environment on the target device.
Boot the target device using the previously prepared recovery drive.
After the device boots, the SVS application will launch automatically, displaying the following menu options:
Xopero: opens the Xopero window with additional recovery options.
Shell: opens the command-line interface, which can be used for manual network interface configuration.
Reboot: restarts the device.
Shutdown: shuts down the device.
Select Xopero to continue.
A new menu screen will appear with the following options:
Device app: launches the Xopero ONE backup agent application on the device.
Fix boot problems: resolves the operating system boot issues; can be used to fix errors related to the SVS application.
Select Device app to continue.
Enter the service address and the device name to use in Xopero ONE Management Service, then click Connect.
On another device, open the Xopero ONE Management Service panel and start the recovery procedure.
The following steps describe the restore process in Xopero ONE Management Service.
Click the laptop icon in the top-right corner of the management service panel.
Find the target device, select it, and click Activate to assign a license to it.
Open the Devices tab, locate the device from which you want to restore the backup, and click the Restore button.
Select the backup plan from which you want to restore the data.
Choose the timestamp from which you want to restore the data, click Restore, and select the BMR recovery option from the drop-down menu.
Next, select the disk you want to restore and click Restore selected.
Verify that the correct target device is selected in the Restore to field. To change it, click Edit and select the appropriate device. Then, in the Restore directory section, specify the disk to which the backup should be restored.
Optionally, in the Restore settings section, select the checkbox to reset the system drivers, or leave it unchecked to keep the original driver configuration.
Verify that all entered settings are correct, then click the Restore button in the bottom-right corner of the Restore data pane to begin the recovery process.
Prior to agent installation, check if your system is meets all the requirements.
System requirementsSupported platformsDownload the agent installer (bash script) to your Linux system and grant execute permission to the file owner (user or group) using the following chmod command:
chmod +x xoperoclient.shNext, run the script using the following command:
Accept the END-USER LICENSE AGREEMENT to proceed.
Next, enter the IP address in the Address field (including the protocol and port) and click OK to finish the installation. Your address can be found in Xopero ONE Management Service — the system will display it once you start downloading the agent installer.
Now that Xopero ONE agent is installed, you can activate it in the Xopero ONE Management Service (XMS) web panel and start protecting your data.
Download Xopero ONE agent installation wizard via XMS and run it.
Click Continue to proceed.
To learn how to activate the agent in the Xopero management console, check the Useful links and items section.
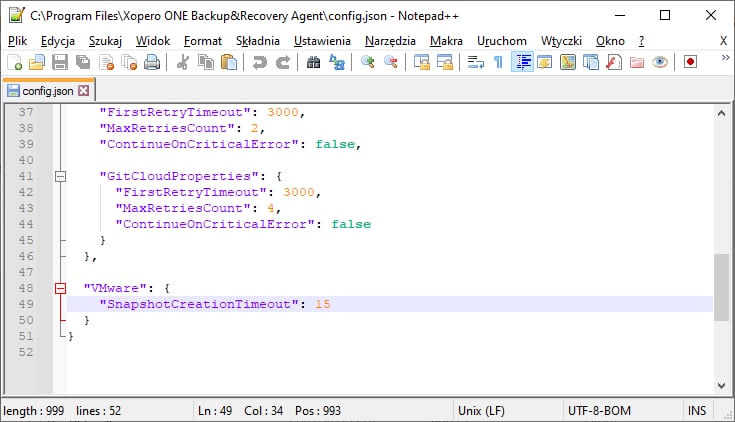
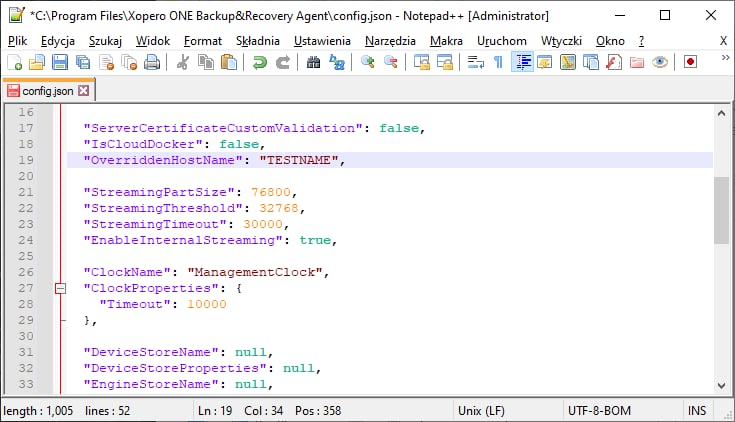
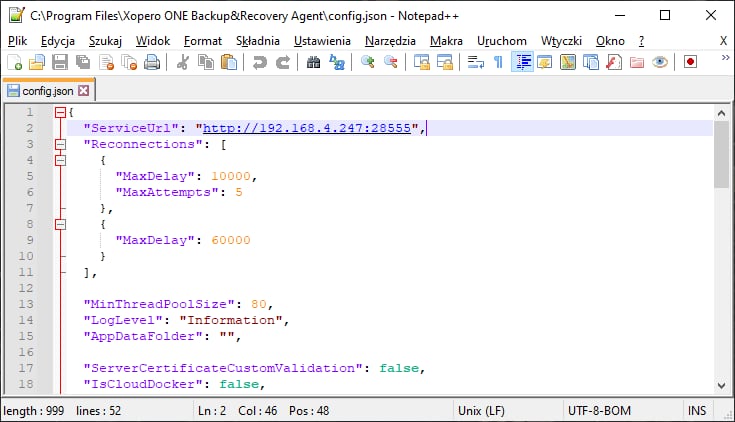
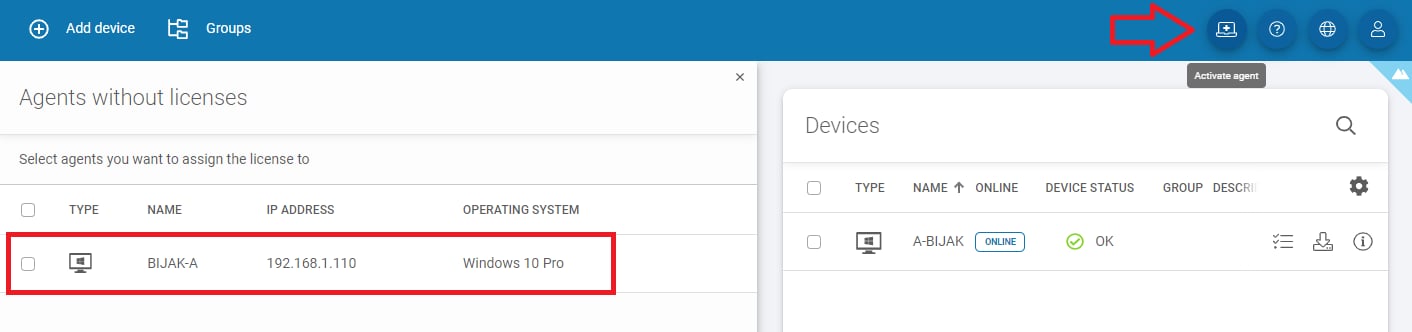
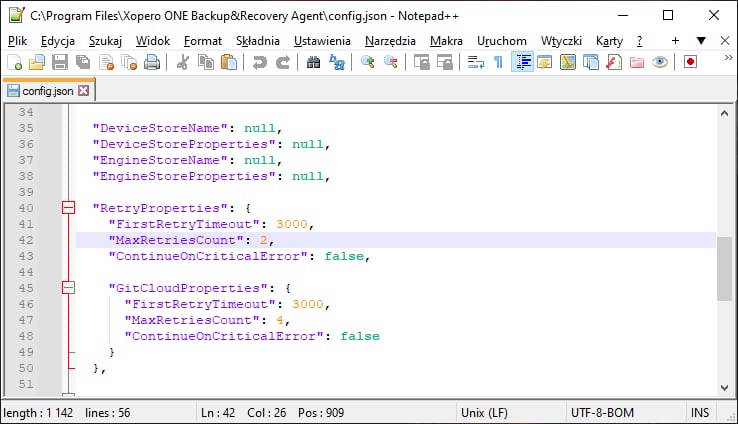
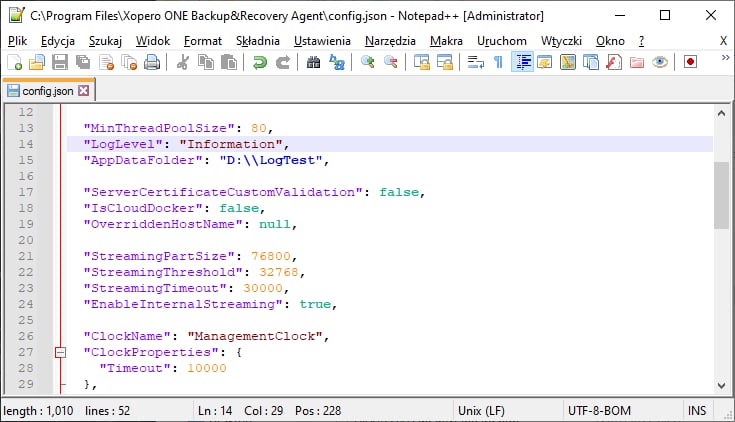
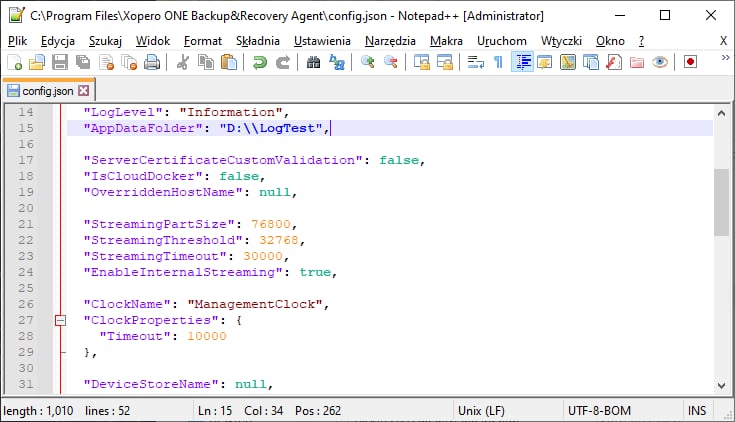
Drivers: allows you to load or add new drivers.


Select Continue in the Read Me section.
Read the END-USER LICENSE AGREEMENT and hit Continue to accept it.
Hit Agree to accept the terms of the software license agreement.
Change the installation directory if needed and click Install to begin the installation.
During the installation process, the creator will ask you for the address of your XMS— define it in this step.
Click OK to confirm your configuration.
The Xopero ONE agent has been successfully installed— you can close the installation wizard.
If you don't want to use the installation wizard, you can choose the unattended installation option.
Download the xoperoclient.pkg file to your device.
Run the following command in macOS terminal (Applications > Utilities > Terminal):
‼️Command overview:
After installation, in a few steps you need to add the necessary permissions for the Xopero file.
Click on the Mac icon in the upper left corner and select System Preferences... from the drop-down menu.
Next, go to Security & Privacy.
Navigate to the Privacy tab, then select Full Disk Access from the menu on the left.
Add Xopero.Device.App.app to the list.
Grant access to Xopero.Device.App.app to finish the configuration.
./xoperoclient.sh or bash xoperoclient.shsudo command


sudo /bin/launchctl setenv "XOPERO_INSTALLER_SERVER_ADDRESS_CONFIG" "https://XMS_adress::28555>" && sudo installer -pkg <pkg_file_location> -target /; sudo /bin/launchctl unsetenv "XOPERO_INSTALLER_SERVER_ADDRESS_CONFIG"sudo /bin/launchctl setenv "XOPERO_INSTALLER_SERVER_ADDRESS_CONFIG" "https://<XMS_adress::28555>"sudo installer -pkg <pkg_file_location> -target /;sudo /bin/launchctl unsetenv "XOPERO_INSTALLER_SERVER_ADDRESS_CONFIG"


This article explains how to restore an Oracle database from a backup.
The first step in restoring an Oracle database from backup is to restore the database files from storage to a temporary directory. These files will then be imported into the Oracle database environment.
To restore files backed up using a file-level backup plan follow this guide.
If the database files are restored to a temporary directory, run the following command in the CLI:
/opt/XoperoONEBackupAgent/Xopero.Device.App --oracle-restore database_ID backupuser /home/backupuser/oracle/oracle_database_dump/opt/XoperoONEBackupAgent/Xopero.Device.App — path to the Xopero ONE application
--oracle-restore — parameter used to restore the Oracle database
database_ID — ID of the database to be restored
backupuser — user with permission to restore the database
/home/backupuser/oracle/oracle_database_dump — path to the directory containing the restored database files
If the restore completes successfully, information about the restored database will be displayed on the screen:
If part of the database is currently unavailable (for example, if a user deleted a table), the restoration process described above may fail, as the deletion is a more recent operation in the database.
The solution is to run the modified command:
The last optional parameter, required only when restoring to the source host, should be set to true. This ensures Xopero sets the SCN (System Change Number) to the point immediately after the backup.
Setting this parameter resolves issues with unrestored parts of the database. The restoration method described in the first section of this article will still work, but it may not always produce the expected results.


/opt/XoperoONEBackupAgent/Xopero.Device.App --oracle-restore database_ID backupuser /home/backupuser/oracle/oracle_database_dump true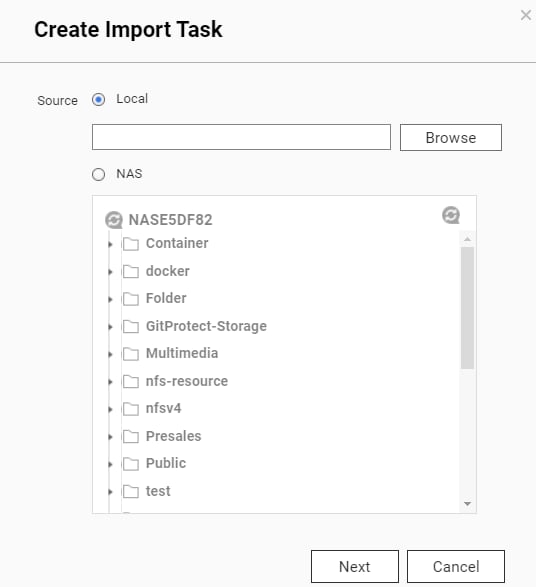


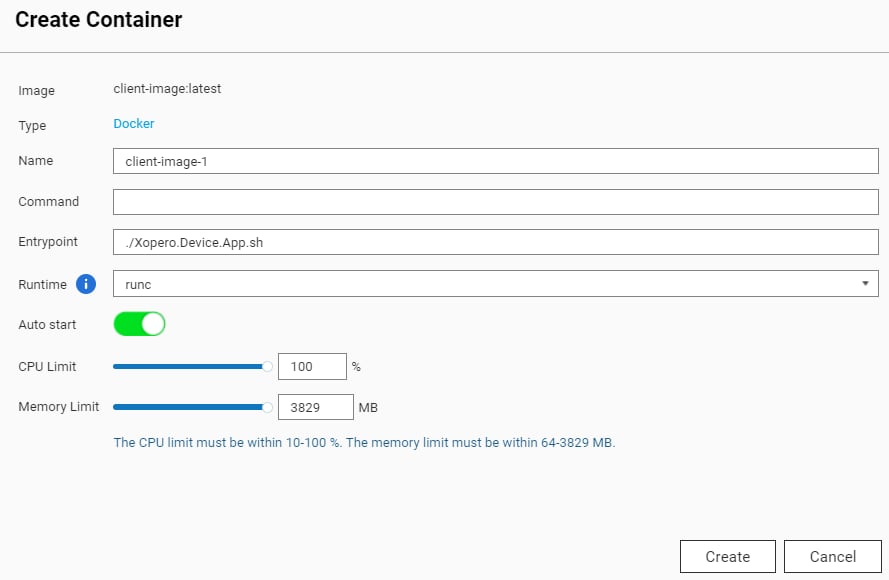
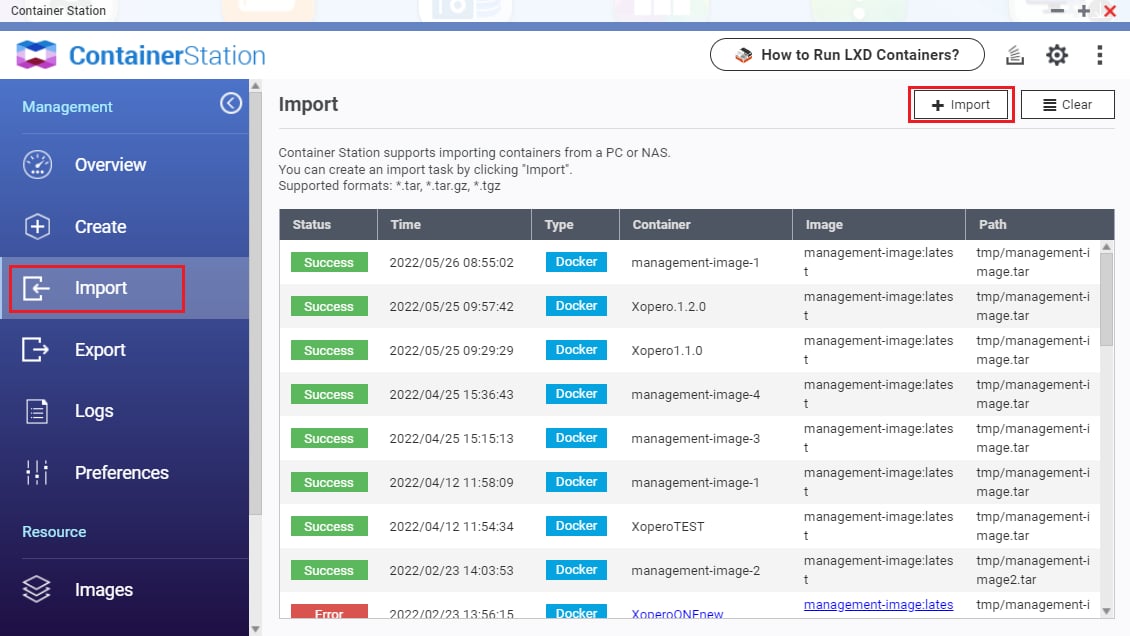
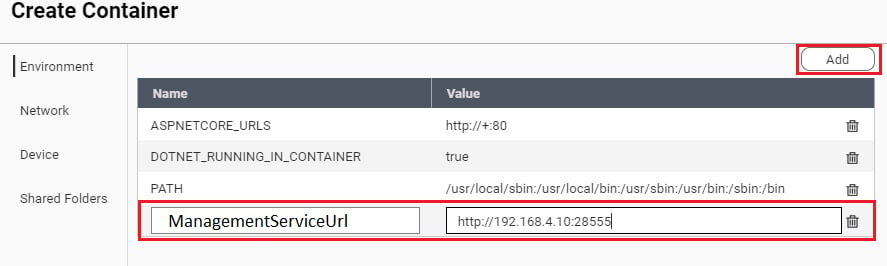


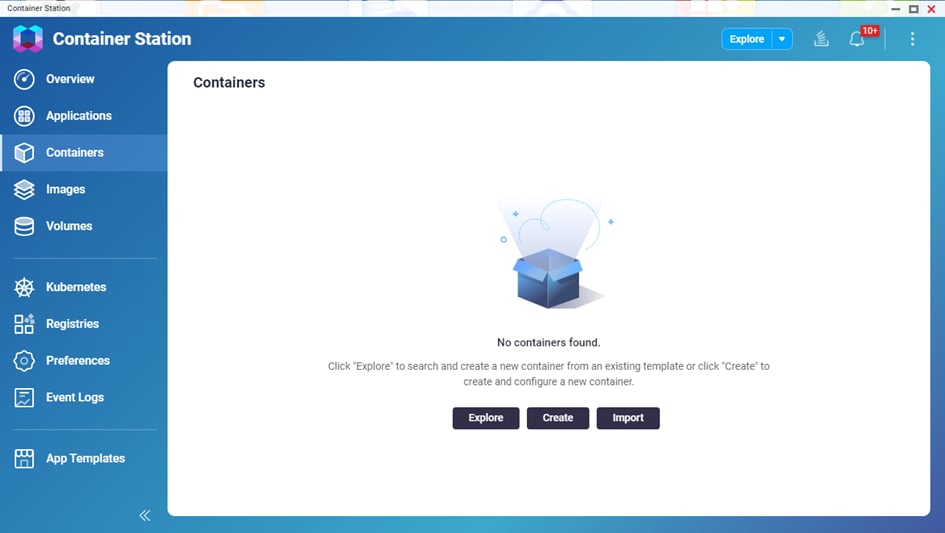
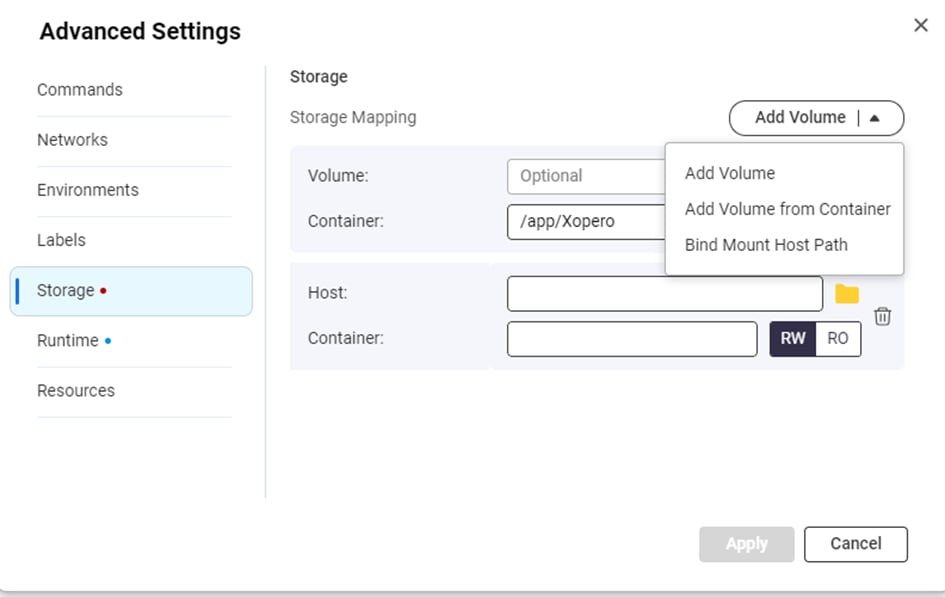
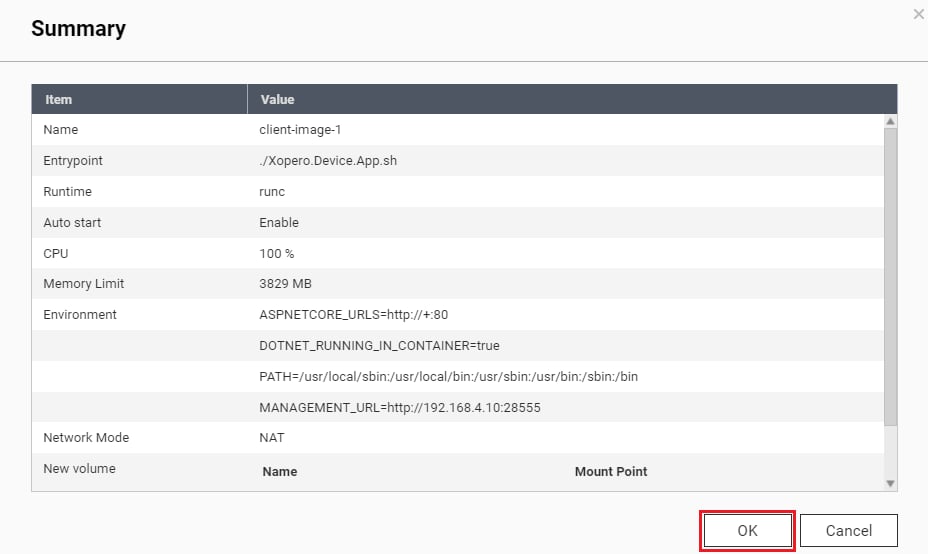
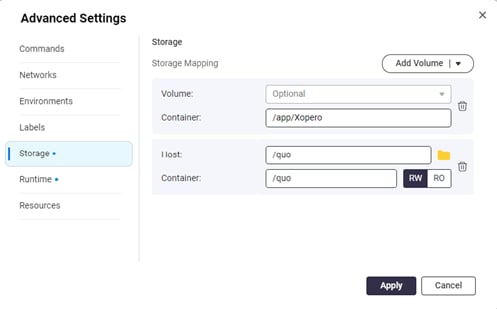
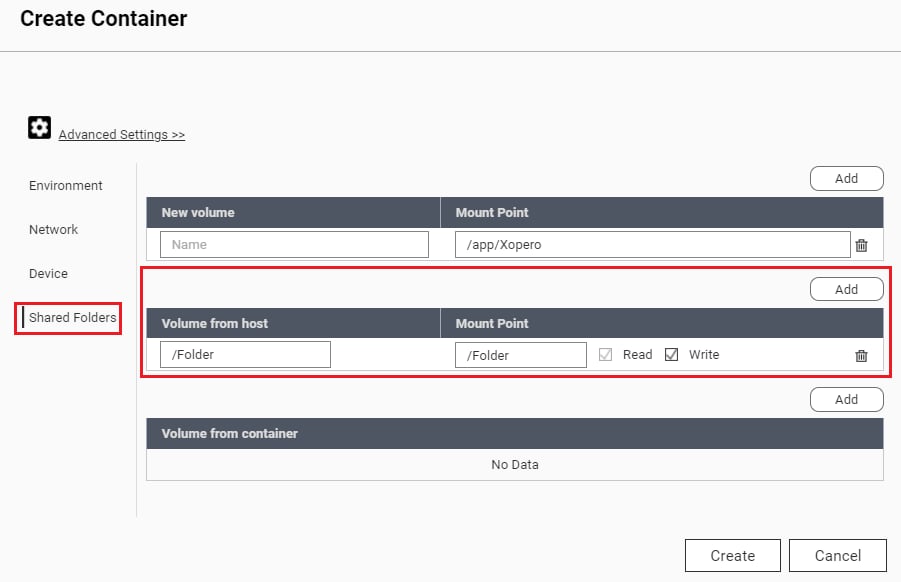
This article describes the process of Xopero ONE Management Service (XMS) installation within Docker container for on-premise deployment model.
Download Xopero ONE Management Service (XMS) Docker image to your device. Next, open cmd console and pull XMS Docker image using the following command:
docker load -i docker_name.tarOnce the Docker image is imported, use the following command to create a container:
docker run -d \
--name <container_name> \
-p <xms_port>:80 \
-v <drive_location_database>:/app/Xopero \
docker run -d \
--name xone \
Next, use the following command to view the list of containers (or view the list in Docker Desktop):
If you see no errors, that means the XMS implementation was done correctly. You can open the Xopero ONE Management Service web panel using the following address:
Before you start using XMS you must create an administrator account and assign a license to your unit.
QNAP with:
x86 or x64 CPU (ARM is not supported)
minimum 2GB of RAM
Container Station app from the App Center
QNAP with:
Synology must meet the following requirements:
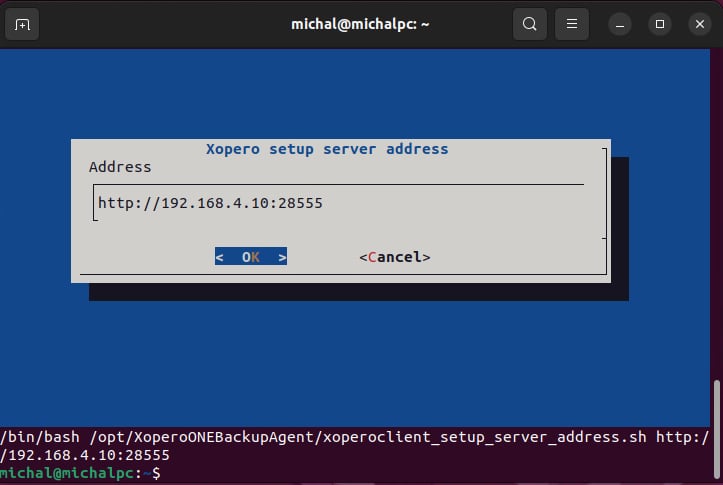

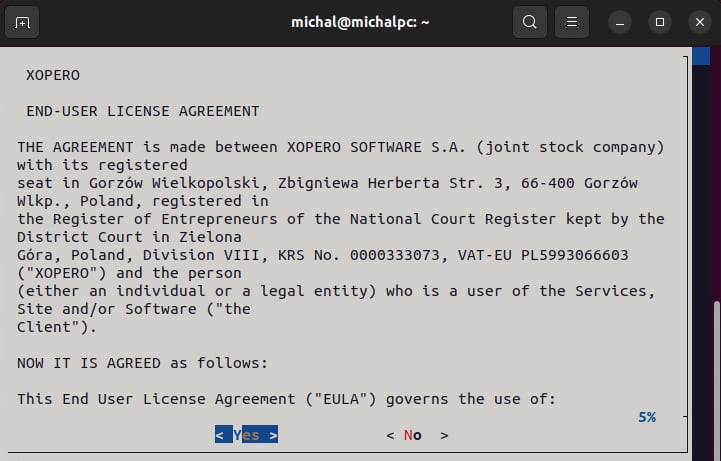
Login to your QNAP web panel and open the App Center application. Go to QNAP Store > All Apps and search for Container Station (CS).
Download the Container Station application. Once downloaded, open the app and select the path you'll be using as your Docker container data directory.
Click Start Now to proceed.
In the Container Station application, open the Containers menu option, and click the Create button.
In Image Configuration, choose Advanced mode. For Image type select Docker image, and in the Image field, paste the following:
Ensure Try pulling the image from the registry before creating the container. checkbox is checked, then hit Next.
In the Configure Container tab, configure the Xopero ONE Docker container and hit Next to continue.
Name: set a custom name for the container
Auto start: defines if the container should startup automatically (i.e., in case of QNAP restart)
Publish network ports: enter a port number in the Host field— this will be the port used to connect to Xopero ONE service on the container on port 80 (the recommended host port number is 28555)
Double-check your configuration settings and hit Finish.
Container Station will download the latest Xopero ONE image and create the container based on it.
Once the container creation process is completed, your new container will be available in the Container Station application (under Containers menu option).
Connect to Xopero ONE using your web URL address in the following format (you can find it under Container Details > General > Web URL):
http://QNAPaddress:port
To finish the XMS setup, create a new administrative account, provide the license code, and select data to protect.
Login to your QNAP web panel and open the App Center application. Go to QNAP Store > All Apps and search for Container Station (CS).
Download the Container Station application. Once downloaded, open the app and select the path you'll be using as your Docker container data directory.
Click Start Now to proceed.
Open the Container Station application and click ➕ Create in the left-hand side menu.
Copy and paste xopero/xopero-one-service in the search field and hit Enter to search for XMS Docker image (it should be the first search result in Docker Hub tab).
Click the Install button next to the Docker image to start the container creation process.
Select the latest image version and click Next to continue.
In the Create Container window, configure the Xopero ONE Docker container.
Name: set a custom name for the container
Auto start: defines if the container should startup automatically (i.e., in case of QNAP restart)
CPU Limit: allows you to set the CPU percentage usage available for the container
Memory Limit: RAM memory allocated to the container
Scroll down a little and click the ⚙️ Advanced Settings>>
In the ⚙️ Advanced Settings>> go to Network and click the Add button on the right. Enter a port number in the Host field under the Port Forwarding section— this will be the port used to connect to Xopero ONE service (the recommended, default port number is 28555).
Click the Create button— this will display the setup summary. Double-check your configuration and click OK to create the container.
Once the container creation process is completed, your new container will be available in the Container Station application (under Container menu option).
Connect to Xopero ONE Management Service by launching it via Container Station, or using your web URL address in the following format:
http://QNAPaddress:port
To finish the XMS setup, create a new administrative account, provide the license code, and select data to protect.
Open the Docker Hub, navigate to the Container menu, and click Create button.
Expand the Image section and select Add image. Then, search for xopero/xopero-one-service. Once located, select the image, click Download, and choose the version tagged as latest. Confirm the selection to proceed.
Once you download the image, select it from the Image drop-down menu in General Settings. Next, define a name for the container and enter it in the Container Name field. Configure container resource limits if necessary.
Check the Enable auto-restart checkbox to ensure the container automatically restarts when the device reboots, and proceed to the next step.
In Volume Settings, click ➕ Add Folder button. To ensure data persistence during container updates or maintenance operations, mount the management databases to an external directory. The databases are stored in /app/Xopero and should be mapped to a designated location outside the container to prevent data loss or inconsistencies.
In the Environment section, define the required variables:
ASPNETCORE_URLS: management service ports for http and https protocol (i.e., http://+:PORT_NUMBER;https://+:PORT_NUMBER)
Go to Advanced Settings. Select bridge from the Network Name drop-down menu in the Network tab to enable the container to share the same network namespace as the container's host, then select Use the same network as Docker Host checkbox at the bottom.
Confirm the configuration and click Next. In Summary, double-check the settings and hit Done to finish the container creation process.
Once you've created the container, you can connect to your XMS using one of the following addresses:
https://yourSynologyAddress:28555 (i.e., https://192.168.0.100:28555)
http://yourSynologyAddress:28556 (i.e., http://192.168.0.100:28556)
docker ps -ahttp://DockerHostAddress:28555xopero/xopero-one-service:latest


In this article you will learn how to configure your Xopero ONE login with SAML.
Xopero ONE integration works via the SAML 2.0 protocol, meaning any platform supporting this protocol can be integrated with Xopero ONE.
The configuration process is straightforward and requires only the entity ID, metadata URL, reply URL, and logout URL (the names may vary depending on the naming conventions used by specific platforms). In some cases, a certificate and a private key are also required.
Below table illustrates SAML integration configuration for selected platforms, including Auth0, Entra ID, CyberArk, Google, JumpCloud, Okta, and OneLogin.
Open your Auth0 admin dashboard, go to Dashboard > Applications > Applications, and hit Create Application button in the top-right corner of the screen.
In Create application window enter a unique, custom application name (in this example we'll be using XoperoAuth0), select Regular Web Applications option, and click Create:
In the newly created application window go to Settings tab, scroll down to the very bottom, and click Advanced Settings collapsible to expand it.
Go to the Endpoints tab and locate SAML section. Copy the SAML Metadata URL and save it for later — it will be needed for Xopero ONE configuration.
Scroll back to top and open the Addons tab, then toggle the SAML2 WEB APP button.
In the window that opens up open the Settings tab and enter the Application Callback URL as follows:
https://XoperoONEManagementServiceURL/Auth/AssertionConsumerService
In the same tab, scroll down inside the code input field and uncomment 31st, 32nd and 33rd line, then edit line 32 as follows:
Once done, scroll down to the bottom of the addon window and click Enable button, then close the window to finish app configuration.
Login to your XMS web panel, go to Settings (bottom-left corner in the left-hand side menu) and select External Identity Providers.
Click Add new provider button and fill in the details:
Name: your own custom name, i.e., Auth0
Entity ID: should be the same name you've set as application name in Auth0 (in this example it's XoperoAuth0)
Next, paste the previously copied SAML Metadata URL in the Metadata URL field.
Add certificate and password if required.
Set up a default Language and Role for users with Auth0 SAML authentication permissions.
Double-check the settings and hit Save at the bottom of Add identity provider tab.
Login to , select Entra ID, and click Enterprise apps.
Click the New application button and then Create your own application.
Enter a custom name for the app and select Integrate any other application you don’t find in the gallery (Non-gallery).
Log in to your CyberArk account. Expand Apps & Widgets dropdown menu and select Web Apps.
Click Add Web Apps button in the top-right corner.
Go to Custom
Login to your Google admin console. Next, click the burger menu icon in the top-left corner of the screen and go to Apps > Web and mobile apps. Click Add app and select Add custom SAML app from the drop-down menu.
In the app details page create a custom name for your app and type it in App name field, then click Continue.
Log in to the JumpCloud Admin Portal, navigate to USER AUTHENTICATION > SSO Applications, and then click + Add New Application.
In Create New Application Integration window search for Custom Application, select it, and hit Next.
PKCS #12 file with X.509 certificate and private key (usually a .pfx file; can be password protected) must be included in IdP configuration in Xopero ONE. X.509 certificate file (usually a .crt file) for signature verification on IdP side must be included in application configuration defined in Okta panel.
Both files contain the same certificate. The PKCS #12 file also contains a private key to this certificate.
In Admin dashboard (in the right-top corner of the window) expand the Applications tab and select the Applications option.
Login to your OneLogin admin console and go to Applications > Applications > Add App.
Search for SAML Custom Connector (Advanced) and select the first result from the search results.
Next, enter a unique, custom name for the app in Display Name field and hit Save
To log in to Xopero ONE using a SAML-integrated identity provider, always start from the Xopero ONE panel. Do not log in from the IdP panel (for example, the Okta panel) to the application configured for Xopero ONE — the only exception is JumpCloud, which provides a built-in option to log in directly from its panel.
To enable an existing Xopero ONE user to log in via an identity provider (IdP), you must turn on the IdP login toggle for that account (⚙️ Settings > Accounts > Edit). Once an account is set to use an identity provider (IdP) for authentication, it cannot be switched back. To change the authentication method, you must delete the account and add it again.
Confirm the configuration and click Create button.
Open the Single sign-on tab and select SAML method.
Click the Edit button in Basic SAML Configuration section to edit it.
Set up a unique Identifier (Entity ID) i.e., SAMLTestAzure
Enter the following URL in Reply URL (Assertion Consumer Service URL) section:
https://XoperoONEManagementServiceURL/Auth/AssertionConsumerService
Change the Logout Url (Optional) to the following address:
https://XoperoONEManagementServiceURL/auth/SAMLLogoutResponse
Double-check if the info you have entered is correct and click the Save button.
Next, click the Edit button in Attributes & Claims section and click + Add a group claim button.
Select All groups and go to Advanced options. Check the Filter group box and fill in the fields as follows:
Attribute to match: Display name Match with: Prefix String: XONE*
*This is an example of the suffix used for the group to be added to the application.
Check the Customize the name of the group claim checkbox. Enter the custom group claim name in the Name field and save your settings.
Go back to SAML-based Sign-on page and copy the App Federation Metadata Url.
Save your settings.
Open the Users and groups tab and click + Add user/group button. Select users you want to be able to login to Xopero ONE and save your settings.
Login to your XMS web panel, go to Settings (bottom-left corner in the left-hand side menu) and select External Identity Providers.
Click Add new provider button and fill in the details:
Name: your own custom name, i.e., Entra ID
Entity ID: should be the same name you've set in Identifier (Entity ID) in Azure Portal (in this example it's SAMLTestAzure)
Next, paste the previously copied App Federation Metadata Url in the Metadata URL field.
Add certificate and password if required.
Set up a default Language and Role for users with Entra ID SAML authentication permissions.
Double-check the settings and click Save at the bottom of Add identity provider tab.
Click Save to finish the setup. You can now log out and test your configured SAML login integration.
Confirm adding SAML as a web app.
You’ll be redirected to SAML web app settings. Start with setting up a custom name for the app (i.e., XONESAML).
Next, set up a unique Application ID in Advanced section and Save your settings (in this example we will be using XONESAMLID).
Open the Trust tab and copy Metadata URL in Identity Provider Configuration section (it will be needed later for Xopero ONE configuration).
Next, scroll down to Service Provider Configuration section, set it to Manual Configuration, and enter the following data:
In SP Entity ID / Issuer / Audience type your previously defined Application ID (in this example it is XONESAMLID)
In Assertion Consumer Service (ACS) URL enter:
https://XoperoONEManagementServiceURL/Auth/AssertionConsumerService
In Single Logout URL enter:
https://XoperoONEManagementServiceURL/auth/SAMLLogoutResponse
Go to SAML Response tab and scroll down to Script to set custom claims section. Enter the following script and press the Save button:
Head over to Permissions tab, click Add button, select all users you want to authorize to use SAML integration, and Save your settings.
Login to your XMS web panel, go to Settings (bottom-left corner in the left-hand side menu) and select External Identity Providers.
Click Add new provider button and fill in the details:
Name: your own custom name, i.e., CyberArk
Entity ID: should be the same name you've set in Application ID in CyberArk (in this example it's XONESAMLID)
Next, paste the previously copied Metadata URL in the Metadata URL field.
Add certificate and password if required.
Set up a default Language and Role for the users with CyberArk SAML authentication permissions.
Click Save to finish the setup. You can now log out and test your configured SAML login integration.
Next, click DOWNLOAD METADATA button under Option 1: Download IdP metadata. Upload the downloaded file to your web server and save its URL (it will be needed later for Xopero ONE configuration).
Click Continue and in the next window screen fill the Service provider details as follows:
ACS URL:
https://XoperoONEManagementServiceURL/Auth/AssertionConsumerService
Entity ID: custom, globally unique name (in this example we'll be using SAMLGOOGLE)
Start URL (optional): your XoperoONEManagementServiceURL
Once done, click Continue and on the next page hit Finish.
Back on the admin console main page, click the burger menu in the top-left corner, go to Apps > Web and mobile apps, then select your newly created SAML app.
Click User access and select either On for everyone or Off for everyone based on your organization's needs.
Once done, hit Save to finish the configuration process.
Login to your XMS web panel, go to Settings (bottom-left corner in the left-hand side menu) and select External Identity Providers.
Click Add new provider button and fill in the details:
Name: your own custom name, i.e., Google
Entity ID: should be the same name you've set in Google (in this example it's SAMLGOOGLE)
Next, paste the previously copied metadata URL in the Metadata URL field.
Add certificate and password if required.
Set up a default Language and Role for the users with Google SAML authentication permissions.
Click Save to finish the setup. You can now log out and test your configured SAML login integration.
Check Manage Single Sign-On (SSO) checkbox and select Configure SSO with SAML option., then hit Next.
In Enter general info set a unique custom application name (in this example we'll be using XONE), type it in Display Label field, and click Save Application.
In your new application settings go to SSO tab and fill the fields as follows:
IdP Entity ID: your unique application name (in this example it's XONE)
SP Entity ID: your unique application name (in this example it's XONE)
Click the Copy Metadata URL button under JumpCloud Metadata at the top and save it for later— it will be needed for Xopero ONE configuration in XMS.
Scroll down, set SAMLSubject NameID to email, and for SAML Subject NameID Format select urn:oasis:names:tc:SAML:1.1:nameid-format:emailAddress from the drop down menu.
In Sign section select Assertion. The IDP URL should read:
https://sso.jumpcloud.com/saml2/xone
In Attributes section add a new logout response by filling the fields as follows:
Service Provider Attribute Name:
https://XoperoONEManagementServiceURL/auth/SAMLLogoutResponse
JumpCloud Attribute Name: select email from the drop-down menu
Click Save to update the connector and move to the User Groups tab. Select the groups/users you want to enable JumpCloud SAML authorization for Xopero ONE login to.
Double-check if the data you entered is correct and save your configuration.
Login to your XMS web panel, go to Settings (bottom-left corner in the left-hand side menu) and select External Identity Providers.
Click Add new provider button and fill in the details:
Name: your own custom name, i.e., JumpCloud
Entity ID: should be the same name you've set in SSO IDP Entity ID in JumpCloud (in this example it's XONE)
Next, paste the previously copied Metadata URL in the Metadata URL field.
Add certificate and password if required.
Set up a default Language and Role for the users with JumpCloud SAML authentication permissions.
Click Save to finish the setup. You can now log out and test your configured SAML login integration.
Hit Create App Integration button and select SAML 2.0.
In General Settings enter a unique application name and move to Configure SAML section.
In Configure SAML tab set the Single sign-on URL parameter as follows:
https://XoperoONEManagementServiceURL/Auth/AssertionConsumerService
In Audience URL type your unique application name that you've previously set in General Settings tab.
Click Show advanced settings and upload the certificate file to Signature Certificate field. Check Allow application to initiate Single Logout checkbox in the Enable Single Logout section— it's necessary.
You will now see two additional fields under Enable Single Logout— fill them as follows:
Single Logout URL:
https://XoperoONEManagementServiceURL/auth/SAMLLogoutResponse
SP Issuer: your unique application name that you've previously set in General Settings tab (in this example it's MyOktaApp)
Next, go to Group Attribute Statements section and fill it as follows:
Name: xoperogroup
Starts with: XONE
Double-check if the data you've entered is correct and click Next. In the next window select I'm an Okta customer adding an internal app option, then hit Finish.
Open the created application and go to Sign On tab.
In SAML Signing Certificates section select your uploaded certificate and click Actions > View IdP metadata. Copy the URL of the opened page— it will be required later in Xopero ONE configuration.
Once done, go to the Assignments tab.
Assign the application to a selected user, or group. Hit Done to finish the configuration.
Login to your XMS web panel, go to Settings (bottom-left corner in the left-hand side menu) and select External Identity Providers.
Click Add new provider button and fill in the details:
Name: your own custom name, i.e., Okta
Entity ID: should be the same name you've set in General Settings in Okta (in this example it's MyOktaApp)
Next, paste the previously copied IdP metadata URL in the Metadata URL field.
Add the required certificate and a password to the Password Manager.
Set up a default Language and Role for the users with Okta SAML authentication permissions.
Click Save to finish the setup. You can now log out and test your configured SAML login integration.
Open the Configuration settings of your custom app, fill the displayed fields as follows and hit Save to save the configuration:
Audience (EntityID): a unique, custom name to identify the app on the IdP side (in this example we'll be using XOPEROSAML)
ACS (Consumer) URL Validator*:
https://XoperoONEManagementServiceURL/Auth/AssertionConsumerService
ACS (Consumer) URL*:
https://XoperoONEManagementServiceURL/Auth/AssertionConsumerService
Single Logout URL:
https://XoperoONEManagementServiceURL/auth/SAMLLogoutResponse
Click the SSO menu option on the left. Change SAML Signature Algorithm to SHA-256. Copy the Issuer URL value and save it for later— it will be needed for Xopero ONE configuration.
Save all your settings. Open Users settings in the left-hand side menu, select user(s) you want to have permission to use OneLogin for Xopero ONE authentication, then in the window that pops-up, check the Allow user to sign in checkbox and hit Save.
In the Applications tab, use the (+) button to add proper permissions to your custom application.
Login to your XMS web panel, go to Settings (bottom-left corner in the left-hand side menu) and select External Identity Providers.
Click Add new provider button and fill in the details:
Name: your own custom name, i.e., OneLogin
Entity ID: should be the same name you've set in Configuration (Audience (EntityID)) in OneLogin (in this example it's XOPEROSAML)
Next, paste the previously copied Issuer URL in the Metadata URL field.
Upload the previously downloaded OneLogin .pfx certificate file and add a password to it if required.
Set up a default Language and Role for the users with OneLogin SAML authentication permissions.
Click Save to finish the setup. You can now log out and test your configured SAML login integration.
Go to User > Roles and create roles you would like to use (i.e., XONE viewers, XONE admins, etc.). Assign these roles to different users.
Next, in Applications tab, edit the SAML application. Go to Parameters and use the (+) icon to create a new parameter. In Name field enter http://schemas.xmlsoap.org/claims/Group. Check both Flags (Include in SAML assertion and Multi-value parameter) and save your settings.
In Default if no value selected section select User Roles and Semicolon Delimited input (Multi-value output) from the drop-down menu, and save the parameter.
In your Xopero ONE console go to ⚙️ Settings > External Identity Providers and select the IdP you want to edit.
Click the Group mapping button in the bottom left. In Claim type field enter http://schemas.xmlsoap.org/claims/Group, and in Claim value field enter the name of the role, e.g., XONE viewers. Select roles and permissions you want this group to have, then save. Repeat this step for each role/permission you want to create.
“callback”: "https://XoperoONEManagementServiceURL/auth/SAMLLogoutResponse"


setFilteredAttributeArray("xoperogroup", LoginUser.RoleNames, "XONE.*");
setFilteredAttributeArray("xoperogroup", LoginUser.GroupNames, "XONE.*");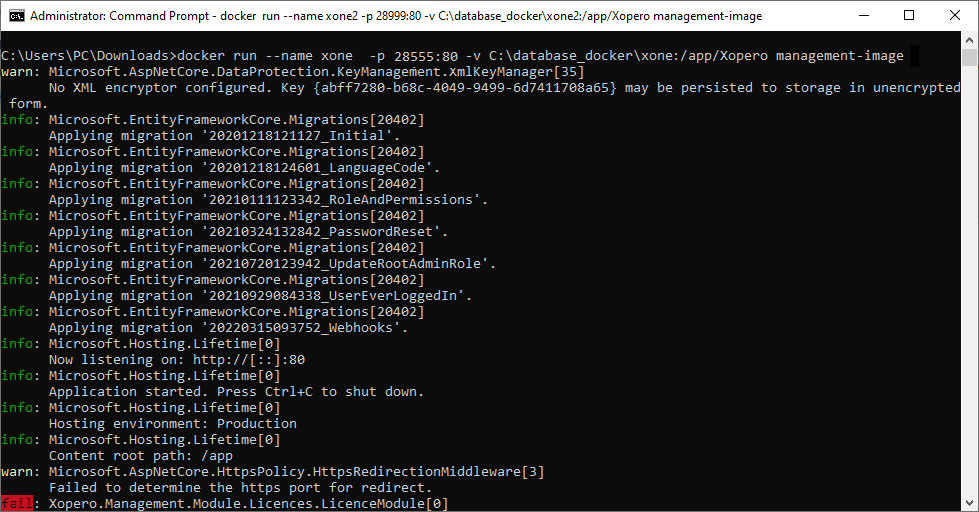


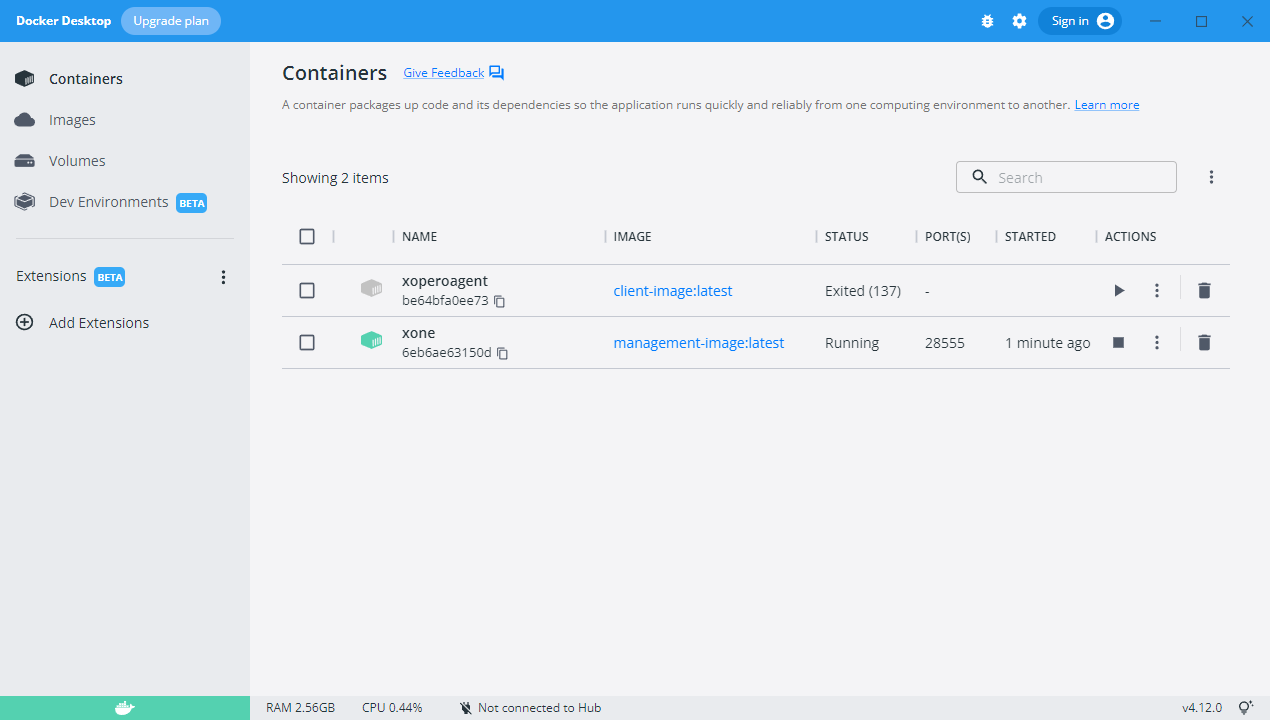
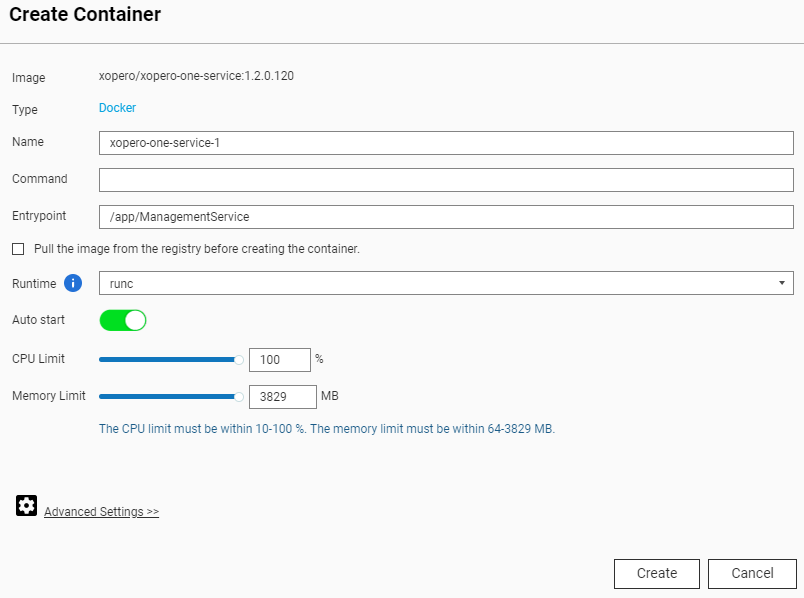
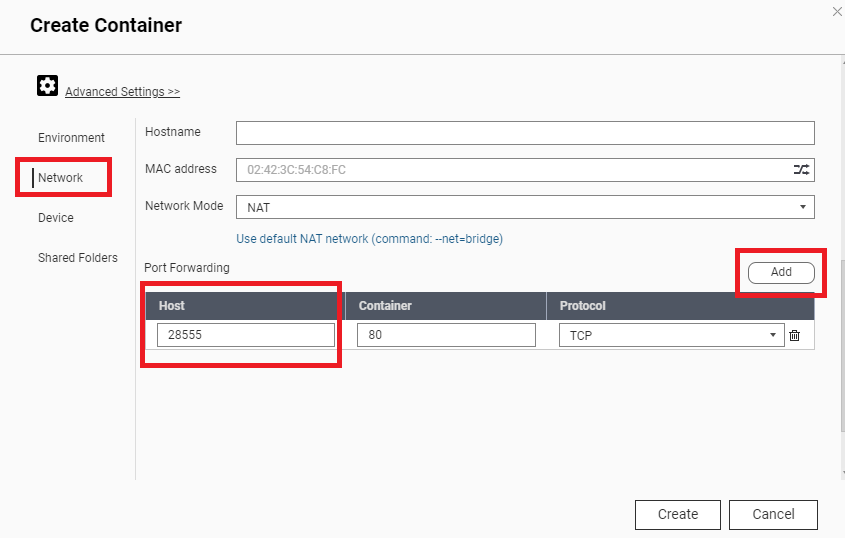
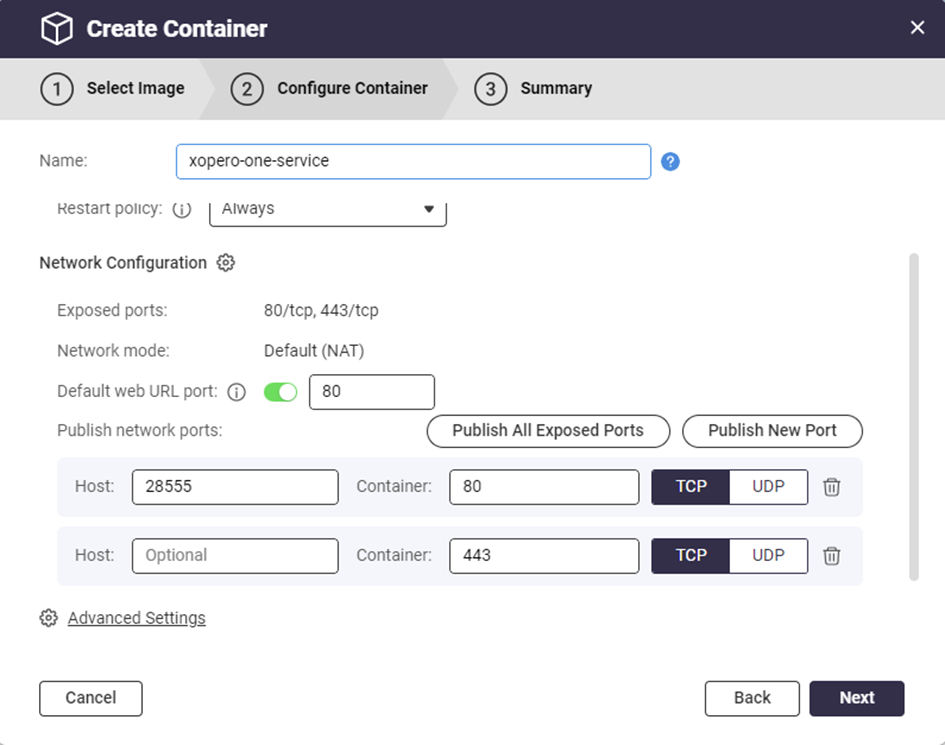
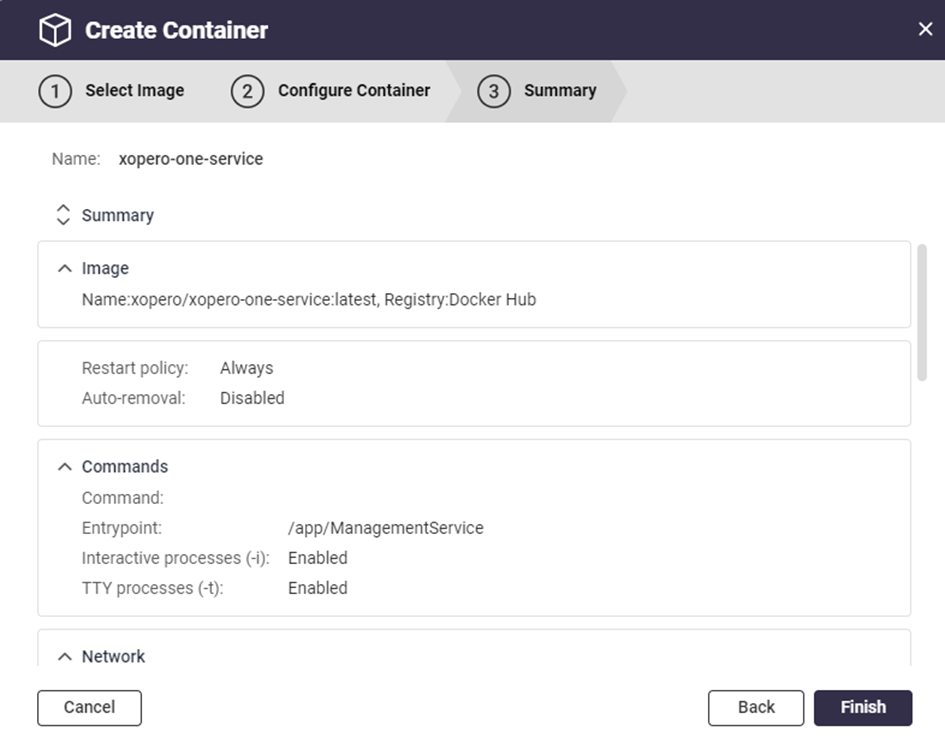
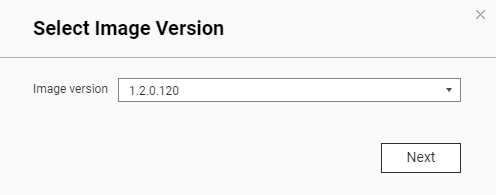
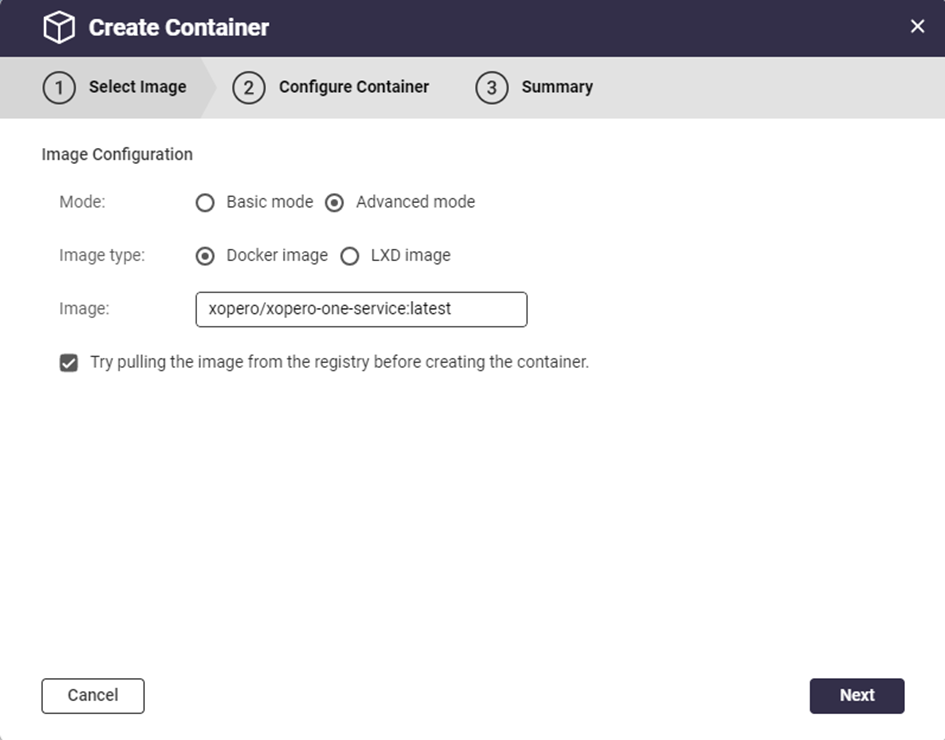
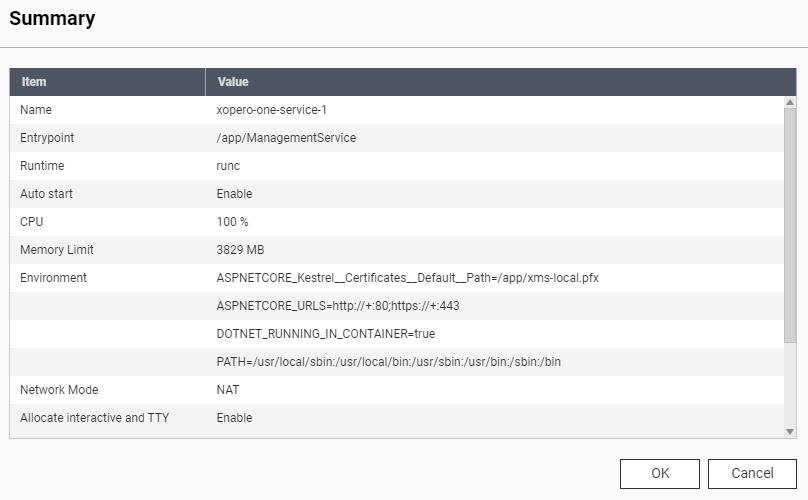
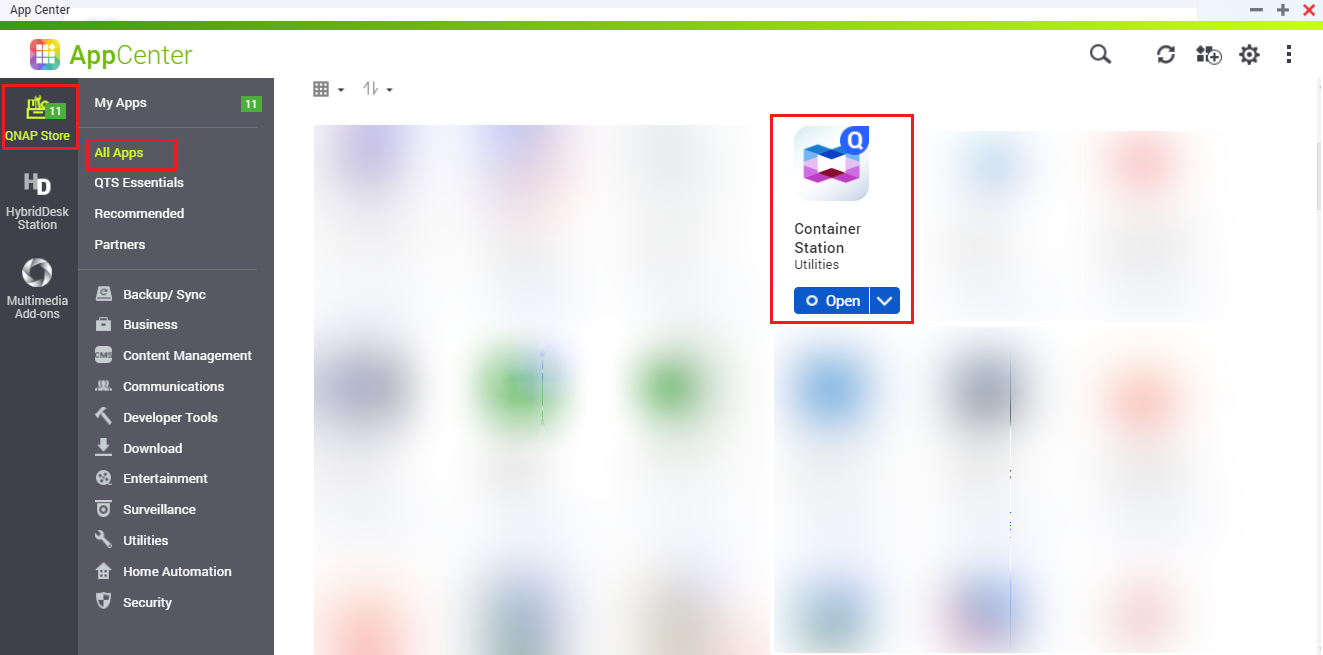
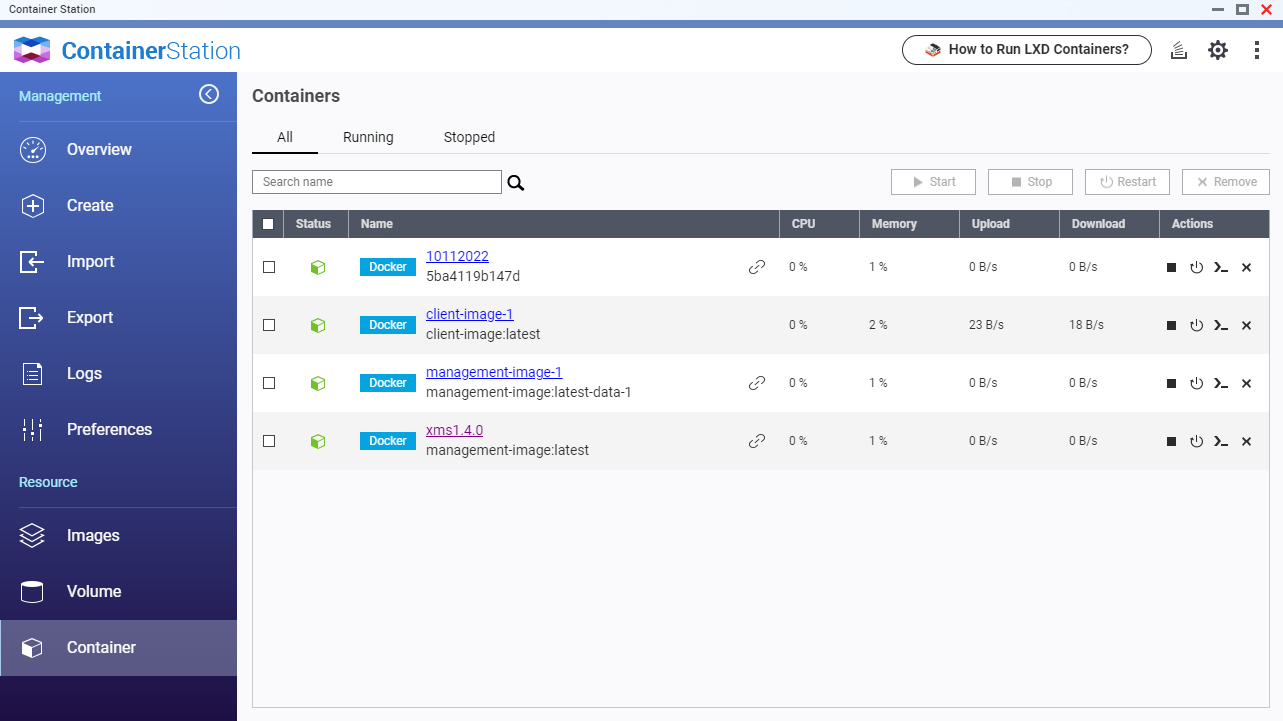
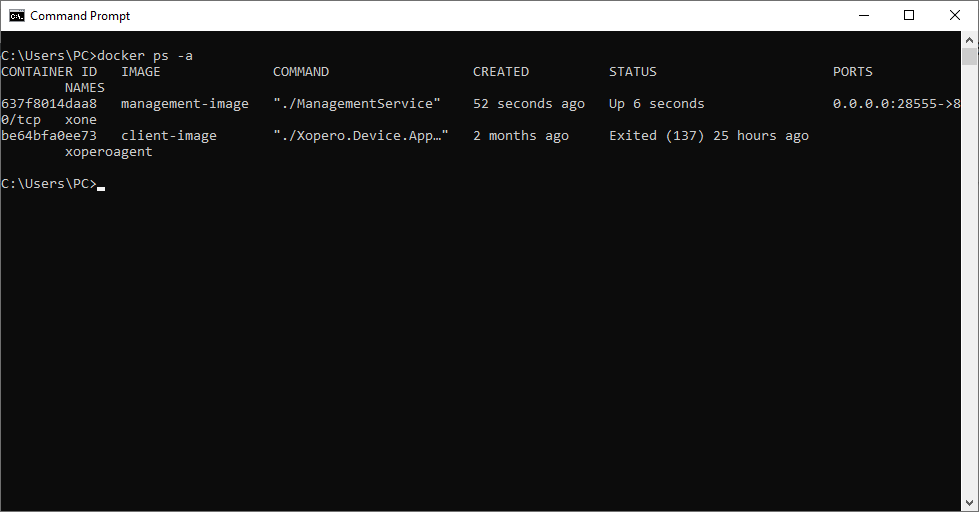
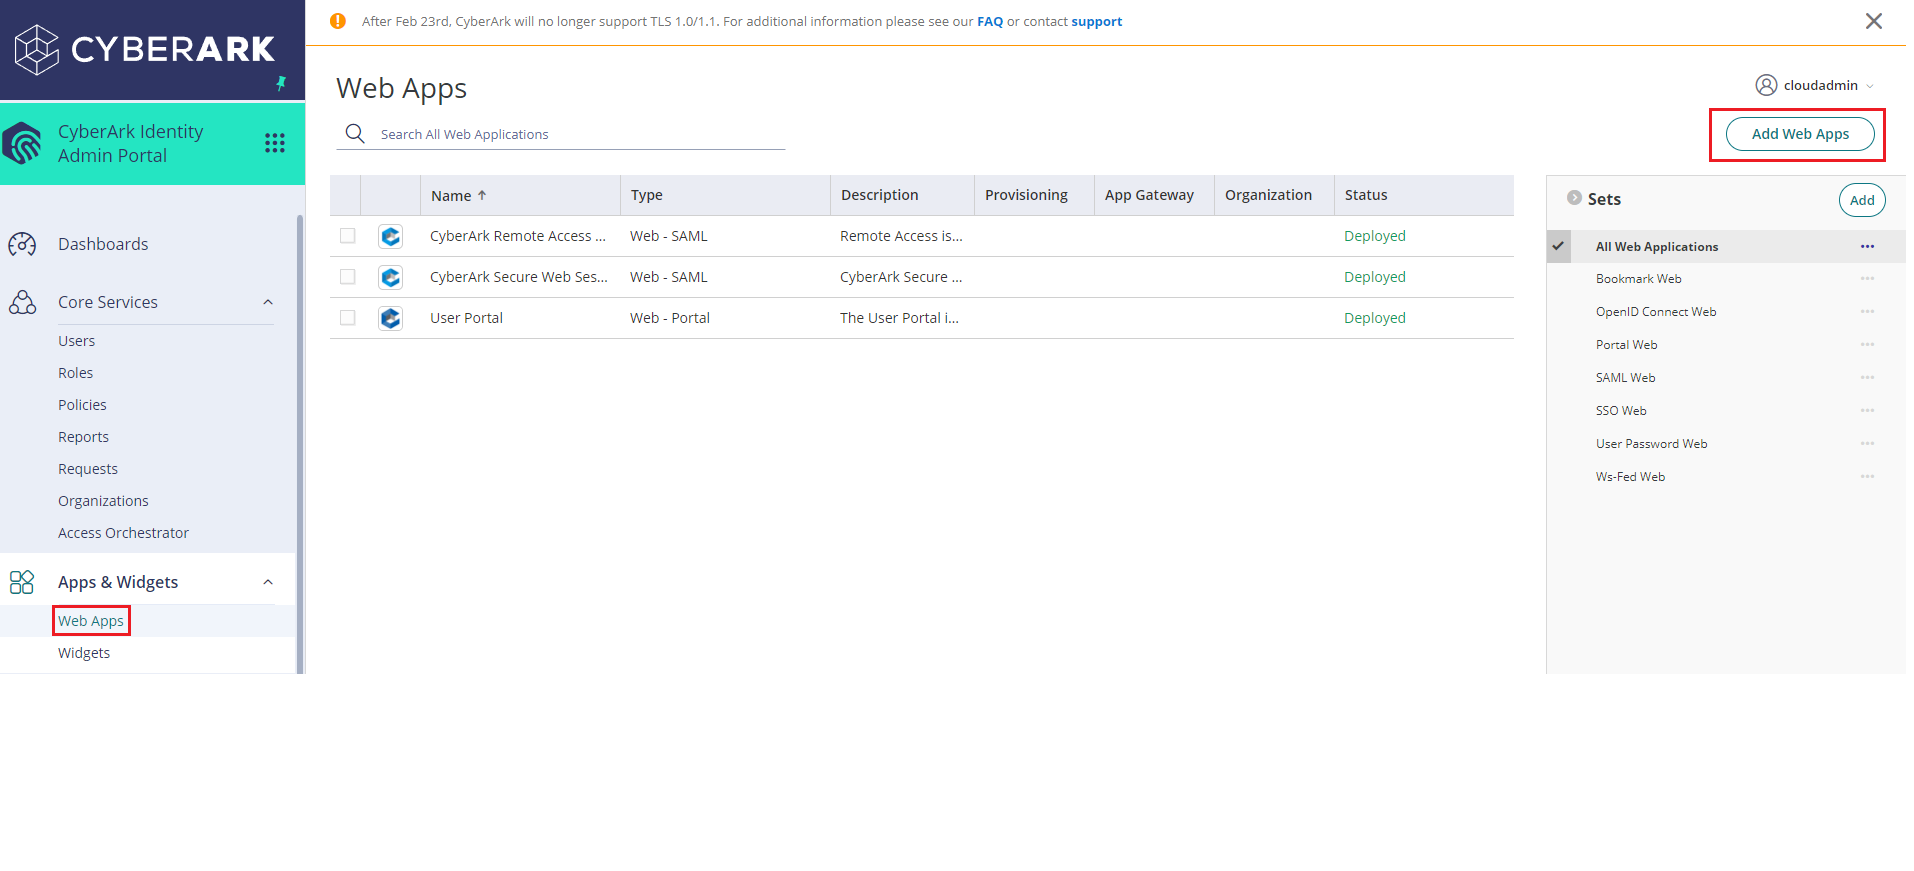
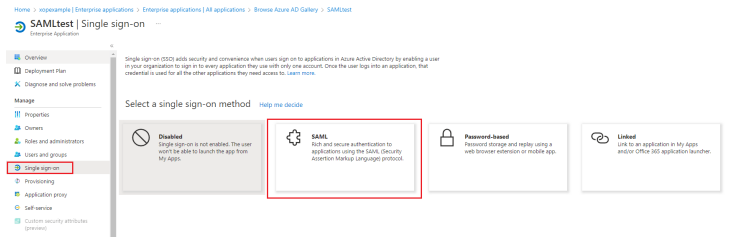
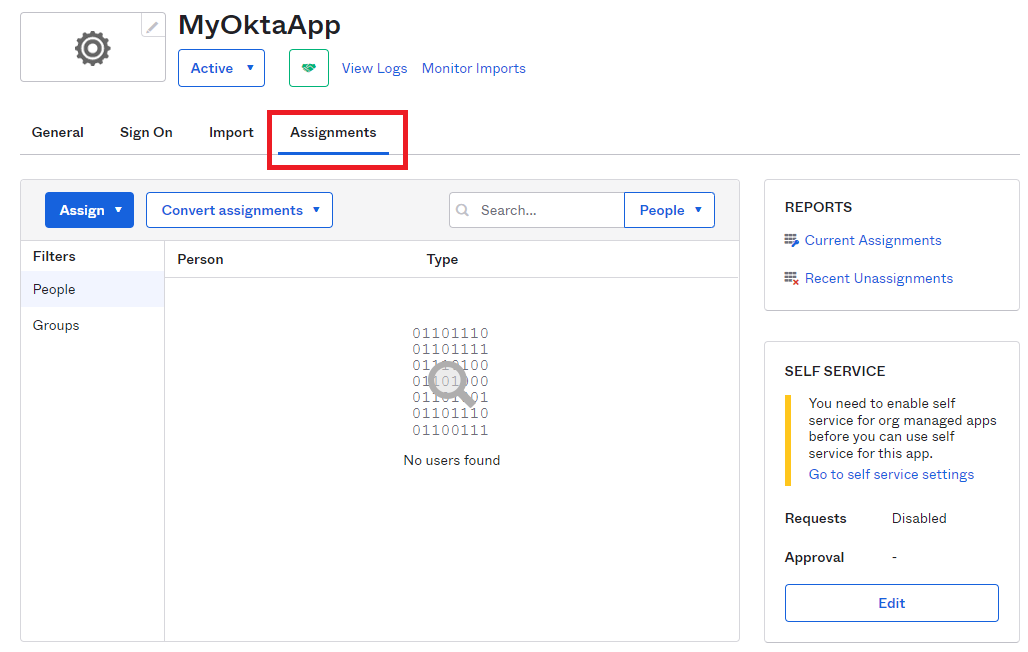
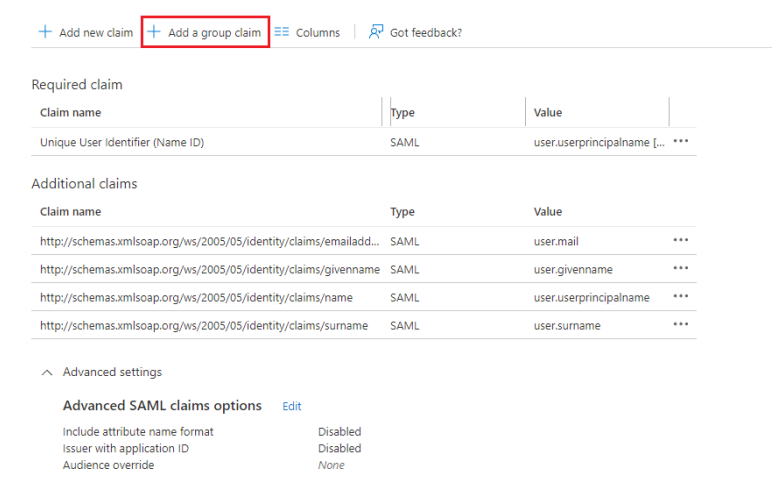
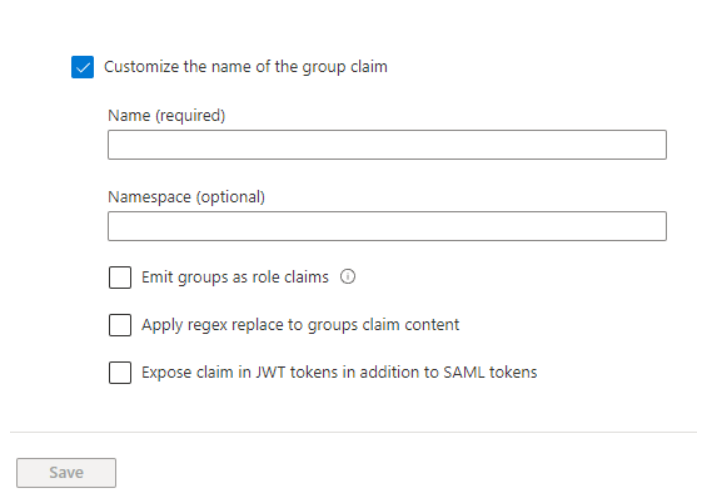
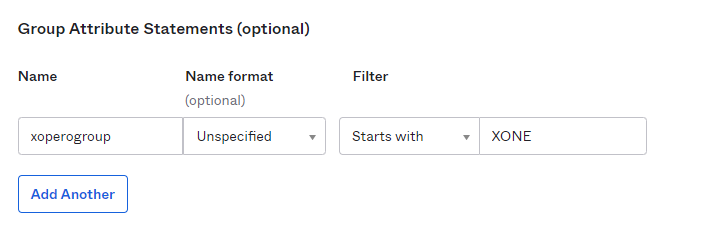
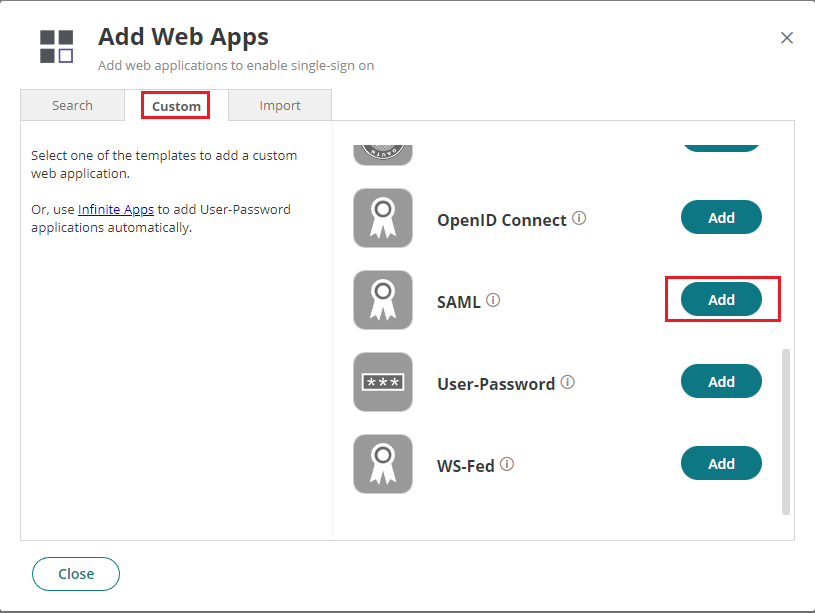
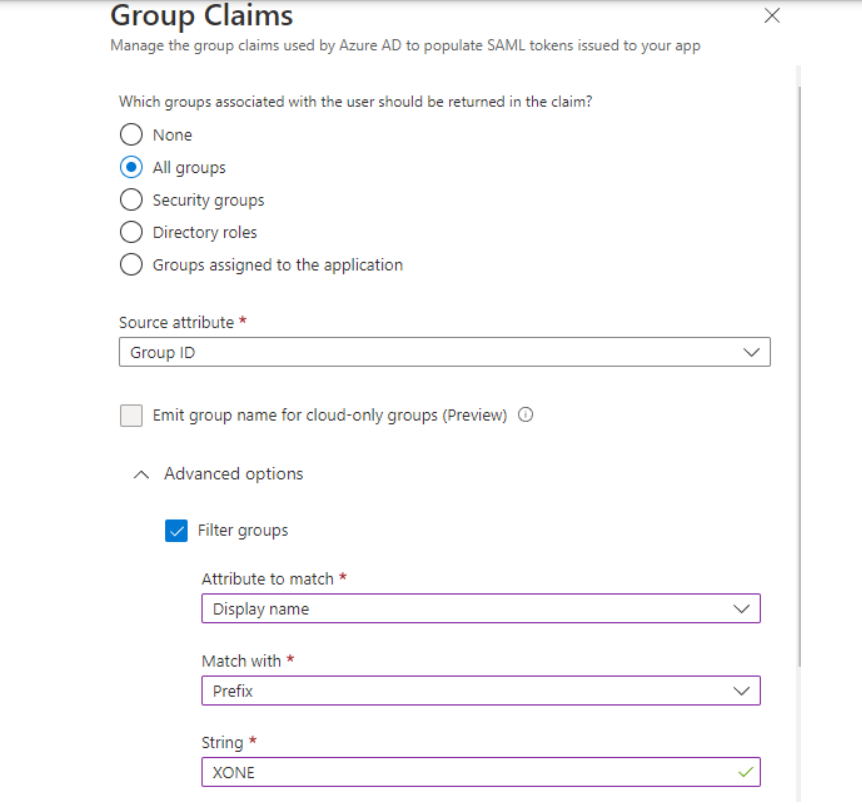
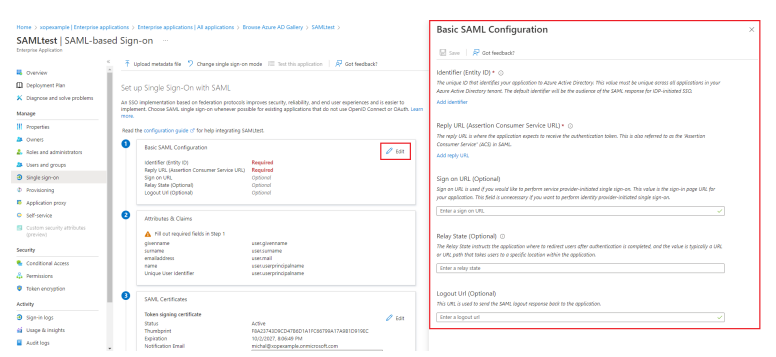
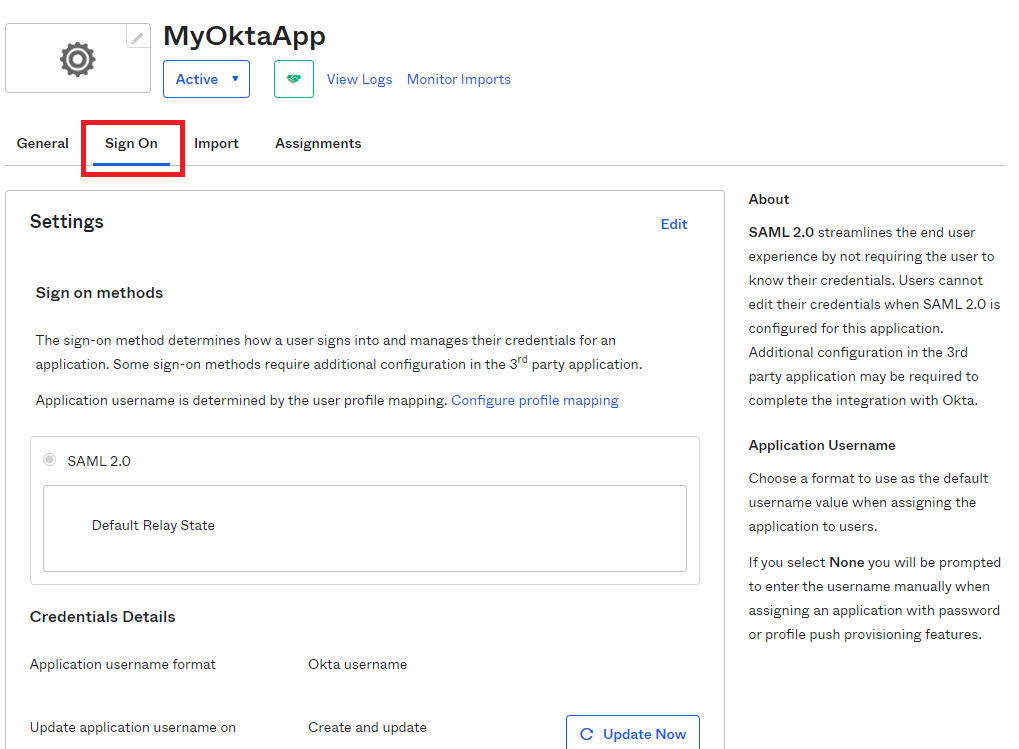
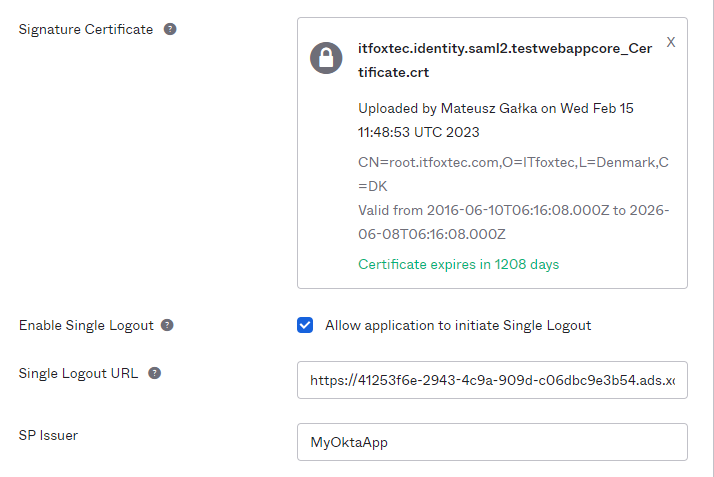
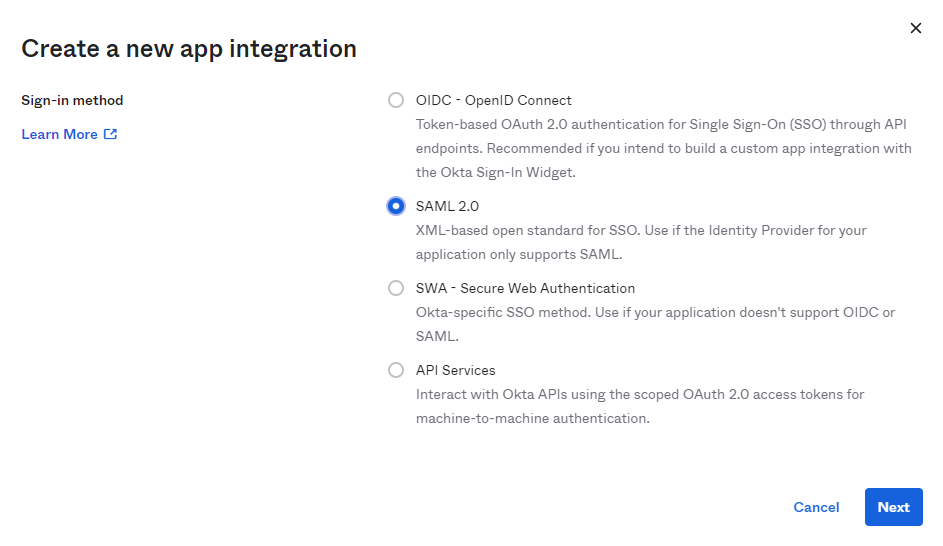
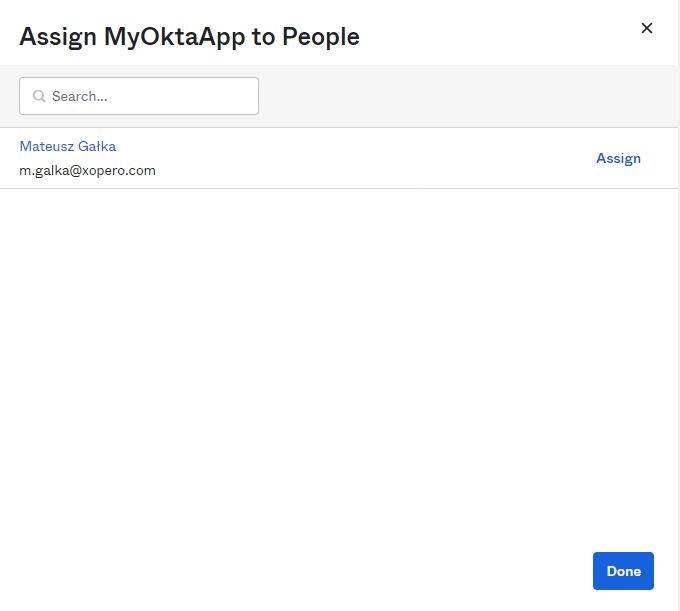

This article explains how to add a VMware ESXi or vCenter server to Xopero ONE.
Log in to XMS, open the Virtual Machines tab on the left side of the window, and select VMware from the list.
Click the Connect button under vSphere/ESX.
Provide the IP address or name of your VMware server, enter a username, and add or select a password from the Password Manager.
Select the default VMware agent—the device that can communicate with VMware and will handle adding it to Xopero ONE.
Specify the frequency at which the VMware server should refresh.
After completing the form, click Next to proceed. Once these steps are complete, you can start planning your VMware backup strategy.


This article provides information about file-level backup in Xopero ONE.
Log in to Xopero ONE Management Service, go to the Backup tab (Plans > Backup) and click the + Add plan button in the top toolbar.
Select Devices from the platforms list.
In the next aside, select Files & folders option and choose one or more devices for the plan to apply to (you can also select the plan to include all activated devices).
Define the name of the backup plan.
In the Data to protect section, select the data you want to include in the backup plan:
Global rules allow you to define locations that will apply to all selected devices. This method offers three options to choose from:
Path — allows you to manually enter the file or folder path.
When creating a backup plan, you can use filters to gain better control over the files being backed up.
Specify the backup location by choosing from the available storage options within your service.
Configure the by defining when backups should run and which types of backup copies to use.
Go to the Advanced settings section to customize additional options, including encryption, compression levels, and bandwidth limit. These settings provide greater flexibility and help optimize the backup process.
After completing the configuration, click the Save button. The protection plan will then automatically begin protecting your devices according to the schedule you defined.
USERPROFILE, ALLUSERSPROFILE, or SystemRoot.
‼️When specifying a variable in Xopero ONE, percent signs % must be omitted.
Xopero variable — provides a predefined list of variables such as SYSTEM_DISK, ALL_DISKS, and HOMES.
Select from device — this method allows you to choose paths individually for each device by connecting remotely to its file system.


This article provides general information about data protection planning.
To protect your workstations and servers, you can use one of three main types of backups:
File-level — saves individual files and directories.
Image-level — protects the entire physical disk.
Databases — backs up your databases.
Similarly to backup types, Xopero ONE offers three methods to restore your data:
File-level backup — allows you to restore files directly from your storage. It can also be used to restore databases protected with file-level backup.
Image-level backup — enables restoring an entire disk, individual files from the backup, or the disk as an image file. You can also use BMR (bare-metal recovery) technology to recover data, allowing restoration between physical devices.
Database recovery — includes methods for restoring previously backed-up databases.
Test the Xopero ONE system to determine when backups are performed and choose the best backup schedule. For example, you can schedule backups to run after working hours and enable automatic device shutdown after the backup in the plan settings.
The backup process typically uses the VSS service and device resources. To reduce resource usage, you don’t need to create multiple backup plans for different storages — instead, you can create a replication plan to copy data to another storage.
This article explains how to configure the Microsoft SQL database environment using Xopero ONE.
The Microsoft SQL database backup process in Xopero ONE consists of two steps:
Creating a database dump using backup scripts.
Backing up the database dump.
The first step is performed through Xopero ONE using the backup scripts feature. The second step is a standard file-level or image-level backup executed directly by Xopero ONE
Worker can manage storage, perform and restore backups; it can be combined with a dedicated Microsoft 365, GitProtect, or Jira license, but it cannot back up its own device.
Installing a worker in your local environment can be crucial and essential in many scenarios. The backup agent is the only component that directly handles data during its transfer to storage.
Using a local worker helps comply with internal policies by keeping data internal and secure. It also allows direct backups to your local infrastructure, which the SaaS agent () does not have access to.
In Xopero ONE Management Service (XMS) go to the Settings
Log in to XMS, go to the Backup tab (Plans > Backup) and click the + Add plan button in the top toolbar.
Select Devices from the platforms list.
In the next aside, select one of the available options and choose one or more devices for the plan to apply to (you can also select the plan to include all activated devices).
Define the name of the backup plan.
Configure your backup plan according to your needs (more information about the backup plan setup can be found in and articles).
Go to the Advanced settings section and click Edit to customize additional options.
Scroll down to the Backup scripts section and click the Pre-task script toggle to turn it on.
Select the script dedicated to backing up the Microsoft SQL database environment (Windows).
Type your database username into the Database user field.
Choose the user password by opening the Password Manager, where you can either add a new password or select an existing one.
Set up the script arguments — it should be entered in the Script arguments field as follows:
copy_type — defines the type of copy to be performed. You can choose one of three options: full_only, full_diff, or copy_only:
You can enable the two additional options using the checkboxes:
Wait for the script to continue the task — the application will wait until the dump is ready.
Fail the task if the script fails — if the script fails, the system will notify you of the backup error.
Double-check your settings and click Save to close the Advanced settings aside.
After completing the configuration, click the Save button. The protection plan will then automatically begin protecting your devices and databases according to the schedule you defined.
That’s all you need to do to create the database dump — this file should now be included in the Data to protect section if you are performing a file-level backup (to back up only the database). Alternatively, you can run an image-level backup to protect the entire drive.
Choose your installer based on the system you want to install the worker on.
After downloading the installer, install the agent on your device — you can use the installation guides for different types of operating systems listed in Xopero ONE agent menu under DEPLOYMENT & CONFIGURATION section.
Learn how to create a disk image backup with Xopero Sphere Recovery Drive.
Creating a disk backup with the Xopero Sphere Recovery Drive enables full data protection for ICS/OT systems, such as Windows Embedded, as well as various Windows and Linux versions. Image-level backups capture the entire structure of a selected drive, supporting comprehensive recovery scenarios such as bare-metal restore, disaster recovery, and system migration across different hardware environments.
The following steps demonstrate how to create a disk backup using the Xopero ONE Standalone Agent.
Start the computer using the Xopero Sphere Recovery Drive (you may need to change the boot order in the BIOS/UEFI settings to select the USB device as the primary boot option) and follow the on-screen instructions.
Once the Xopero Sphere Recovery Drive startup window loads, select Xopero and then choose Xopero ONE Standalone Agent.
In the Xopero ONE Standalone Agent backup wizard, select Protect disk and click Next.
Specify the location where the backup will be stored. Select the dedicated backup directory created earlier, and click Next.
The wizard will display the available disks on the connected computer. Select the disk you want to back up, then click Next.
Configure the backup settings.
Next, depending on your encryption settings:
Review your configuration and click Run backup to start the backup process.
Review your configuration and click Next to proceed.
Once the backup is complete, a confirmation message will appear. You can then close the Xopero ONE Standalone Agent, shut down the system, and remove the Xopero Sphere Recovery Drive from your device.
Restore data using bare-metal recovery (BMR), iSCSI target mounting, or file image exports.
Perform targeted granular recovery to restore individual files and folders without conducting a full system rollback.
Restore the entire system from an image-level backup copy.

full_only — always performs a full copy.
full_diff — performs differential copies with periodic full copies.
copy_only — creates a full database copy without affecting the regular backup cycle.
server_name — the name of the Microsoft SQL server along with its instance.
output_dir — the directory where database dumps will be saved. This directory must also be selected as the location to back up.
database1 database2 (...) — names of databases to be backed up, separated by spaces. You can leave this parameter empty — if no database is specified, Xopero ONE will automatically back up all databases from the server specified in the database access parameters.


copy_type server_name "output_dir" database1 database2 ... databaseNfull_diff WINSRV-2019\SQLEXPRESS "C:\MsSQLDumps" database1 database2In Encryption settings window, enter the encryption key and select the key length from the drop-down menu. Then, click Run backup to continue.
Ensure that you have saved the encryption key in a secure location. In the warning dialog box, select the I understand and have saved my key checkbox, and then click OK.
In the next warning dialog box, review the message, select the I understand checkbox, and click OK to start the backup process.


How to sign up for a free Xopero ONE account in an on-premises management service deployment.


Learn how to register for a free Xopero ONE account with the Xopero ONE Management Service on-premises software.
Login to Xopero ONE Management Service (XMS) using a web browser, then go Settings > Advanced > Workers and click the Download agent button.
The Download agent window will open— scroll down to the Server section and click Windows Server > button.
Select WS 2012 or WS 2008 R2 to download a dedicated installer.
The download will start automatically; additionally, an Installation tab with a step-by-step installation instruction will pop-up in XMS.
Under the Install section you will see the address combined a port — save it for later as you will have to use it during agent installation.
Once the installation wizard is downloaded, you can move to the installation process.
Open and run the downloaded setup wizard. Click Next to begin the installation process.
Read and accept the End-User License Agreement, then move to the next step.
Choose the installation directory for the Xopero ONE client.
Paste the previously copied address to the Address field and hit Next to continue.
Click Install to start the installation.
Once the wizard finishes installation, click the Finish button to close it.
You can now activate your device in Xopero ONE Management Service.
Login to Xopero ONE Management Service (XMS) using a web browser, then go Settings > Advanced > Workers and click the Download agent button.
The Download agent window will open— scroll down to the Server section and click Windows Server > button.
Open Active Directory and create a new Organizational Unit on the domain controller under the Active Directory Users and Computers catalog.
Enter a custom name for the Organizational Unit and click OK to confirm.
To learn how to activate the agent in the Xopero management console, check the Useful links and items section.
Select WS 2012 R2 OR NEWER to download a dedicated installer.
The download will start automatically; additionally, an Installation tab with a step-by-step installation instruction will pop-up in XMS.
Under the Install section you will see the address combined a port— save it for later as you will have to use it during agent installation.
Open and run the downloaded setup wizard. Click Next to begin the installation process.
Read and accept the End-User License Agreement, then move to the next step.
Choose the installation directory for the Xopero ONE client.
Paste the previously copied address to the Address field and hit Next to continue.
Click Install to start the installation.
Once the wizard finishes installation, click the Finish button to close it.
You can now activate your device in Xopero ONE Management Service.
Create a folder that will be available on your network to all computers that are to be covered by the installation policy of the Xopero ONE agent, and place the .msi installer in it.
Change access permissions of the folder created in the previous step. Right-click the folder and select Properties, then go to Sharing tab and click the Advanced Sharing button.
Make sure the ✅Share this folder checkbox is checked and click Apply to save your settings.
Next, click the Permissions button under the Comments field and change user permissions for the folder.
For domain adminstrators: Full Control For authenticated users: Read
Open the Group Policy Management (GPO) window, find the OU created in step 1, right-click it, and select the Create a GPO in this domain, and Link it here... option from the drop-down menu.
Enter a custom name for your new group object and click OK.
Right-click the newly created rule and select Edit... from the drop-down menu.
Expand Computer Configuration > Policies > Software Settings > Software Installation tabs. Inside Software Installation, right-click anywhere on the right side of the window and select New > Package... from the dropdown.
Find the shared directory in which you've placed the .msi installer in, then select and open it.
In Deploy Software window select the Advanced deployment method and click OK.
In Xopero ONE Backup&Recovery Agent Properties window, switch to Modifications tab.
Create an .mst file containing additional configuration for the installer — you can use Orca software available as part of the Windows SDK:
1️⃣ Run Orca, go to File > Open, then find and select the Xopero ONE agent .msi installer.
2️⃣ Click Transform and select New Transform from the context menu. Find the Property table and double-click the MANAGEMENT_URL row to edit it — change its value to your XMS IP address (in XMSIPaddress:port format, i.e., https://123.4.5.6:28555).
3️⃣ Additional parameters that can be edited are:
APPDIR — Xopero ONE agent installation path
4️⃣ Next, click Transform > Generate transform and save the .mst file in the previously created shared directory.
Back to Xopero ONE Backup&Recovery Agent Properties window, click Add... and specify the path to the .mst file corresponding to the XMS address (parameter for the MSI installer). Once done, click OK to confirm the changes and close the window.
Once the GPO responsible for MSI installer distribution and deployment is successfully created, you can implement it on user computers covered by this policy in Active Directory— simply run CMD and use the following command:
After restarting the updated station, the Xopero ONE agent will be automatically installed with the parameter corresponding to the XMS address.
gpupdate /force


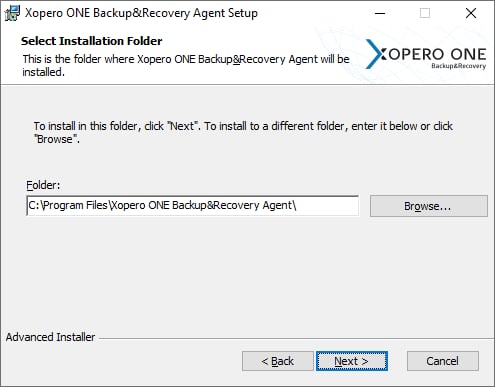
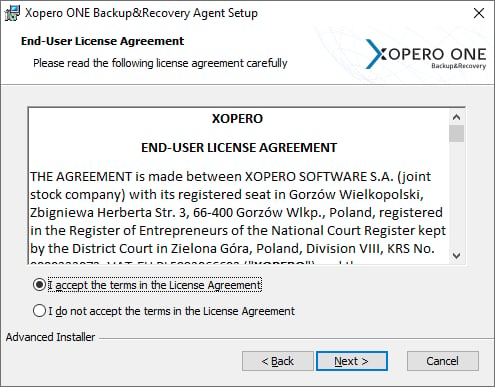
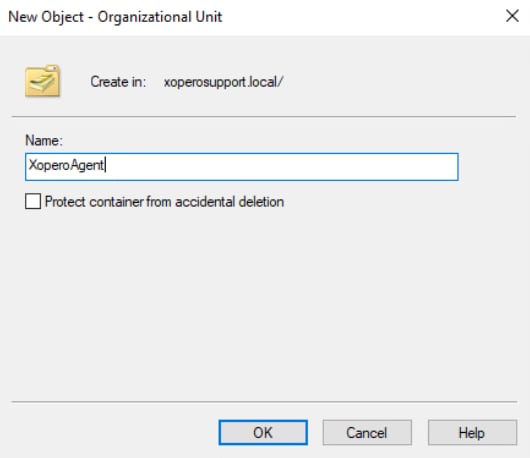
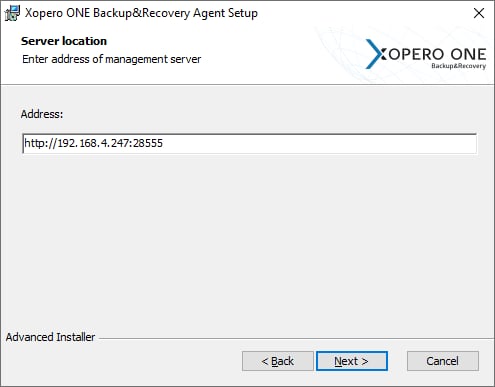

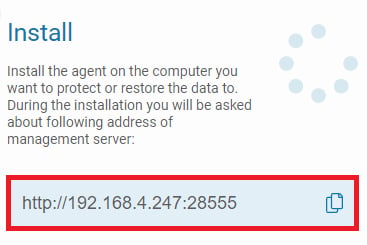
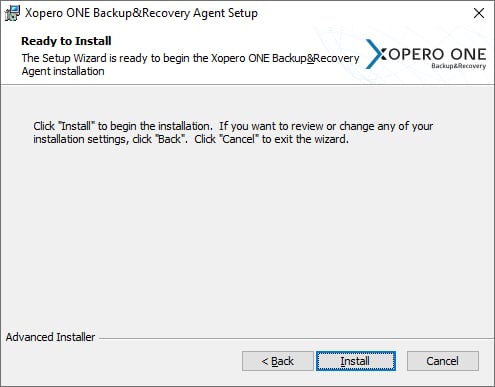
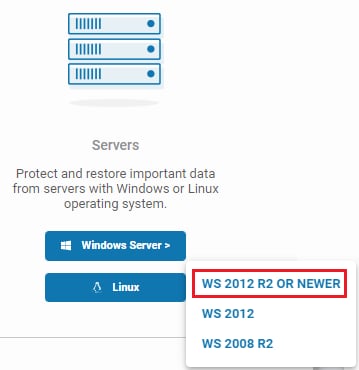
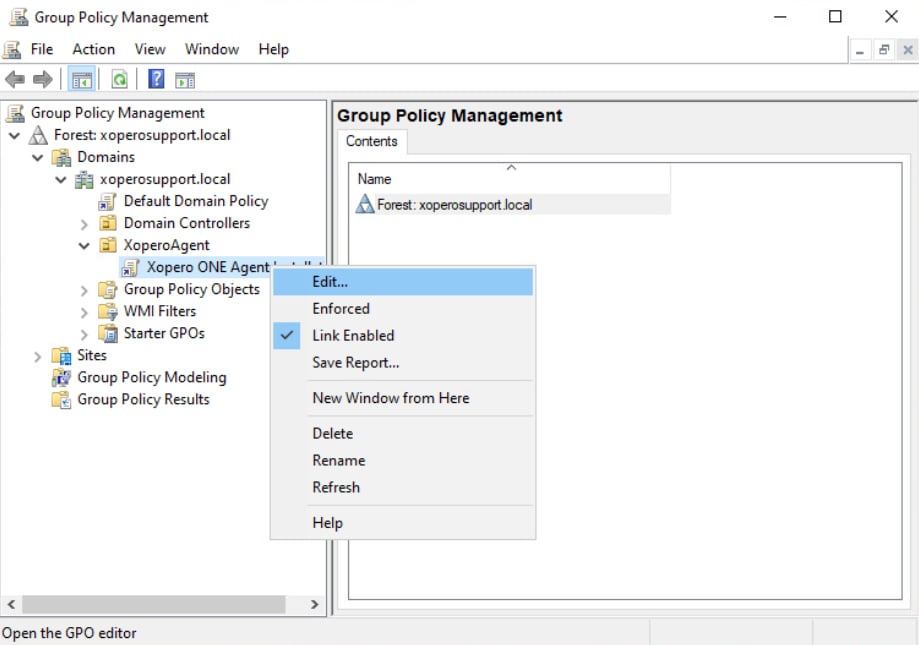
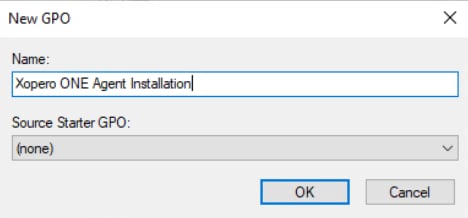

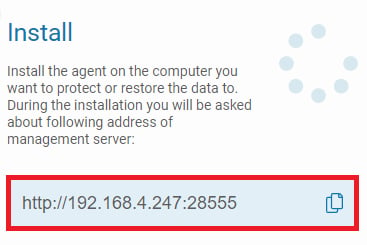
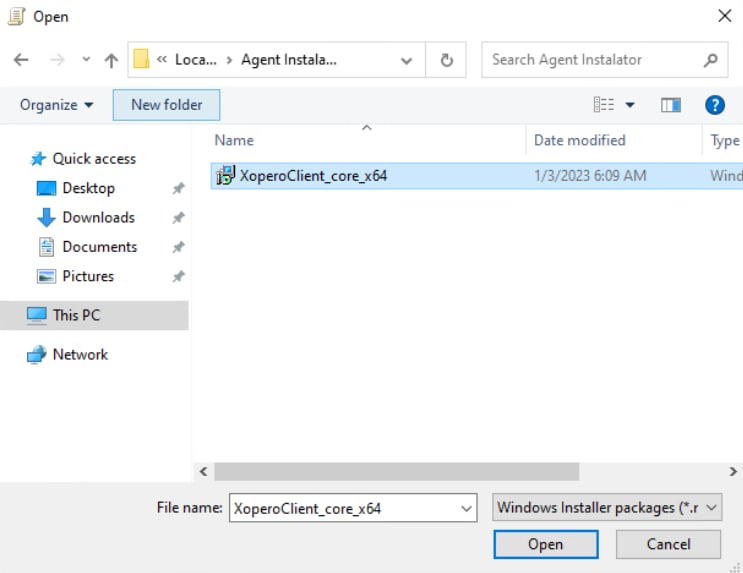
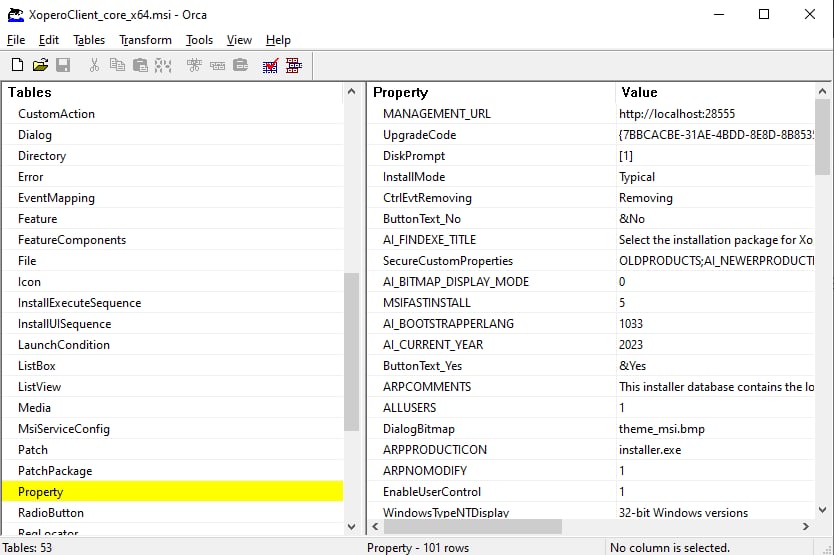
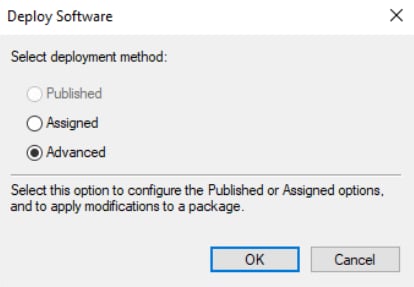
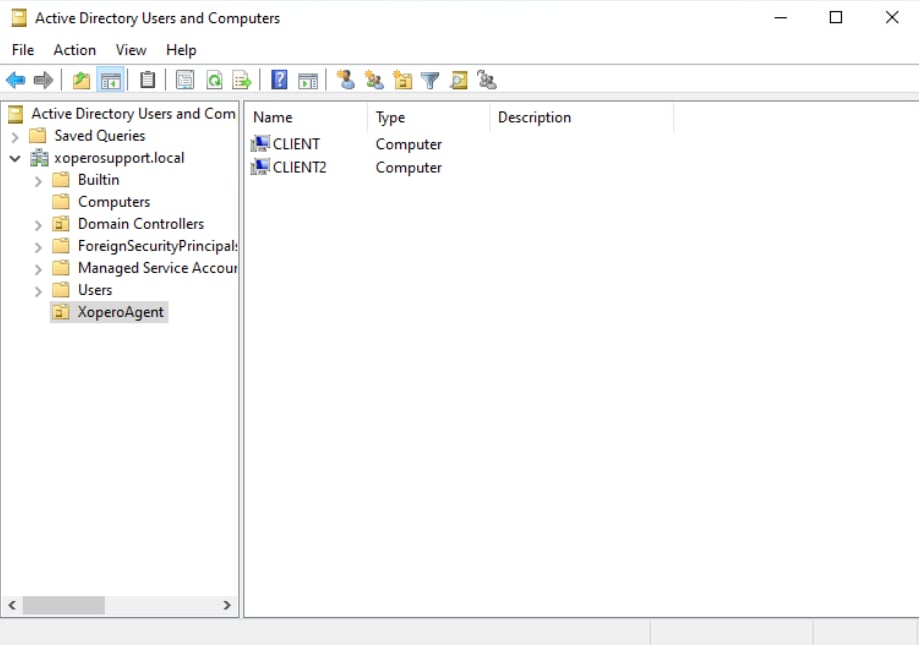
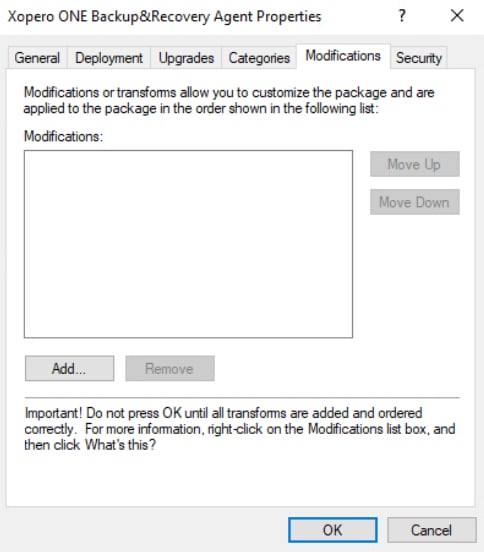
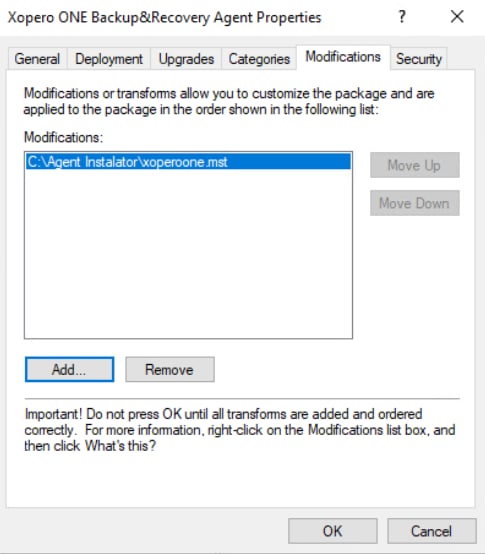
Overview of the Xopero Unified Protection storage architecture, including the technologies used, configuration options, and data retention mechanisms.
Xopero Unified Protection (XUP) implements a multi-layered data immutability architecture to mitigate the impact of ransomware attacks and reduce the risk of threat propagation within the storage infrastructure.
The Xopero ONE system compresses and encrypts data, storing it in non-executable formats. The solution uses immutable storage compliant with the WORM standard, preventing accidental or intentional encryption, modification, or deletion of backup data. Authentication mechanisms restrict access to the storage, ensuring that ransomware cannot access stored data, even if the source machine is compromised.
The AirGap data protection method, based on xSAIR (Secure AirGap Immutable Repository) technology, provides an additional layer of security by isolating data within a demilitarized zone (DMZ) and enabling replication to the isolated environment (an additional XUP appliance). As part of Xopero Unified Protection, the AirGap solution helps ensure resilient, threat-resistant data storage systems.
To ensure the highest level of security, XUP data storage uses advanced protection rules to prevent unauthorized or accidental data deletion. It is based on two key mechanisms: versioning and compliance.
The versioning feature is configured with a 7-day retention period — each modification or overwrite attempt creates a new data iteration, while previous versions are retained for one week. This allows users to restore data from any backup point within that period.
An additional layer of protection is based on the compliance mechanism, configured with a 24-hour retention window. In this mode:
Data can be deleted only after the minimum retention period of 7 days has elapsed.
After this period, an additional 24-hour buffer is activated, preventing final data deletion.
During the compliance lock period, no user (including the root administrator) can delete protected data earlier.
The combination of these mechanisms creates an effective security barrier that significantly extends the time required to execute a destructive attack on the data.
This article describes how to change the temporary folder used for database backup dumps.
When creating a backup plan, in the Data to protect section, select the folder where database dumps will be stored. You can choose either Select from device or Select path or variable — switch between these options by clicking on the text in the list.
Create a new temporary folder.
Go to the Plans tab and edit the plan you want to change or create a new one.
In the Data to protect section, uncheck the old folder and select the new one (if you're creating a new plan, simply select the newly created temporary folder from the list).
Next, go to Advanced settings, then Backup scripts, and update the script arguments to the new database dump location.
Save the changes.
How to restore a disk image from backup using Xopero Sphere Recovery Drive.
Xopero Sphere Recovery Drive enables bare-metal restoration of entire disks from previously created backups, allowing systems to be recovered to a fully operational state after hardware failure, data corruption, or system loss.
The following steps demonstrate how to restore a disk from a backup copy using the Xopero ONE Standalone Agent.
Start the computer using the Xopero Sphere Recovery Drive (you may need to change the boot order in the BIOS/UEFI settings to select the USB device as the primary boot option) and follow the on-screen instructions.
Once the Xopero Sphere Recovery Drive startup window loads, select Xopero and then choose Xopero ONE Standalone Agent.
In the Xopero ONE Standalone Agent backup wizard, select Restore disk and click Next.
Select the backup storage directory and click Next.
Select the specific backup copy to restore, then click Next.
Select the disk you want to restore from the backup copy.
The wizard will display the available disks on the connected computer. Select the target disk for the restoration.
In Restore settings, you can choose to reset system drivers. If the backup is encrypted, enter the encryption key.
Review your configuration and click Run restore to start the recovery process.
Once the restore is complete, a confirmation message will appear. You can then close the Xopero ONE Standalone Agent, shut down the system, and remove the Xopero Sphere Recovery Drive from your device.


