Installation within a Docker container
This article describes the process of Xopero ONE Management Service (XMS) installation within Docker container for on-premise deployment model.
Deployment
Download Xopero ONE Management Service (XMS) Docker image to your device. Next, open cmd console and pull XMS Docker image using the following command:
docker load -i docker_name.tarReplace docker_name.tar with the name of your XMS Docker image file.
Once the Docker image is imported, use the following command to create a container:
docker run -d \
  --name <container_name> \
  -p <xms_port>:80 \
  -v <database_location_outside_container>:/app/Xopero \
xopero/xopero-one-serviceIn the above command, replace drive_location_database with the location to mount the database on (from the container to the local directory) — this is important for upgrading the container later. In place of container_name, enter the name of your container and in place of service_port, enter the service port which will be used by Xopero ONE (by default, XMS port is set to 28555).
docker run -d \
  --name xone \
  -p 28555:80 \
  -v C:\database_docker\xone:/app/Xopero \
  xopero/xopero-one-service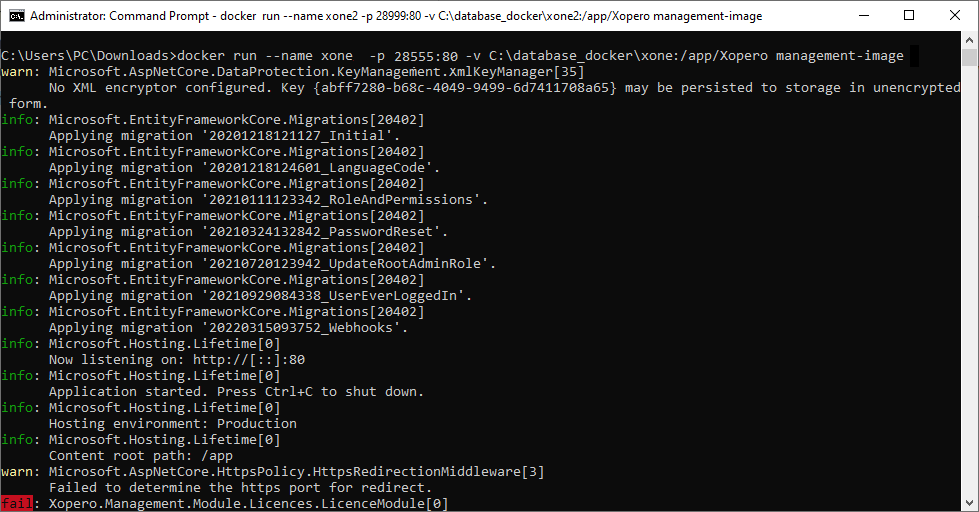
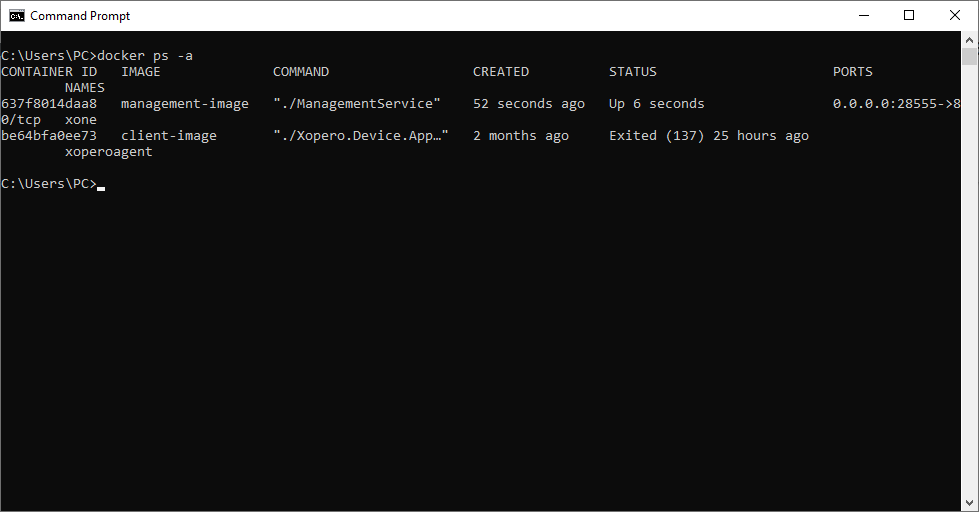
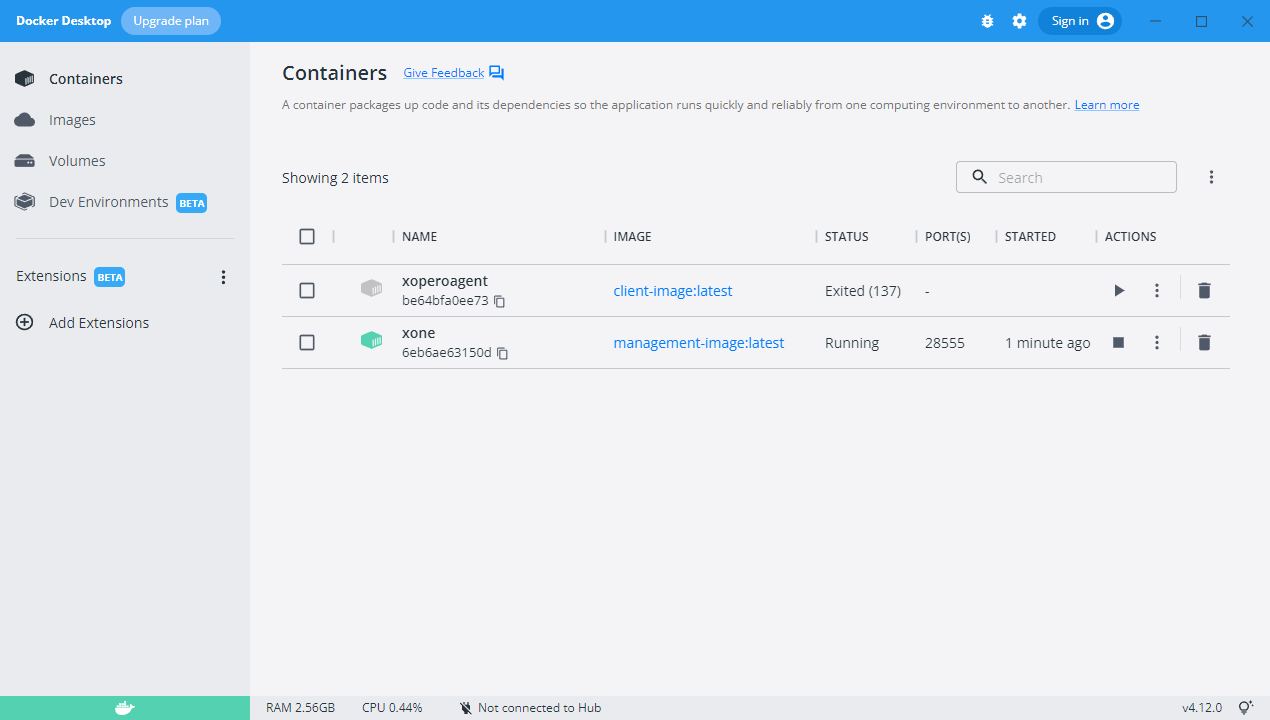
Next, use the following command to view the list of containers (or view the list in Docker Desktop):
If you see no errors, that means the XMS implementation was done correctly. You can open the Xopero ONE Management Service web panel using the following address:
Before you start using XMS you must create an administrator account and assign a license to your unit.

Prerequisites Environment setup Deployment
Prerequisites
QNAP with:
x86 or x64 CPU (ARM is not supported)
minimum 2GB of RAM
Container Station app from the App Center
Environment setup
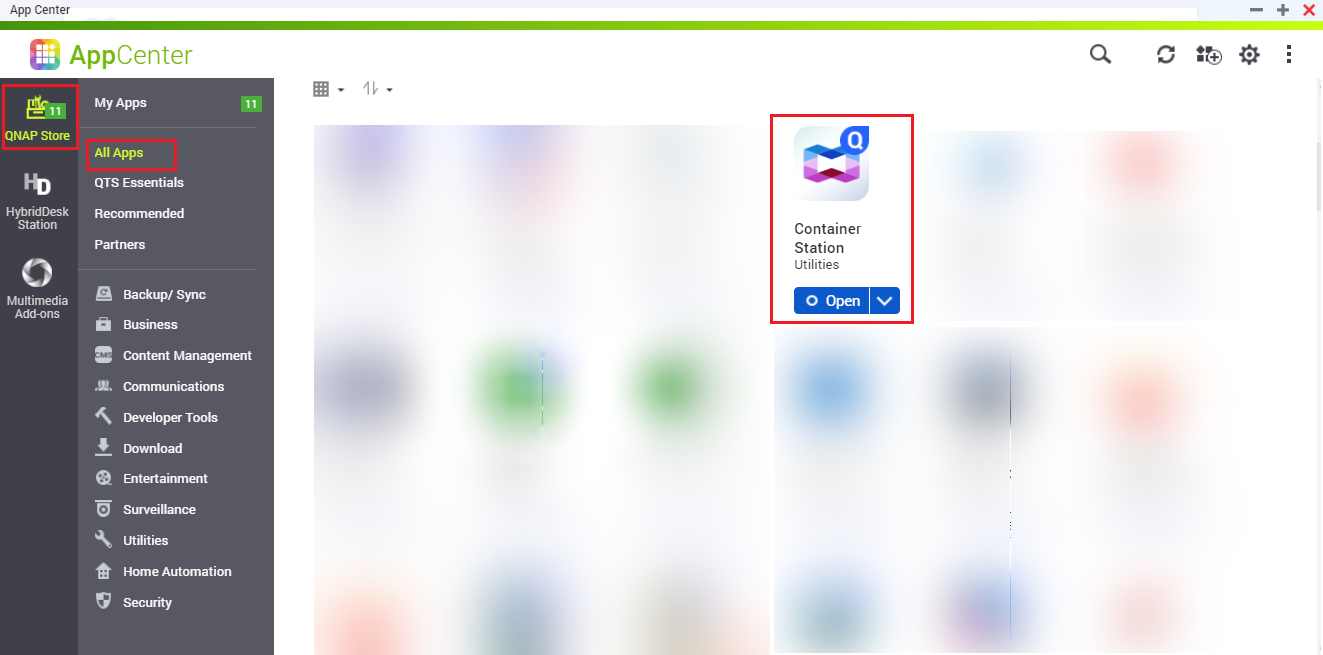
Login to your QNAP web panel and open the App Center application. Go to QNAP Store > All Apps and search for Container Station (CS).
Download the Container Station application. Once downloaded, open the app and select the path you'll be using as your Docker container data directory.
Click Start Now to proceed.
Deployment
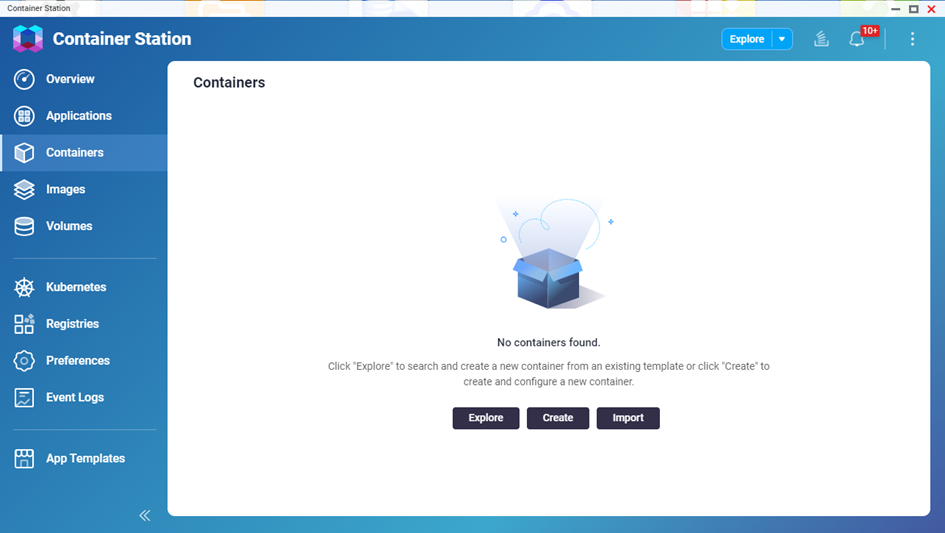
In the Container Station application, open the Containers menu option, and click the Create button.
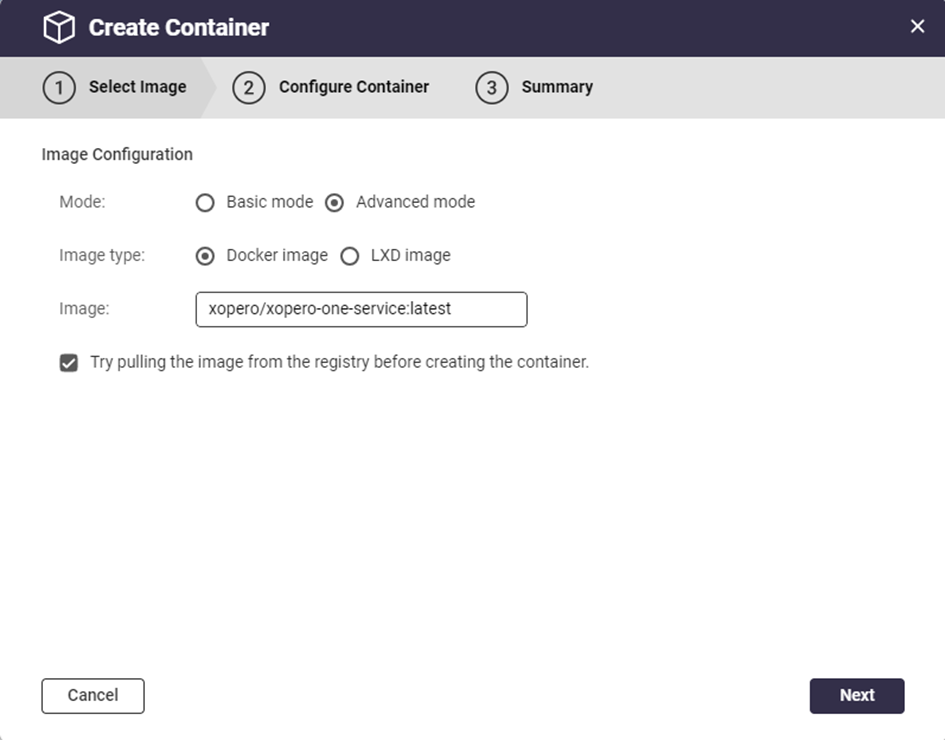
In Image Configuration, choose Advanced mode. For Image type select Docker image, and in the Image field, paste the following:
Ensure Try pulling the image from the registry before creating the container. checkbox is checked, then hit Next.
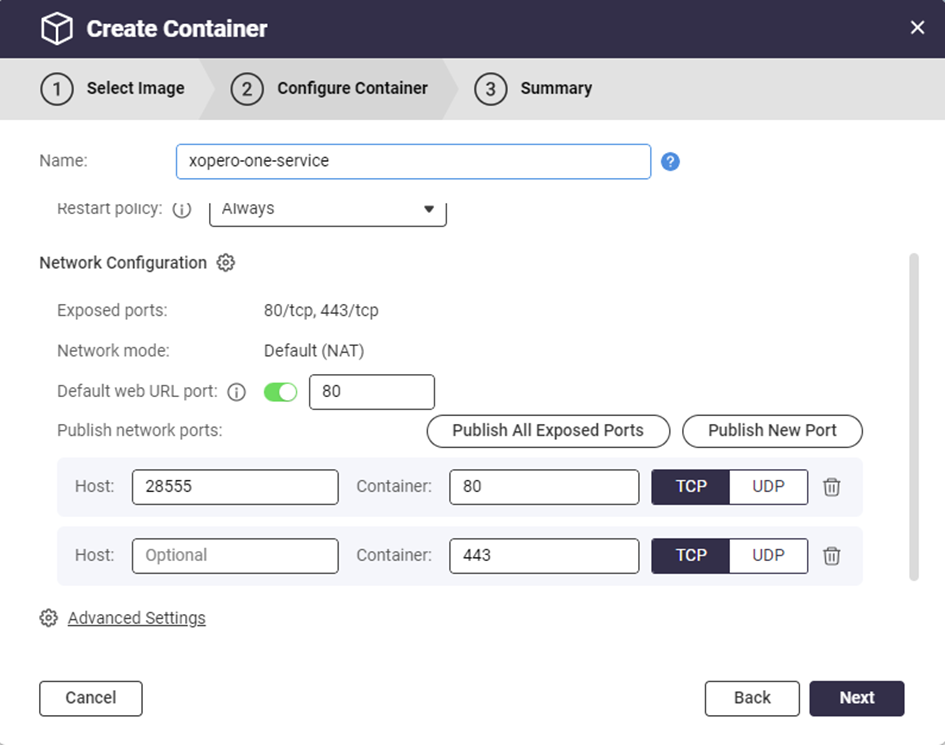
In the Configure Container tab, configure the Xopero ONE Docker container and hit Next to continue.
Name: set a custom name for the container
Auto start: defines if the container should startup automatically (i.e., in case of QNAP restart)
Publish network ports: enter a port number in the Host field— this will be the port used to connect to Xopero ONE service on the container on port 80 (the recommended host port number is 28555)
Double-check your configuration settings and hit Finish.
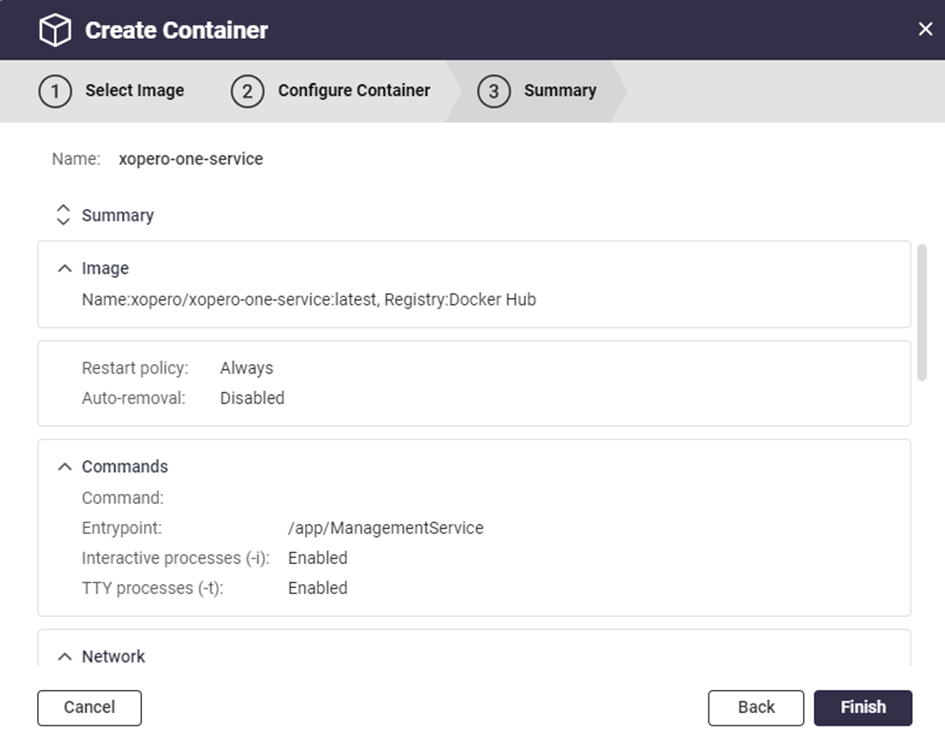
Container Station will download the latest Xopero ONE image and create the container based on it.
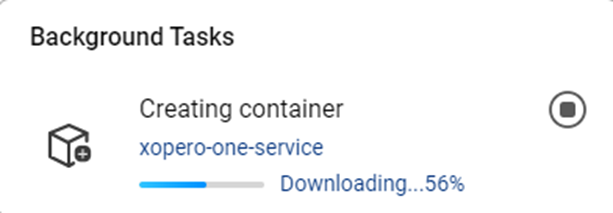
Once the container creation process is completed, your new container will be available in the Container Station application (under Containers menu option).

Connect to Xopero ONE using your web URL address in the following format (you can find it under Container Details > General > Web URL):
http://QNAPaddress:port
To finish the XMS setup, create a new administrative account, provide the license code, and select data to protect.
Prerequisites Environment setup Deployment
Prerequisites
QNAP with:
Environment setup
Login to your QNAP web panel and open the App Center application. Go to QNAP Store > All Apps and search for Container Station (CS).
Download the Container Station application. Once downloaded, open the app and select the path you'll be using as your Docker container data directory.
Click Start Now to proceed.
Deployment
Open the Container Station application and click ➕ Create in the left-hand side menu.
Copy and paste xopero/xopero-one-service in the search field and hit Enter to search for XMS Docker image (it should be the first search result in Docker Hub tab).
Click the Install button next to the Docker image to start the container creation process.

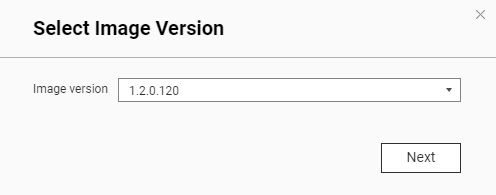
Select the latest image version and click Next to continue.
In the Create Container window, configure the Xopero ONE Docker container.
Name: set a custom name for the container
Auto start: defines if the container should startup automatically (i.e., in case of QNAP restart)
CPU Limit: allows you to set the CPU percentage usage available for the container
Memory Limit: RAM memory allocated to the container
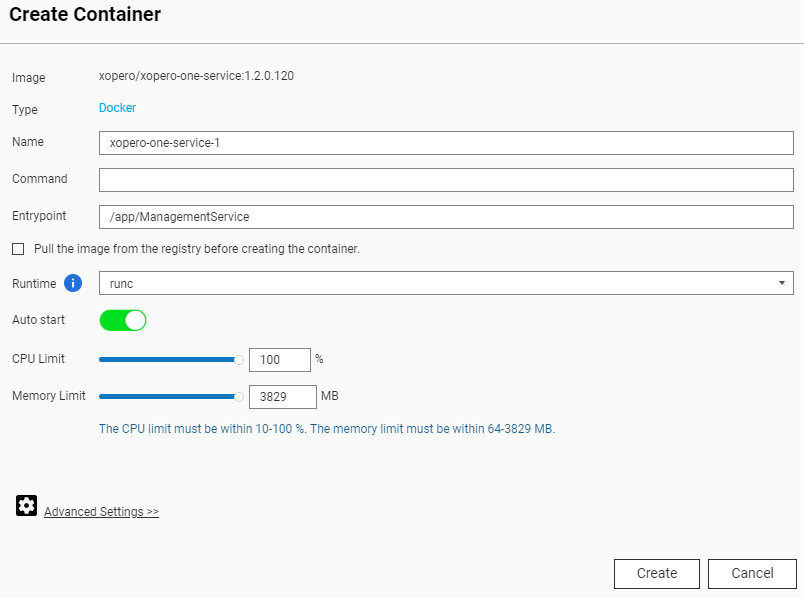
Scroll down a little and click the ⚙️ Advanced Settings>>
In the ⚙️ Advanced Settings>> go to Network and click the Add button on the right. Enter a port number in the Host field under the Port Forwarding section— this will be the port used to connect to Xopero ONE service (the recommended, default port number is 28555).
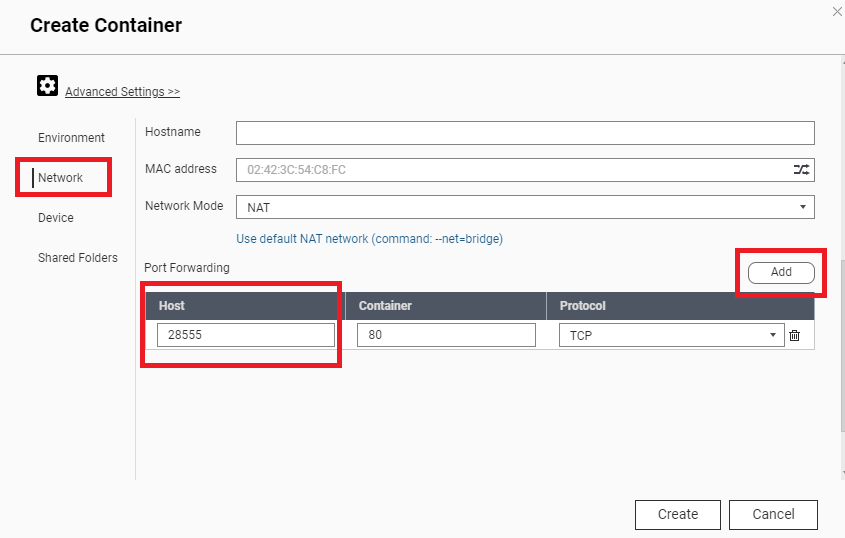
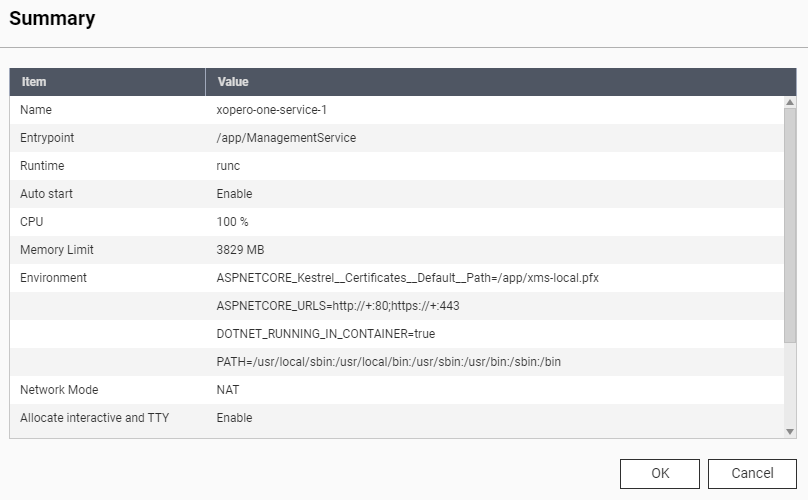
Click the Create button— this will display the setup summary. Double-check your configuration and click OK to create the container.
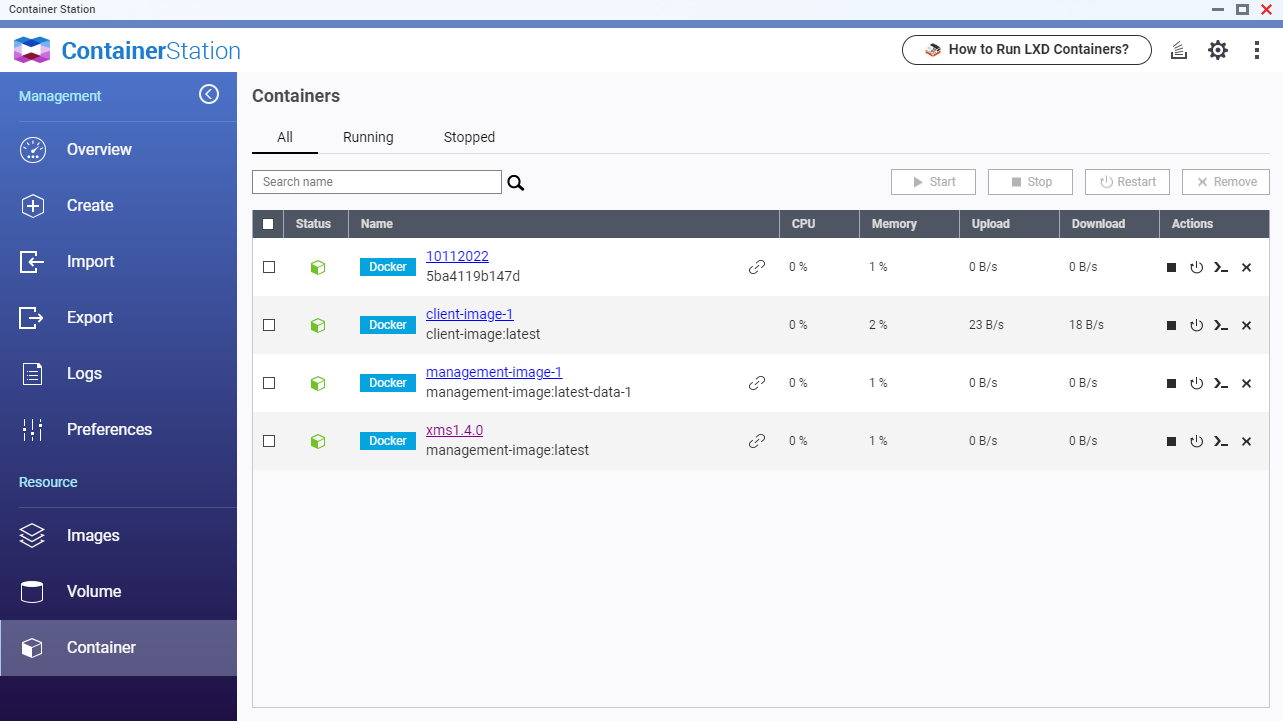
Once the container creation process is completed, your new container will be available in the Container Station application (under Container menu option).
Connect to Xopero ONE Management Service by launching it via Container Station, or using your web URL address in the following format:
http://QNAPaddress:port
To finish the XMS setup, create a new administrative account, provide the license code, and select data to protect.
Prerequisites
Synology must meet the following requirements:
Deployment
Open the Docker Hub, navigate to the Container menu, and click Create button.
Expand the Image section and select Add image. Then, search for xopero/xopero-one-service. Once located, select the image, click Download, and choose the version tagged as latest. Confirm the selection to proceed.

Once you download the image, select it from the Image drop-down menu in General Settings. Next, define a name for the container and enter it in the Container Name field. Configure container resource limits if necessary.
Check the Enable auto-restart checkbox to ensure the container automatically restarts when the device reboots, and proceed to the next step.

In Volume Settings, click ➕ Add Folder button. To ensure data persistence during container updates or maintenance operations, mount the management databases to an external directory. The databases are stored in /app/Xopero and should be mapped to a designated location outside the container to prevent data loss or inconsistencies.

In the Environment section, define the required variables:
ASPNETCORE_URLS: management service ports for http and https protocol (i.e., http://+:PORT_NUMBER;https://+:PORT_NUMBER)
The management console is available on port 28555 for the encrypted protocol (https), and on port 28556 for the unencrypted (http) protocol.

Go to Advanced Settings. Select bridge from the Network Name drop-down menu in the Network tab to enable the container to share the same network namespace as the container's host, then select Use the same network as Docker Host checkbox at the bottom.

Confirm the configuration and click Next. In Summary, double-check the settings and hit Done to finish the container creation process.

Once you've created the container, you can connect to your XMS using one of the following addresses:
https://yourSynologyAddress:28555 (i.e., https://192.168.0.100:28555)
http://yourSynologyAddress:28556 (i.e., http://192.168.0.100:28556)
Last updated