Post-installation actions
This article contains information about how to proceed after installing the Xopero ONE Management Service (XMS) component.
Accessing XMS in on-prem deployment model
To access the on-premise Xopero ONE Management Service, connect to the device which XMS console is installed on, using the following address:
ipAddress:port
ipAddress- the IP address of the device with XMS installed on
port- port defined during installation process— by default, Xopero ONE uses 28555
If your Management Service opened successfully, you can proceed with the below steps (creating your root account, adding the license code, logging in, running your first setup).
Xopero ONE first configuration
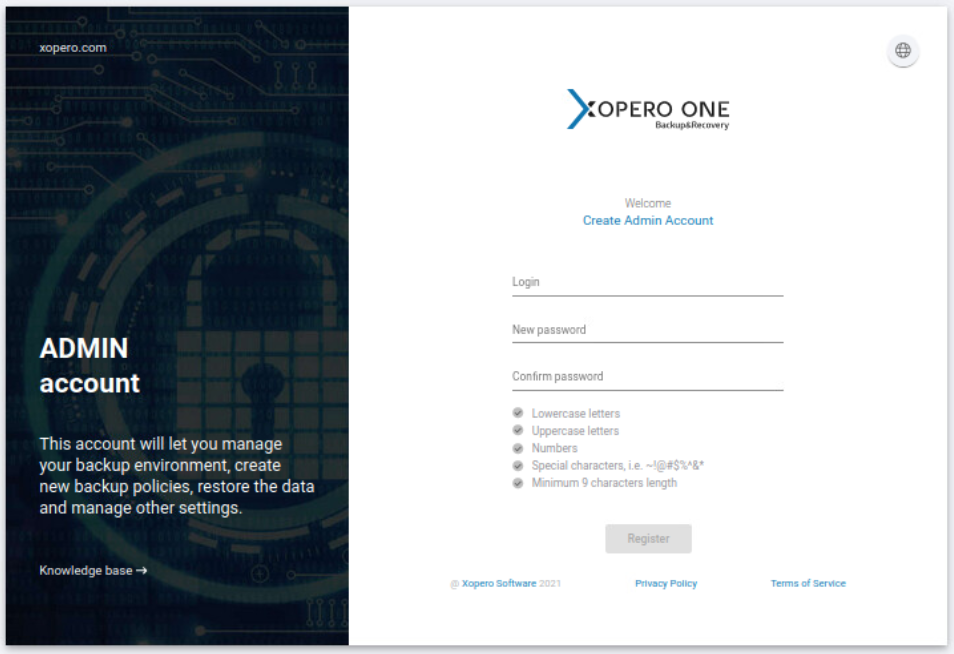
Create the administrator account.
When you launch the Management Service for the first time, you will be prompted to create an administrator account. To register a valid admin account you have to provide your login (it has to be a valid email address) and create a password compliant with the Xopero password policy.
Once you complete the form click Register to proceed to the next step.
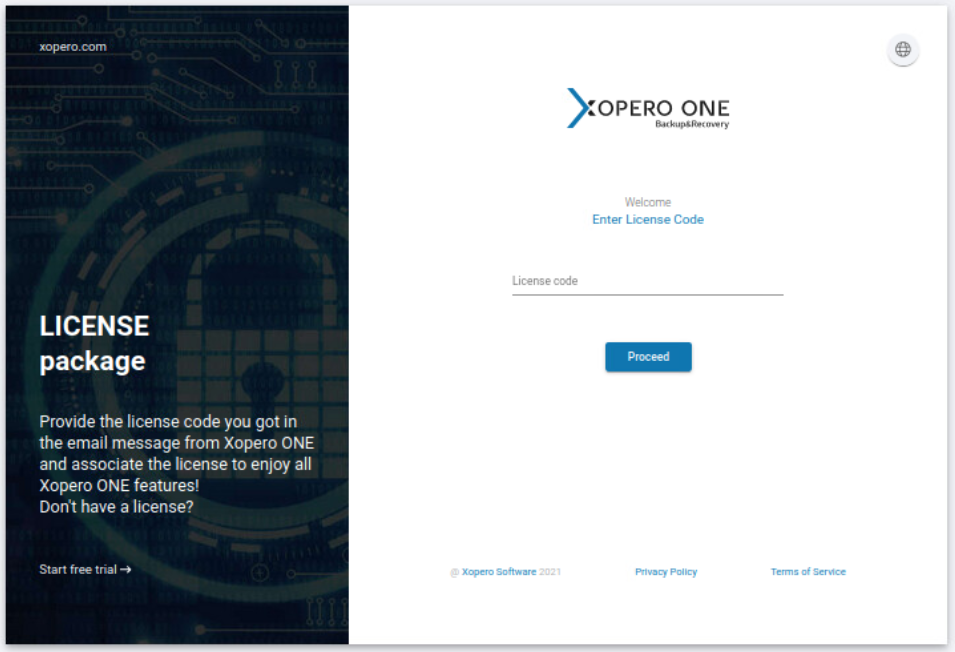
Add the license key.
Having the administrator account registered, you will then be asked to provide a license key (which you should've received via email upon registering for Xopero ONE)— this is the last step before the Xopero ONE system becomes operational and ready to use. Once done, click Proceed to go to the system setup.
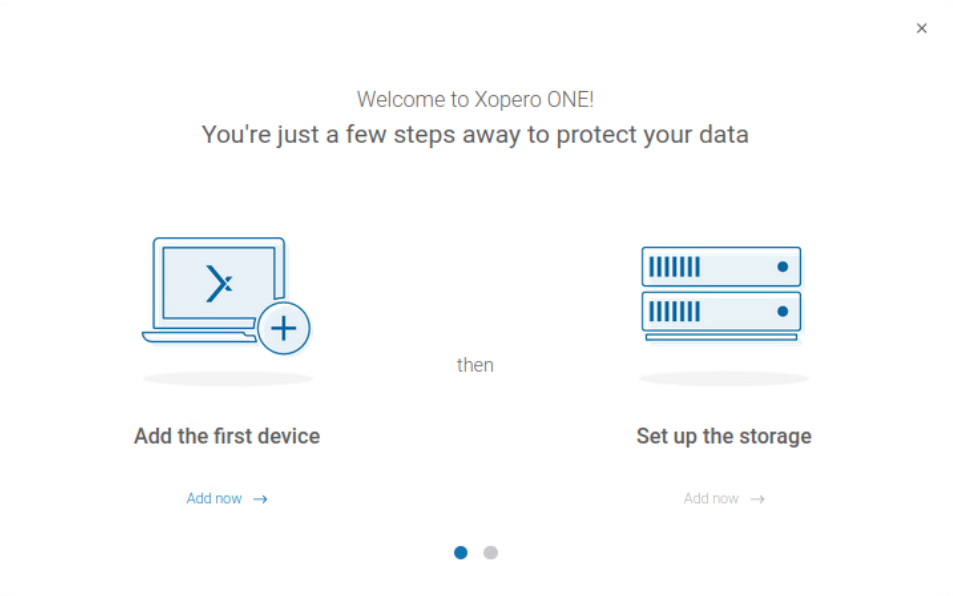
Run your first setup.
In the initial setup you should add your first device which you want to use to set up the storage. Then, you have to install the backup agent and activate it in Xopero system.
Browse Xopero ONE agent category to find more information about agent installation.
Next, add the storage where you want to store your data. As Xopero ONE is a multi-storage system, you can add different storages from different sources and use both local storage (i.e., SMB, NFS) and cloud solutions (i.e., Wasabi, Amazon, etc.).
Learn more about storages in STORAGE (BACKUP DESTINATION) OVERVIEW & SETUP) section.
With all system components initialized, you can start protecting your data and create backup plans.
Last updated