Update within a Docker container
This article describes the process of updating Xopero ONE Management Service within a Docker container on QNAP NAS, Synology NAS and Windows.
Guides for updating Xopero ONE Management Service within a Docker container explain how to perform updates and manage the service efficiently.
Updating the Management Service
The below guides apply to Xopero ONE Management Service on-prem deployment models.
Update process
To update Xopero ONE Management Service running as a Docker container, stop the old container, install the new one with the old databases mounted, and then remove the old container.
Download the new image and remove the old XMS container using the following command:
docker pull xopero/xopero-one-service:latest
docker stop xone && docker rm xone
Next, create the new container with the agent using the following command:
docker run -d \
  --name <container_name> \
  -p <xms_port>:80 \
  -v <database_location_outside_container>:/app/Xopero \
  xopero/xopero-one-service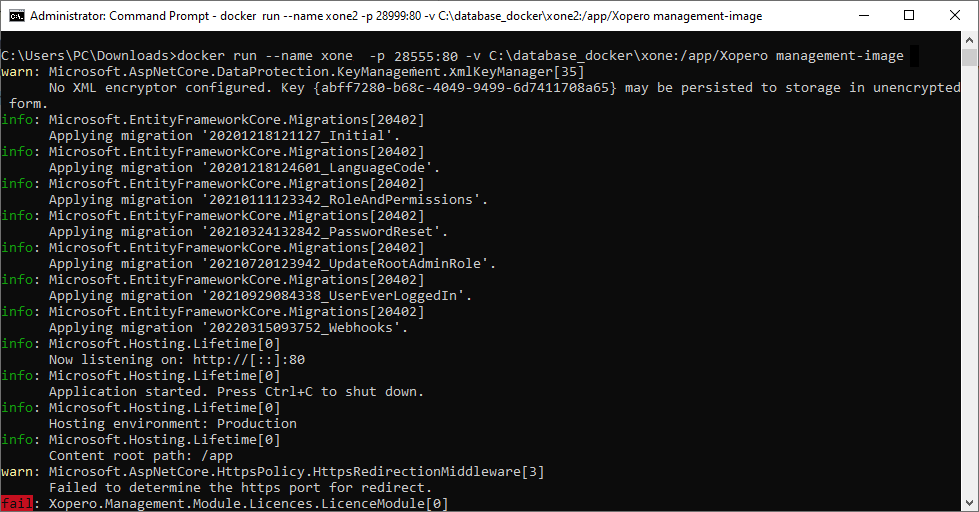
Update validation
Verify that the update was successful — log into the Xopero ONE panel through a web browser, wait for the device status to show online, and confirm that all settings (plans, storages, devices, and others) are intact.
Update process
This method requires Container Station version 3.0 or higher.
Open the Container Station on your QNAP device.
Locate and select the container running the Xopero ONE Management Service that you want to update.
After selecting the container, click the gear ⚙️ icon to open the container settings.
In the settings menu, select the Recreate option to proceed with the update. This will replace the current container with a new one based on the latest image.
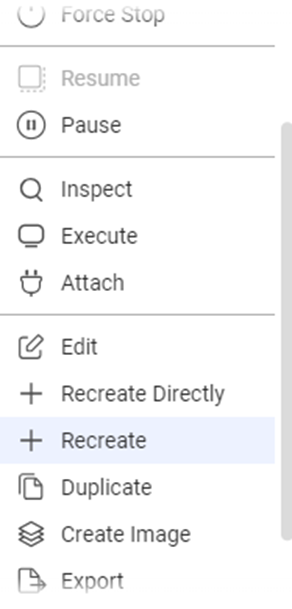
Configure the update settings — switch to advanced mode, as shown in the illustration provided. In advanced mode, you will be prompted to enter the image address from Docker Hub. Enter the following address:
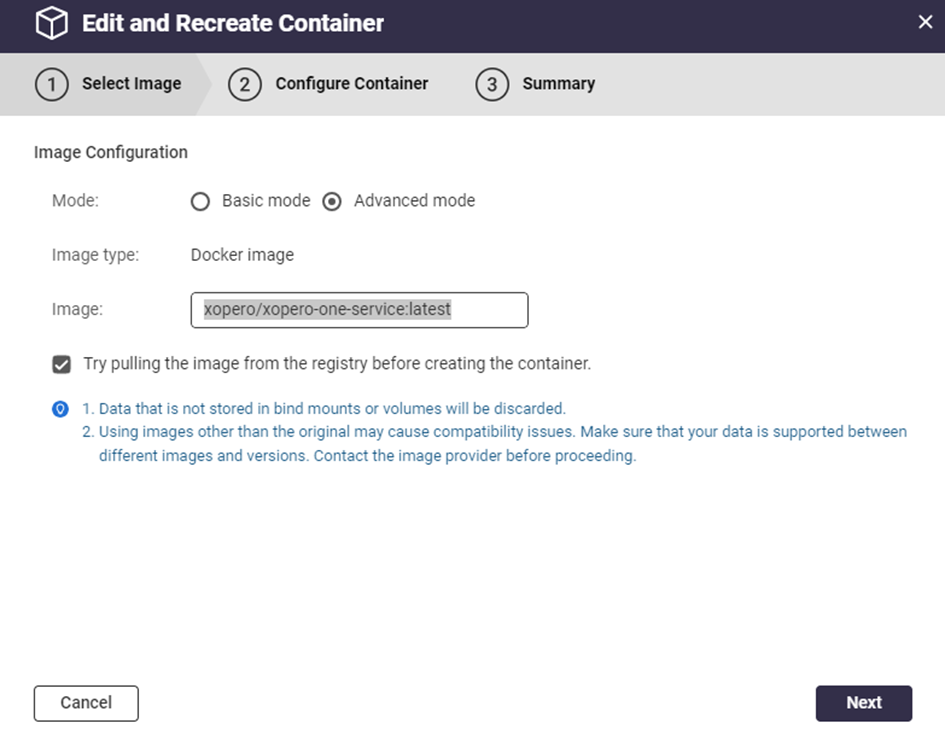
Make sure to check the option Try pulling the image from the registry before creating the container. This ensures that the latest version of the image is used. After configuring the settings, click Next to continue.
You can edit the container settings as you would when creating a new container. Make any necessary adjustments, or click Next to proceed to the summary page.
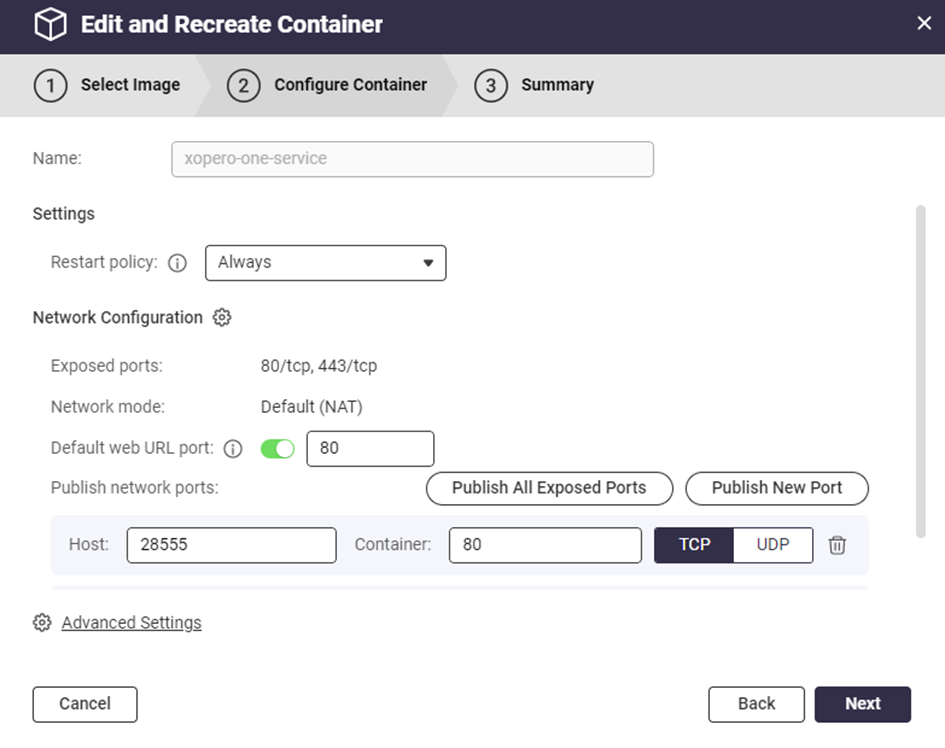
Review the summary of settings and changes, and once satisfied, click Finish.
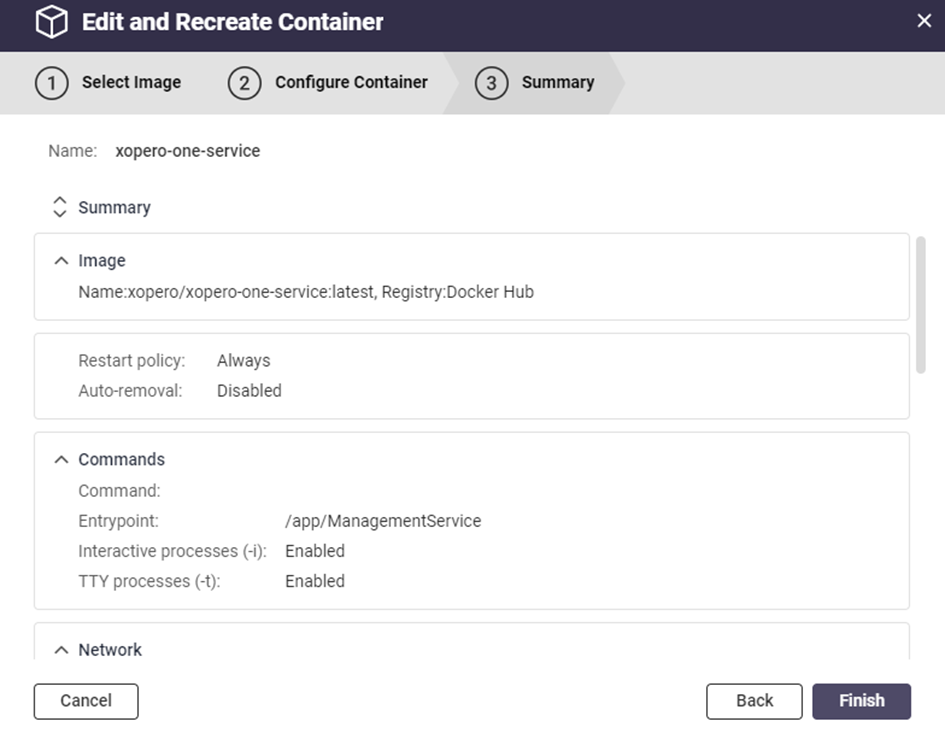
Container Station will download the latest image and create a new container using the previous container’s settings and data. This updates the Xopero ONE Management Service container to the latest version while preserving all existing settings and data.
Update process
Open the Container Station application, select a container, and then click the Settings button.
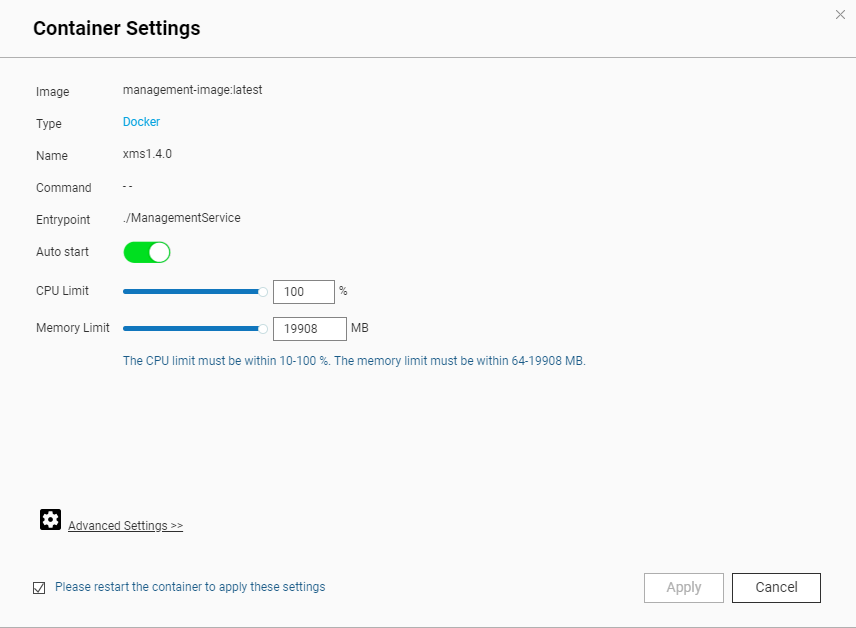
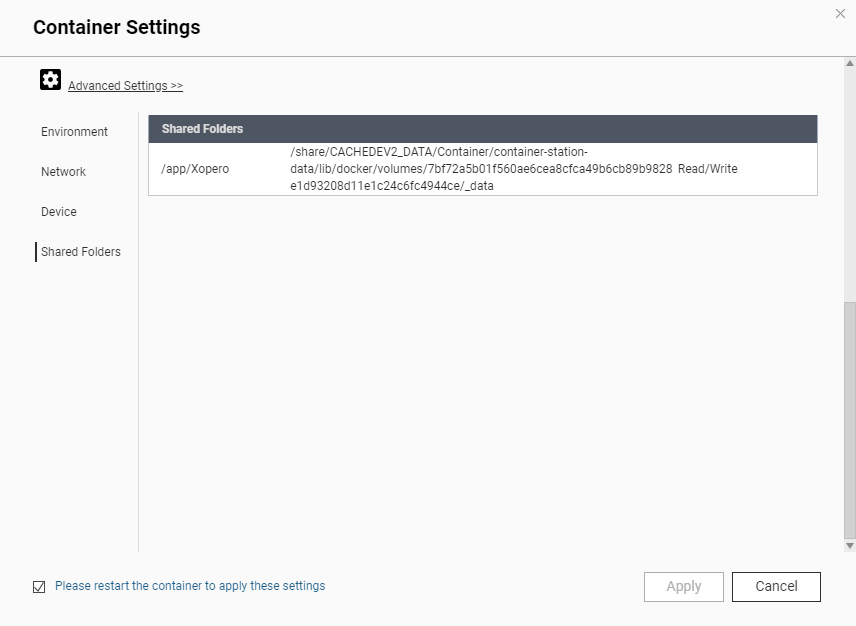
Click Advanced Settings and open the Shared Folders section to view the exact path of your databases on the QNAP. Save this path to use when creating the container with the new version.
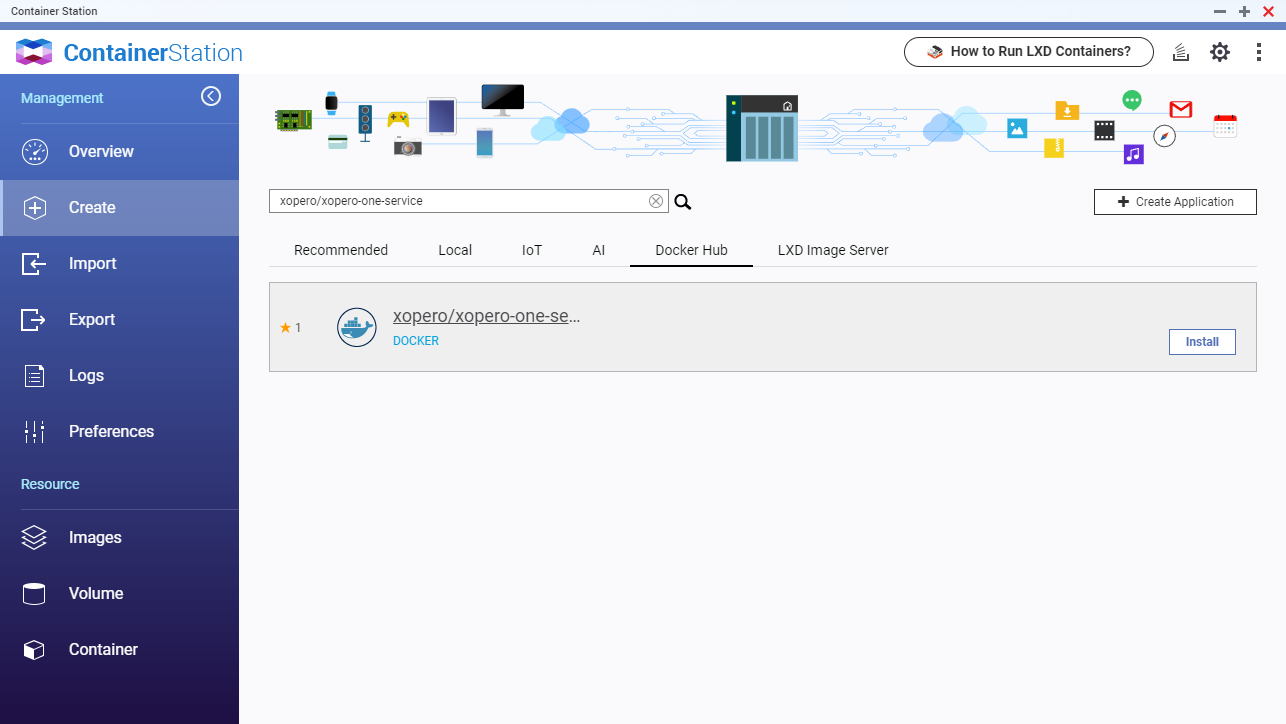
Open the Image tab, search for xopero/xopero-one-service, and click Install.
Make sure to switch to the Docker Hub tab from the Local tab.
Select the latest version of the image and click Next.
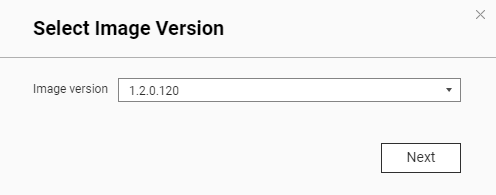
QNAP will display the Create Container window, where you can configure the container name, CPU and RAM limits, and other advanced settings for the Xopero ONE Docker container.
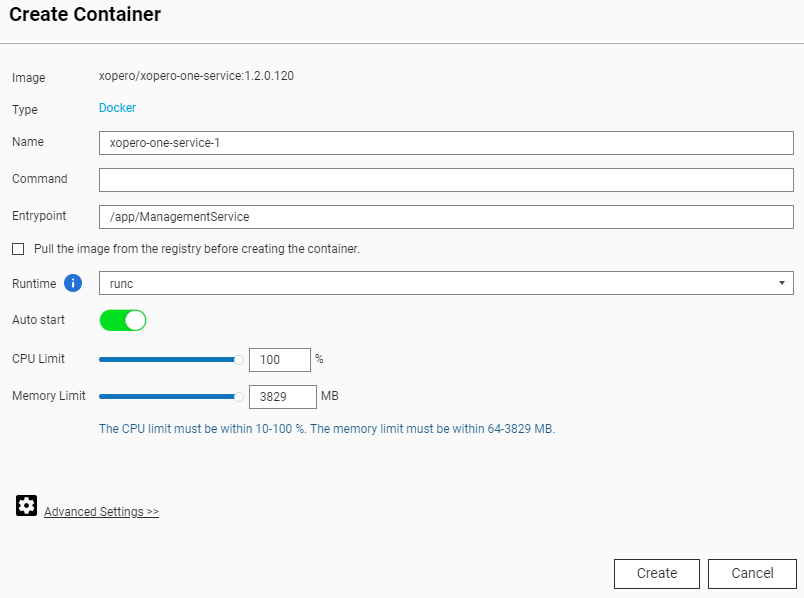
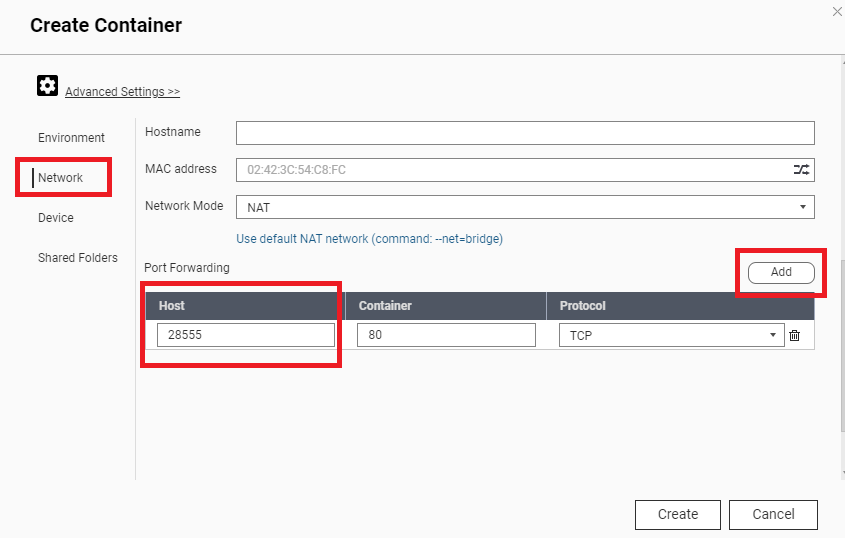
Open the Advanced Settings.
In the Network tab, set the listening port for the Xopero ONE Management Service (default is 28555) by entering the number in the Host field. This must match the port used in your initial installation.
In the Shared Folders tab, select the path for the Xopero ONE Management Service databases. First, delete any entry in the New volume section.
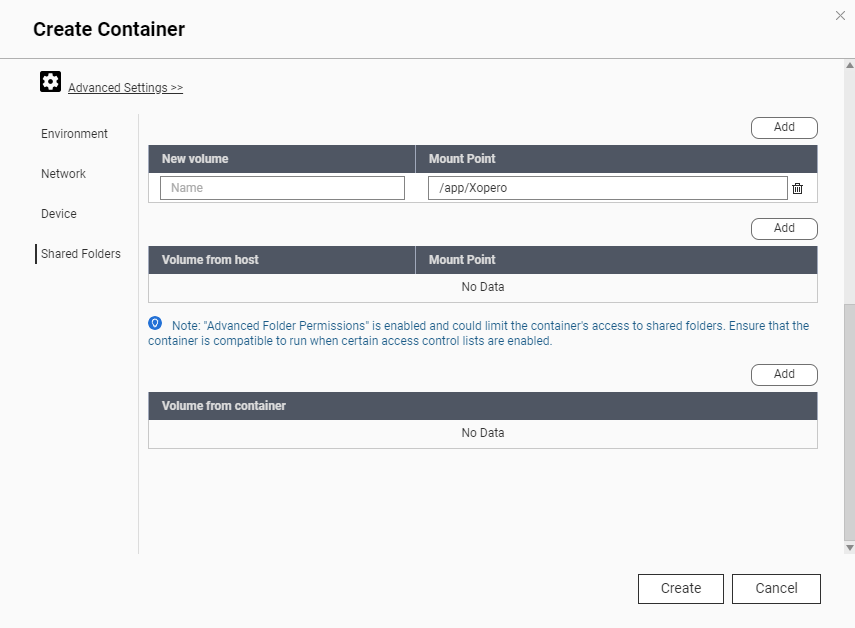
Add the path to the Volume from Host field, using the path you saved earlier.
o not paste the path. Select a location from the list: /share/CACHEDEV2_DATA/Container/cointainer-station-data/lib/docker/volumes/<container_folder>/_data
If the /share/CACHEDEV2_DATA/ path is not displayed, navigate to the folder above and start from the /Container/ directory.
Set the Mount Point to /app/Xopero.
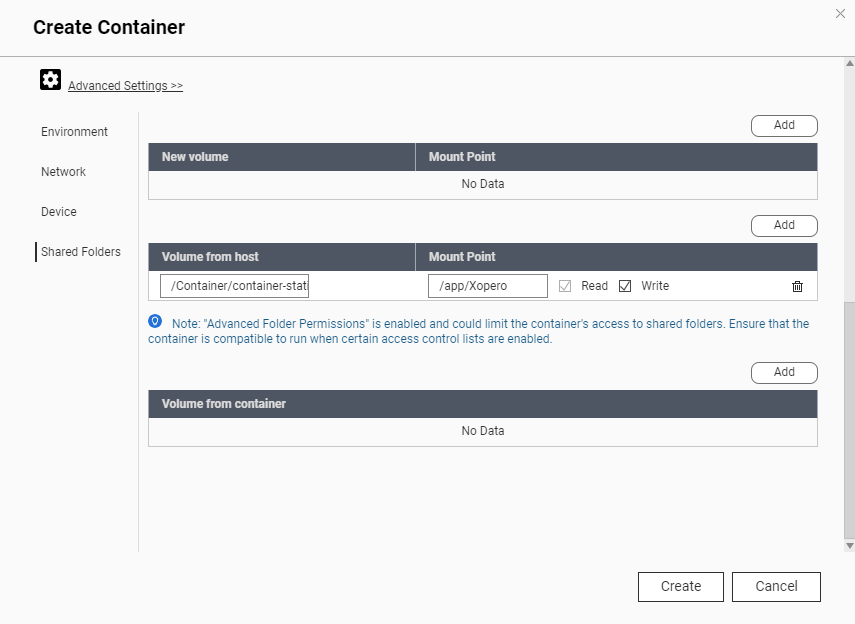
Click the Create button, review the Summary window, and then select OK to proceed.
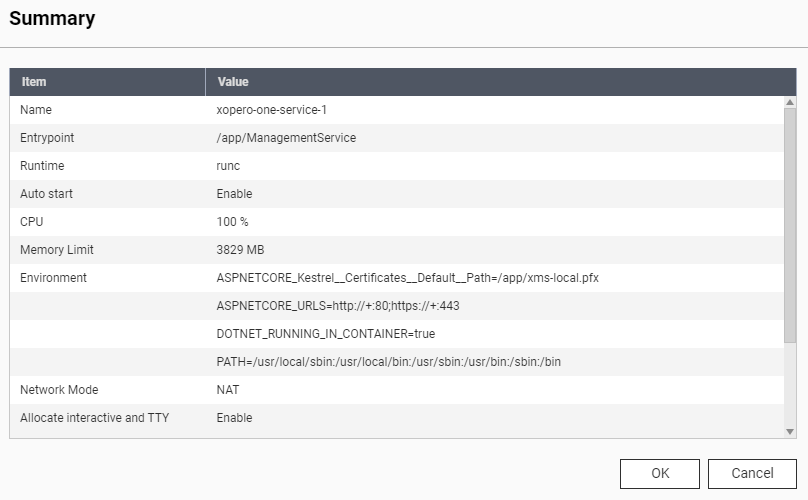
Update validation
Log into the Xopero ONE panel and wait for the device status to show online. Verify that all previous settings—plans, storages, devices, and others—are intact. Once confirmed, you can either delete the old container or keep it temporarily to ensure the new version is functioning correctly.
Update process
To update the Management Service installed in Docker on a Synology NAS, install the new version with the old databases mounted.
When using the
:latesttag, Container Manager monitors the image for updates. When a new version is available, a notification appears in the Image tab showing the status Update available. To start the update process, simply select the Update available button.
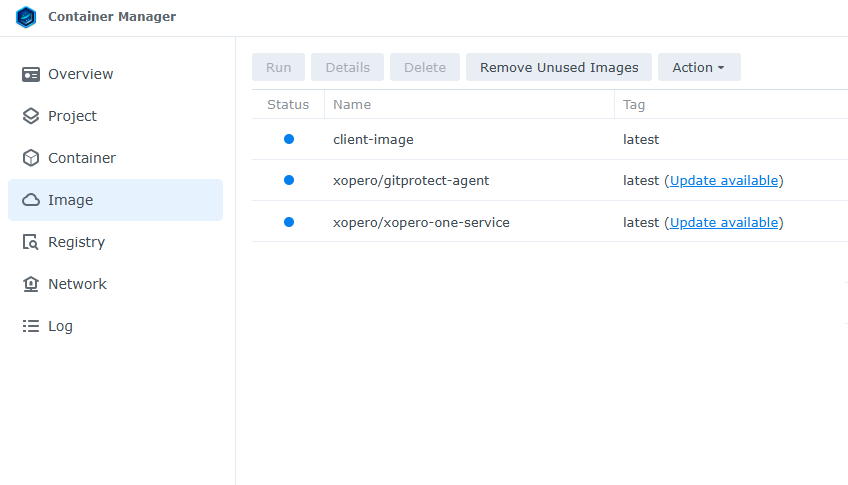
After activation, a system prompt will inform you that the services and container will be temporarily suspended during the update. Confirm by selecting the Update button.
A second confirmation step will require you to confirm the update again by selecting Update.
The update progress will be shown in the operations list. After the updated image is downloaded, containers configured with the auto-start option will restart automatically.
To verify the update, go to the Containers tab to ensure the container is functioning correctly. Then, in the Xopero ONE Management Service, confirm that the system shows the latest version.
Last updated

