Installation within a Docker container
Deployment
To install the Xopero ONE agent within a Docker container, use the images available on Docker Hub:
docker pull xopero/gitprotect-agent:latestCreate a host directory for the Xopero ONE Management Service container databases (which are located at
/app/Xoperoinside the container) to store databases outside the container:
mkdir -p /opt/gitprotect-agent/dataRun the container with the correct volume mounting and environment variables using the following command:
docker run -v /host/path:/container/path -e ENV_VAR=value image_namedocker run -d \
--name <container_name> \
-e ManagementServiceUrl="<your_xopero_one_service_URL>" \
-e XoperoOverriddenHostName="<device_name>" \
-v /opt/gitprotect-agent/data:/app/Xopero \
--restart unless-stopped \
xopero/gitprotect-agent:latestdocker run -d \
--name xopero-agent \
-e ManagementServiceUrl="https://192.168.1.10:28555" \
-e XoperoOverriddenHostName="Docker_agent" \
-v /opt/gitprotect-agent/data:/app/Xopero \
--restart unless-stopped \
xopero/gitprotect-agent:latestCheck if the container works correctly by using the following command:
Once all the above steps are completed, the agent will report to the Management Service panel for activation.
Prerequisites Environment setup Deployment
Prerequisites
QNAP with:
x86 or x64 CPU (ARM is not supported)
minimum 2GB RAM
Container Station app from AppCenter
Environment setup
Download the Container Station app from the App Center.
Login to your QNAP web panel and open the AppCenter application. In QNAP Store, select All Apps and search for the Container Station.


Download and open the application. Select the path that will be used as a directory for your Docker container data, and click Start Now to proceed.
Deployment
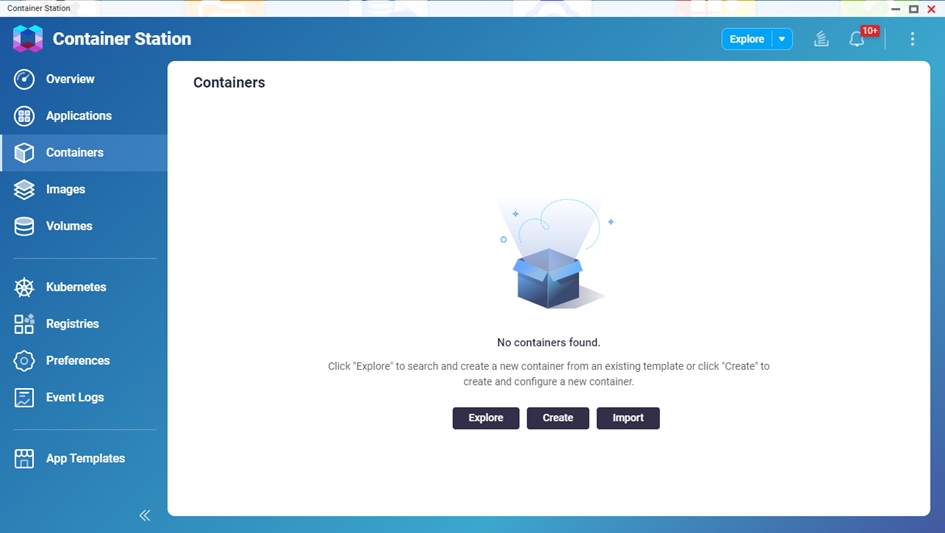
Open the Container Station application, select the Containers tab, and click the Create button.
In Image Configuration choose the Advanced mode option. In the image type, select Docker image, and in the Image field, paste the following command:
Ensure the Try pulling image from the registry before creating the container option is checked, and hit Next.

Within the Configure Container tab, the form contains several fields, with the most crucial being:
Name — here you can set a custom name for the container
Restart policy — defines if the container will star automatically in case of, for example, QNAP restart
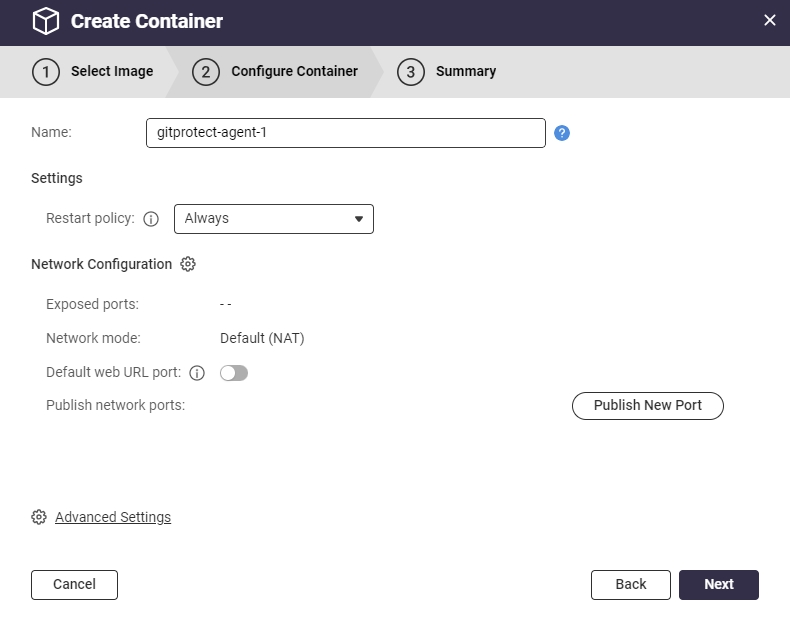
In the Configure Container tab, navigate to ⚙️Advanced Settings.
Go to the Environments section and click Add New Variable to add new environment variables with the following values:
Replace Xopero ONE Management Service address with your Xopero ONE Management Service address*.
‼️*ManagementServiceUrl – your Xopero ONE Management Service (XMS) address in one of the following formats (depending on the XMS deployment model):
http://ipaddress:port, i.e.,http://192.168.0.1:28555https://XMSID.ads.xopero.com, i.e.,https://a00b0dc0-0116-0000-0000-d0000028960e.ads.xopero.com

Click Apply to save your changes.
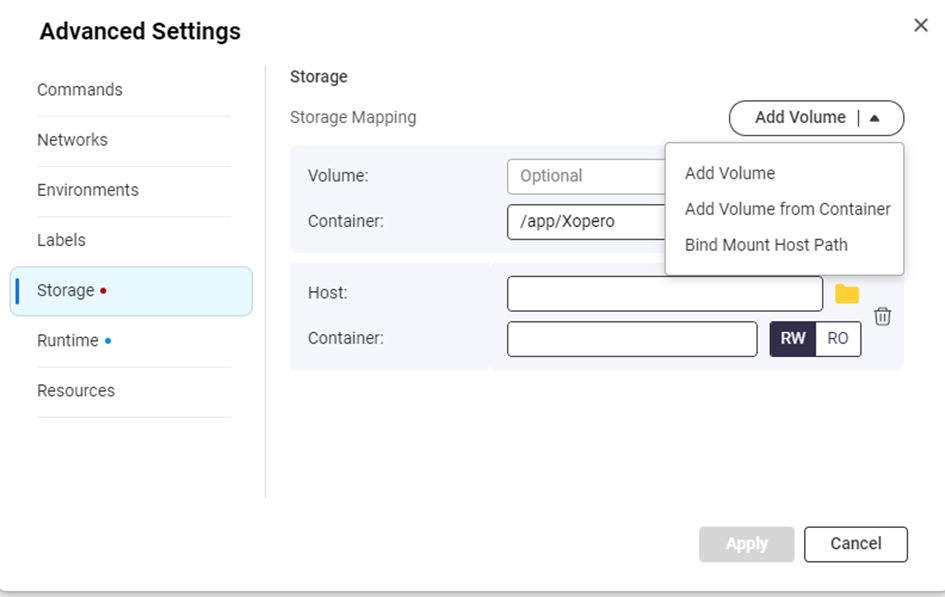
Navigate to Storage tab—here you can mount your QNAP volumes to the Xopero ONE agent docker container.
You can mount multiple directories to the container using Add Volume button and repeating the operation.
To back up data from your QNAP device, choose Bind Mount Host Path under Add Volume drop-down menu — it lets you specify which data the Xopero ONE container can access. Select a directory from the host and enter the path visible inside the container in the Container field.
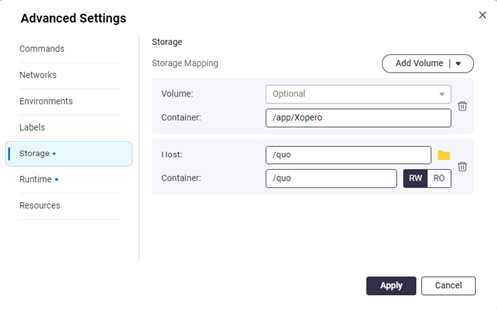
Next, double-check and confirm your settings, then click Finish to create the container.
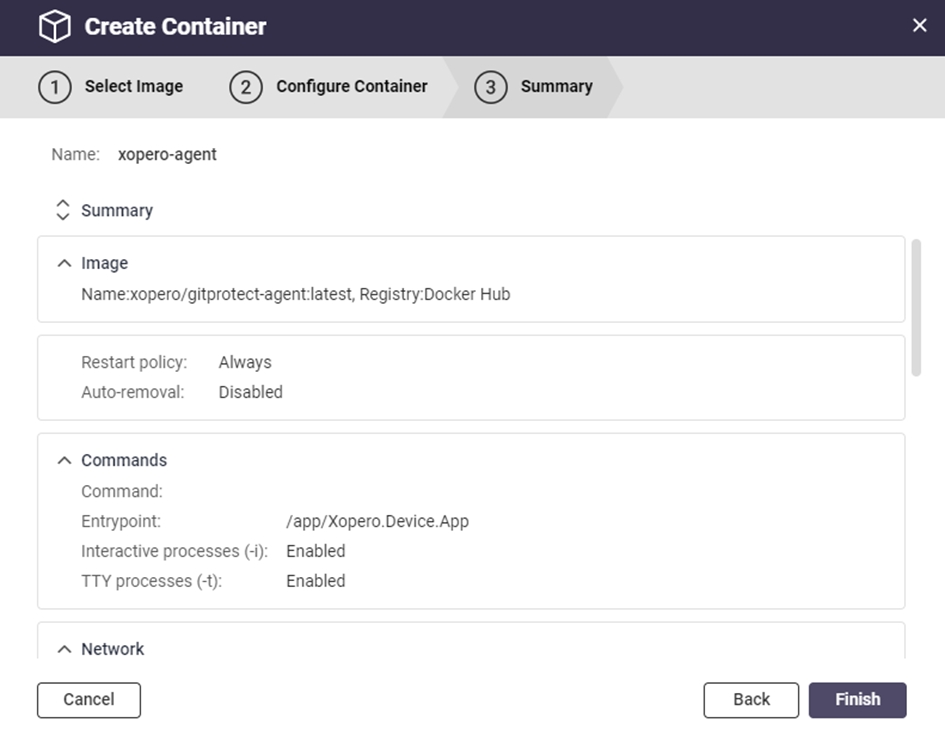
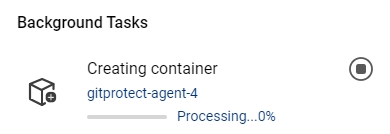
Container Station will download the latest Xopero ONE image and create the container based on that image.
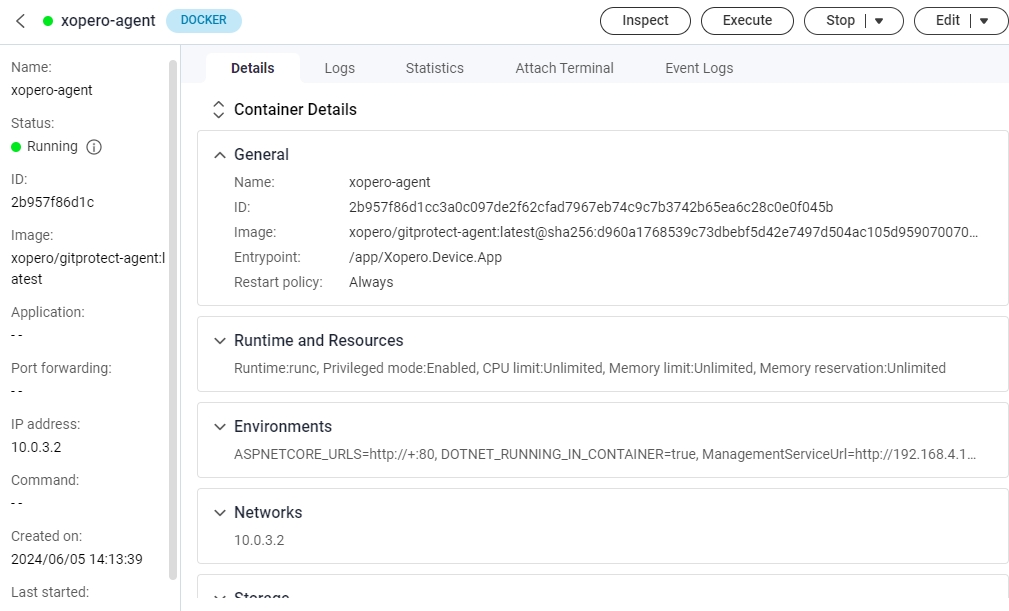
Once the container creation process is completed, your new container will be visible under Container tab in Container Station.
You can now connect to your Xopero ONE Management Service admin panel to activate the agent.
Prerequisites Environment setup Deployment
Prerequisites
QNAP with:
x86 or x64 CPU (ARM is not supported)
minimum 2GB RAM
Container Station app from AppCenter
Environment setup
Download the Container Station app from the AppCenter.
Login to your QNAP web panel and open the AppCenter application. In QNAP Store, select All Apps and search for the Container Station.


Download and open the application. Select the path that will be used as a directory for your Docker container data, and click Start Now to proceed.
Once done, download the Xopero ONE agent Docker image, which is available on our official server.
Deployment
Open the Container Station application and navigate the Import tab.
Click the ➕Import button to upload the previously downloaded Docker image file.
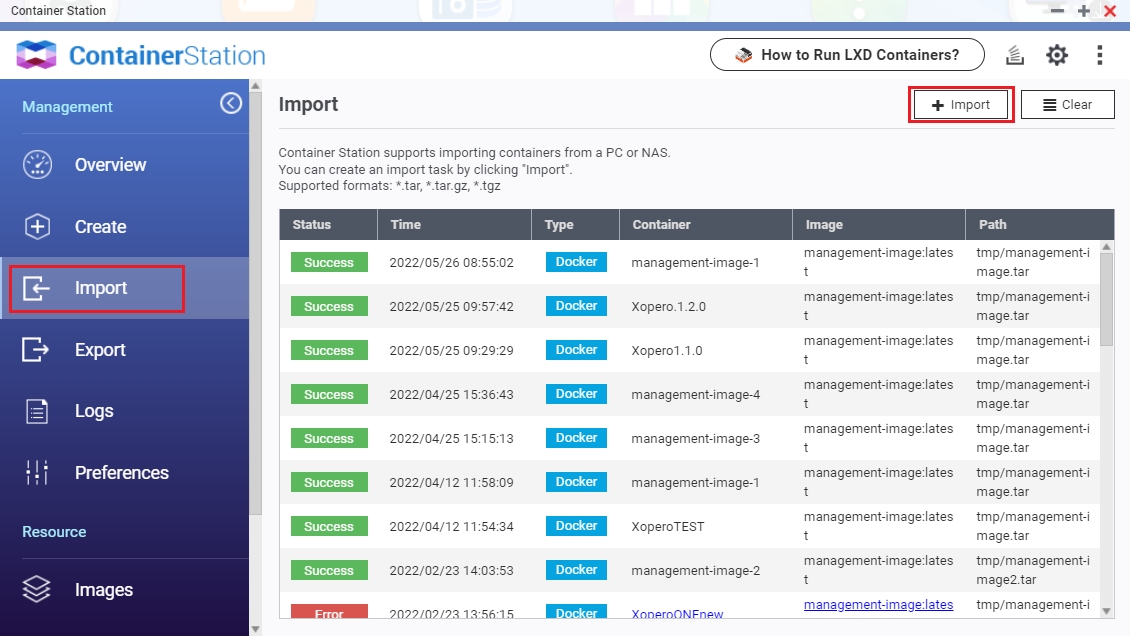
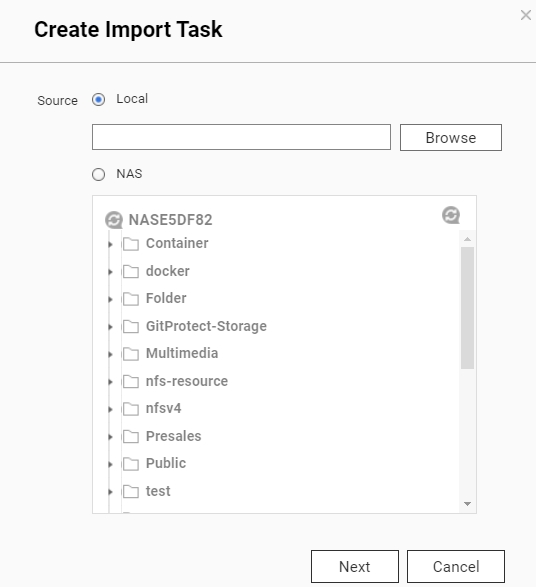
In Create Import Task window, select the source type and file path of the Xopero ONE agent Docker image and hit Next to continue.
Selecting a file from a local source enables you to choose files stored on your device. Alternatively, you can use the NAS option to access files directly from QNAP.
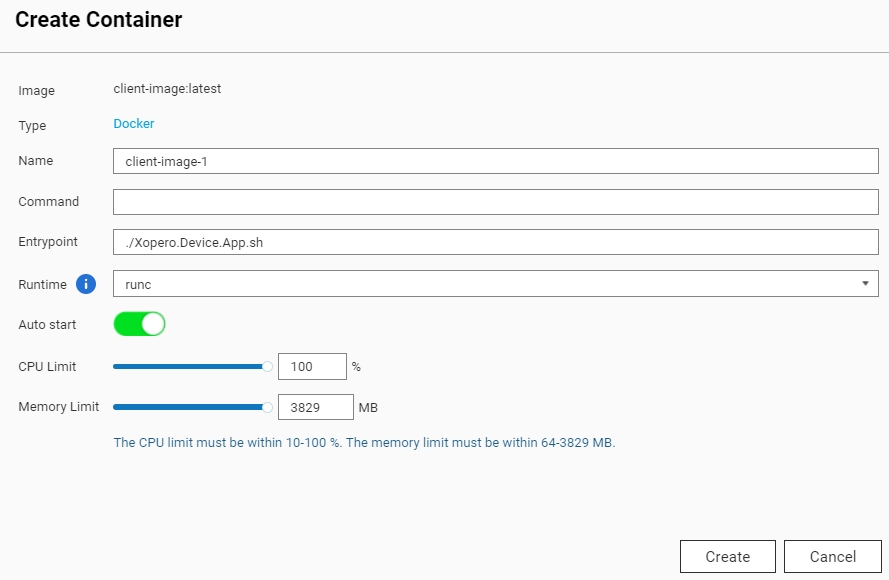
Within the Create Container tab, the form contains several fields, with the most crucial being:
Name — here you can set a custom name for the container
Auto start — defines if the container will star automatically in case of, for example, QNAP restart
CPU Limit — allows you to specify the percentage of CPU usage allocated for the container
Memory Limit — RAM limit for the container
Click the ⚙️Advanced Settings >> button and navigate to the Environment section.

To add a new environment variable, click the Add button, name it ManagementServiceUrl, and set its value to your Xopero ONE Management Service address*.
‼️*ManagementServiceUrl – your Xopero ONE Management Service (XMS) address in one of the following formats (depending on the XMS deployment model):
a.
http://ipaddress:port, i.e.,http://192.168.0.1:28555b.
https://XMSID.ads.xopero.com, i.e.,https://a00b0dc0-0116-0000-0000-d0000028960e.ads.xopero.com

Go to the Shared Folders section — here you can mount your QNAP volumes to the Xopero ONE agent Docker container.
You can mount multiple directories to the container using Add button in Volume from host section and repeating the operation.
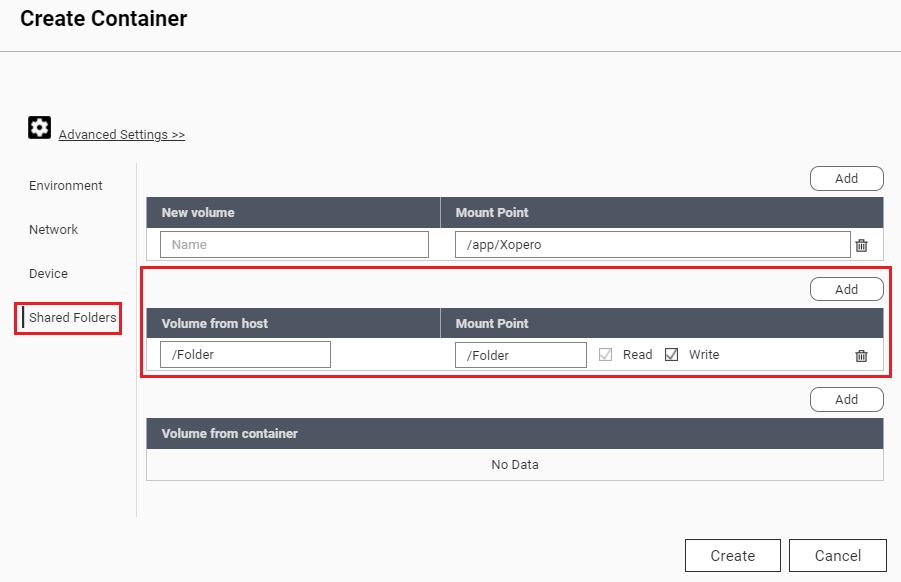
To back up data from your QNAP device, choose Add under Volume from host section— it lets you specify which data the Xopero ONE container can access. Select a directory from the host in Volume from host field and enter the path visible inside the container in the Mount Point field.
For instance, if you need to back up a directory named Backup inside a public shared folder, set the Volume from the host field to /Public/Backup. The Mount Point can be different, i.e., /Backup.
Once you're done with the above steps, click Create to continue.
In the Summary window double-check your settings, then click OK to finish the configuration.
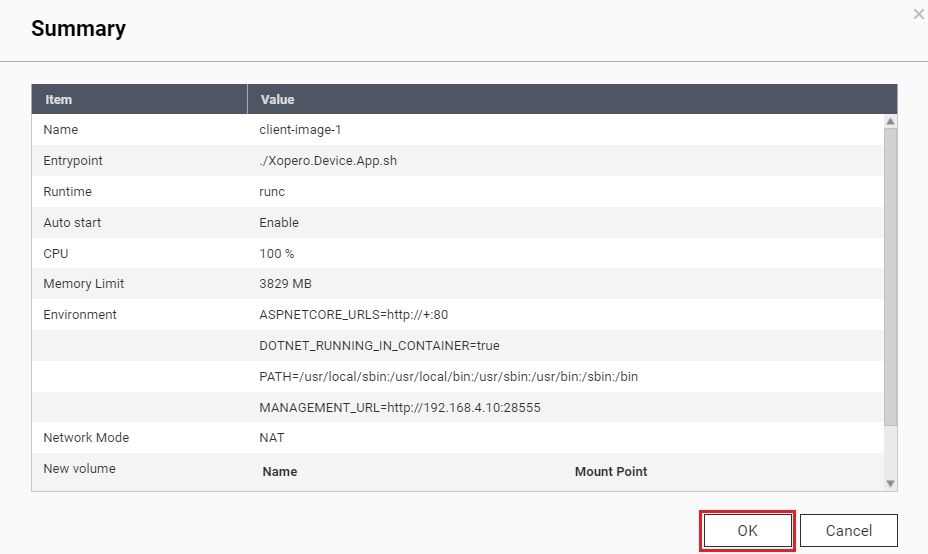
You can now connect to your Xopero ONE Management Service admin panel to activate the agent.
Deployment
To deploy the Xopero ONE agent on a Synology device using Docker, use the Container Manager application. If it's not installed, download it from the Package Center.
Navigate to the Container tab and click the Create button. Expand the Image section and click Add image, then search for
xopero/gitprotect-agentimage.
Select the image, click Download, and choose the version tagged as latest. Click Select to confirm.
Once the image is downloaded, select it from the Image field drop-down menu.
Next, define a custom name for the container. Additionally, configure container resource limits if needed.
Check the Enable auto-restart option to ensure the container automatically restarts when the device reboots, then click Next to proceed.
In the Volume Settings section, click the ➕Add Folder button, and select directories that require protection. The container needs to have external directories mounted to access them while performing backups.
To protect data stored in the Public directory, select this folder and specify the same path to ensure consistency between the host and the container's file systems.
You can mount multiple directories to the container by clicking ➕ Add Folder and repeating the operation.
Additionally, to ensure data persistence during container updates or maintenance operations, mount agent databases to an external directory. These databases are located in
/app/Xoperoand should be mapped to a designated location outside the container to avoid data loss or inconsistency.
Next, in the Environment section, define the required variables:
ManagementServiceUrl — your Xopero ONE Management Service (XMS) address in one of the following formats (depending on the XMS deployment model):
a.
http://ipaddress:port, i.e.,http://192.168.0.1:28555b.
https://XMSID.ads.xopero.com, i.e.,https://a00b0dc0-0116-0000-0000-d0000028960e.ads.xopero.comXoperoOverriddenHostName — specify agent's name to facilitate identification
Click Next to confirm the configuration. In Summary window, double-check your settings and if they're all correct, hit Done to finalize the process.
Last updated

