Adding new storage
This article describes the process of setting up an S3-compatible bucket as storage in Xopero ONE.
Open the Storages section and click Add storage button.

The Add storage sidebar will appear— use it to enter the name of your new storage in the Add storage name field (step 1), then click the arrow next to the Storage type section (step 2) to expand the list of available storage types.

Scroll down the list and select the S3 storage option.
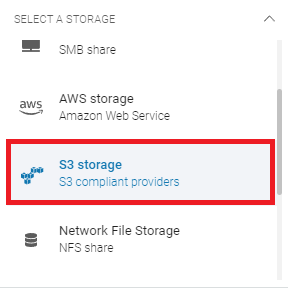
After selecting storage option, the system will display additional sections, including: Authentication data, Service URL, Bucket name, and Optional description.

Copy the access key ID and secret access key from your S3-compliant storage provider, paste the access key ID to the corresponding field, and click Select or add secret access key to open the Password Manager menu and add your copied secret key to your bucket.
To get the access key ID and secret access key, visit your S3-compatible platform and create a new access key.
In the Service URL field, enter the URL provided by your S3-compliant storage provider.
Enter the bucket name in the Bucket name field and proceed to the next step.
Ensure that the browsing machine—a device with an active license and the Xopero ONE agent installed—can access your S3 bucket. To use a different device, click Change next to the Browsing machine at the bottom.
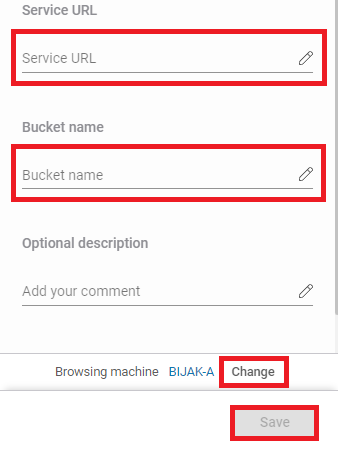
Review your settings and click the Save button to add the storage to Xopero ONE. Refresh the page to see the newly added storage on your storages list.
Last updated